I agreed to trade a pair of shoes for a couple of hats, and was thrilled to get the better end of the deal (the joke being that a good deal is defined by each party thinking that they got the better trade =). The order was for a pair of shoes similar to those in Lesson 8: Late 16th / Early 17th C. Heels (Timber), except that they were to be done on crooked (left and right) lasts, and with a very particular color of orange.
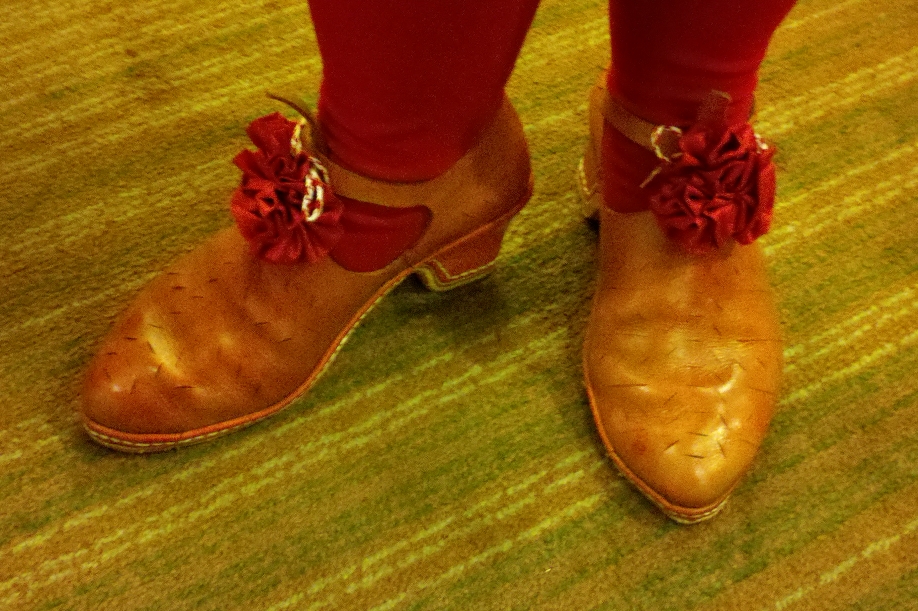 |
Oh yes, I almost forgot – the finished products! Do forgive the poor quality of the picture, but it gives a good representation of what the shoes look like. | |
Until this time, I have always dyed leather by using a foam brush dipped into the dye, and with dry leather. However, this can sometimes leave streaks, and the only solution is to continue to dye until you’ve basically dyed the heck out of it. This did not work for this particular color of dye, because once overdyed, the color was simply too dark. So, I ended up experimenting quite a bit to try and figure out the best way to dye. I must also give the biggest thanks to the fabulous Sarah Lorraine (http://www.modehistorique.com) who was absolutely instrumental in this process; I was so dye-shy at points that I refused to dye anything without her approval!
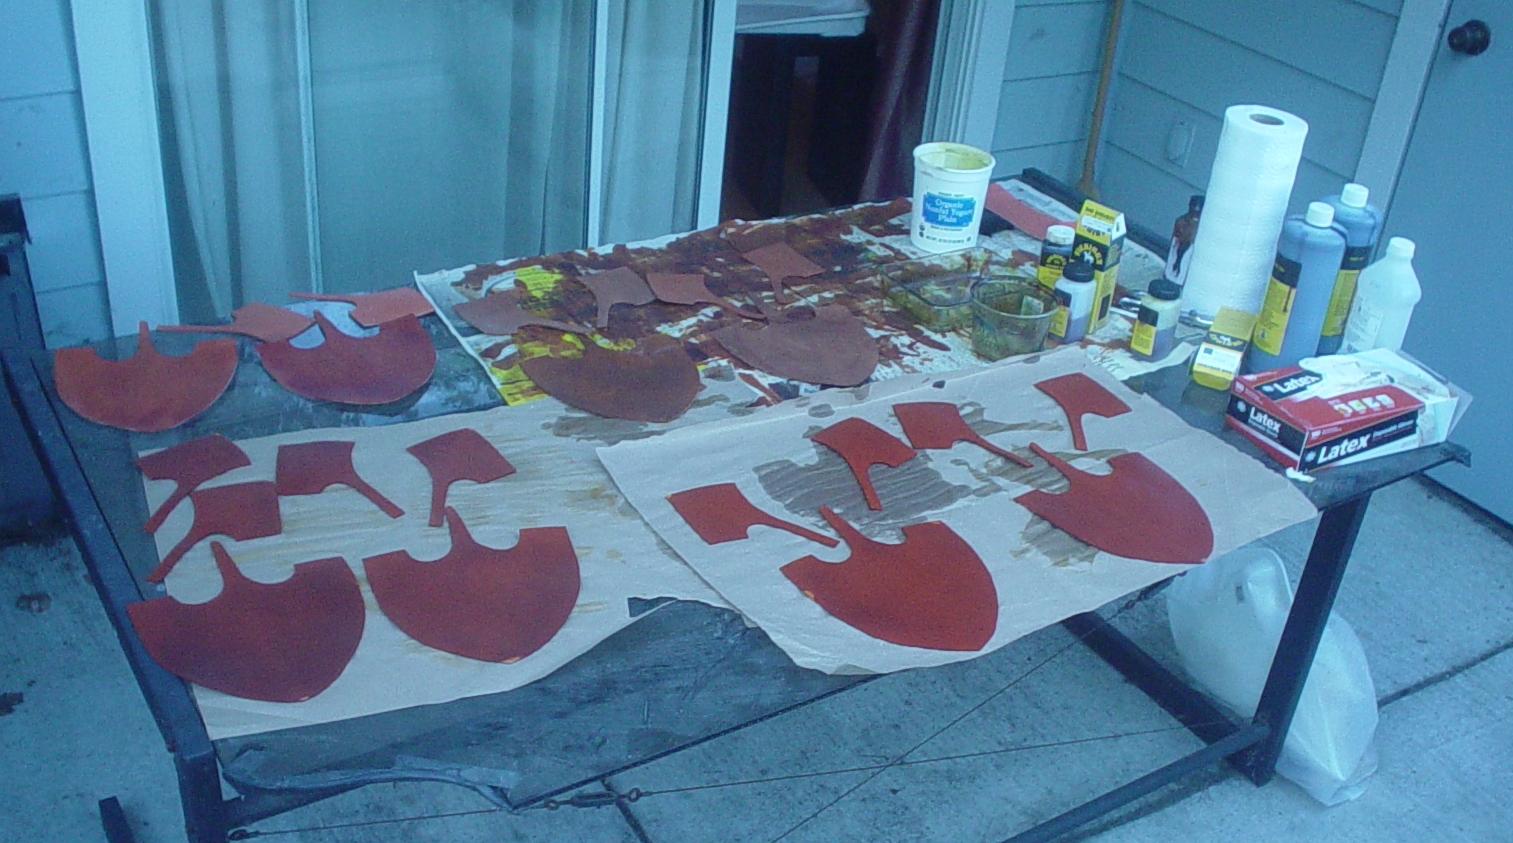
As you can see, there is a reason that I have titled this picture “dying” instead of “dyeing” – it was killing me to perform all of these experiments! But, in the long run, it was worthwhile, since I got a good bit of information out of the trials, which I will share with you here. One note: I am using Fiebing’s spirit dye which is no longer available in California. The “Eco-Flow” dye that Tandy sells is not at all suitable for shoes, since it is water based and will leech out as soon as it gets wet. Oil based dye is probably the best stuff, but color selection and availability is somewhat limited.
Most importantly: Wet your leather. Wet leather will not absorb dye nearly as quickly as dry leather. As a result, you will get more uniform color and fewer streaks. Of course, wet leather alone will not get you all of the way there, but it is a critical step in the dying process. It does mean that you won’t be able to work the leather immediately afterwards, but it is worth waiting a day to get a nice, uniform finish. For darker colors, like dark brown or black, you probably can get away with just spritzing the surface of the leather rather than wetting the entire piece.
After some experimentation, I can offer two techniques of dying which should give good results. Here we go!: Technique 1: Vat dying. Instead of brushing on the dye with a foam brush or roller, pour a quantity of dye in a flat, shallow pan (or pyrex) just enough to coat the bottom of the pan. Make sure you have a bucket of water close by. After wetting the leather in the bucket and allowing any surface moisture to evaporate, place a leather piece grain side down into the pan, and then pick it up quickly (checking quickly to make sure you coated everything) and then dunk it into the bucket, waving it around. This will remove any excess dye which might cause splotching. Although you might get a little bit of dye on the inside of the leather, it is a small price to pay for an even coating of dye on the outside.
Technique 2: Dye-soaked terrycloth. When dying a piece of wet leather, I was able to get a “sheen” of dye across the surface by using a well wet dye-soaked terrycloth and rotary strokes which then dyed evenly. Note that if you are trying for a slightly darker color, you might need to apply two coats of dye. For the second coat, you probably only need to spray the top surface of the leather rather than dunking it. Oh – and regarding cotton daubers that come with the dye, just say no! They soak up far too much dye for a given area, making the streaking problem even worse.