Some of you may have gone through the Lesson 2 Writeup on a set of 16th century pantofles, but I’m pleased now to be able to give you a far better reconstruction, based on period examples and historical practice. This was a special project for Miss Kit, and I’m delighted to be able to give you some details on the construction process. Many of the techniques were similar to those in Lesson 2, so I ought not to completely decry that older knowledge, but this new piece looks so much more like the period examples.
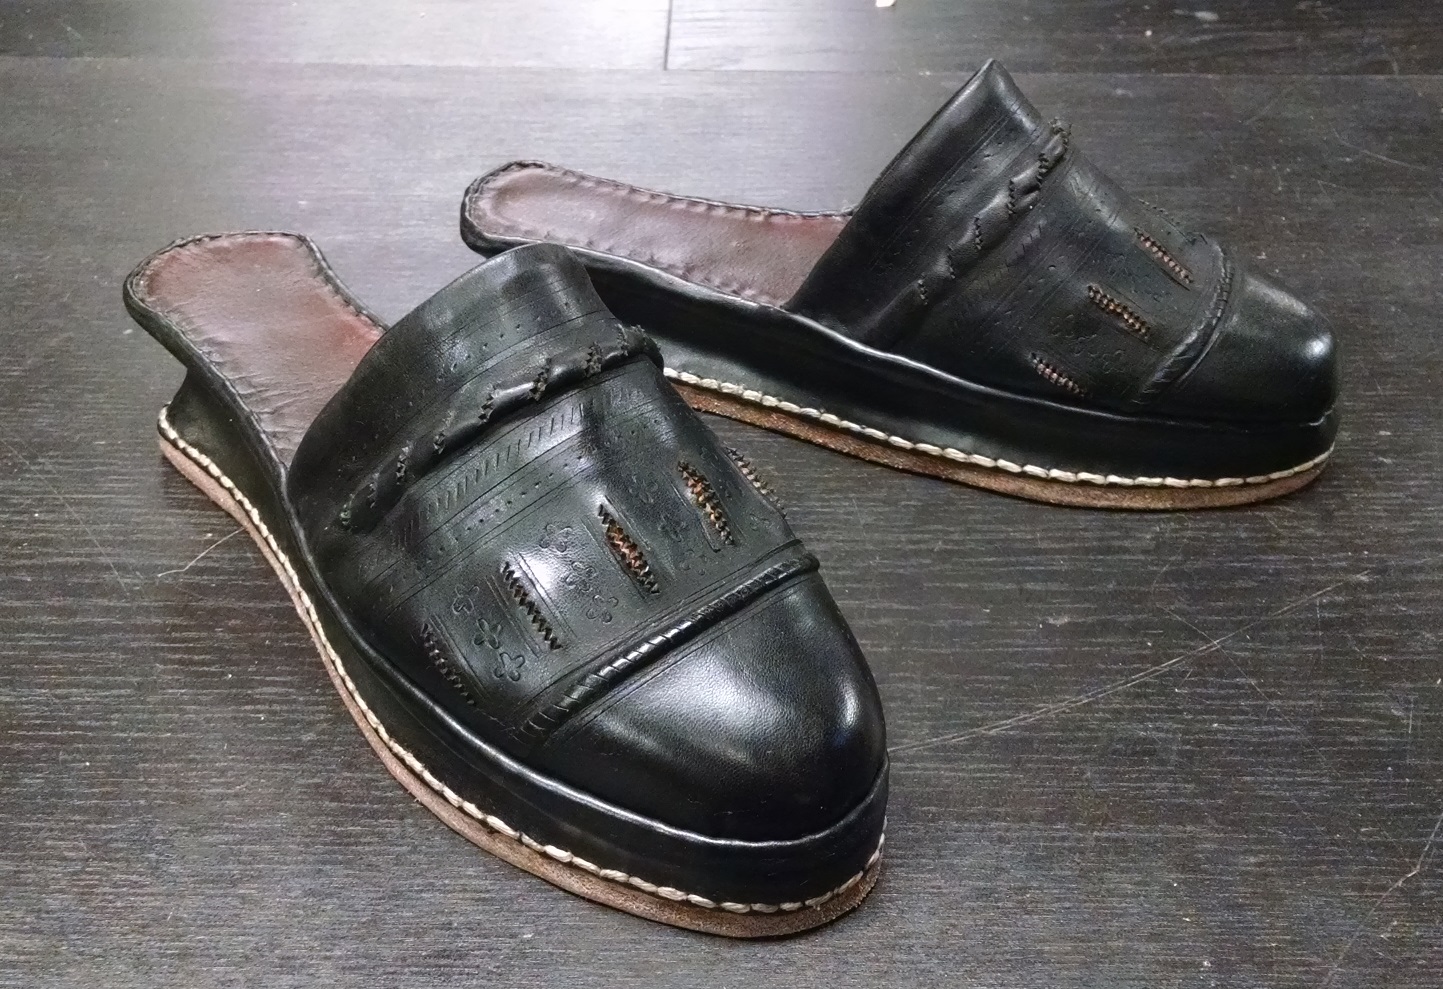
What I thought worked particularly well were the slashed “ridges” on the upper of the pantofles. These are very similar to some extant pieces off of which I modeled this new pair.
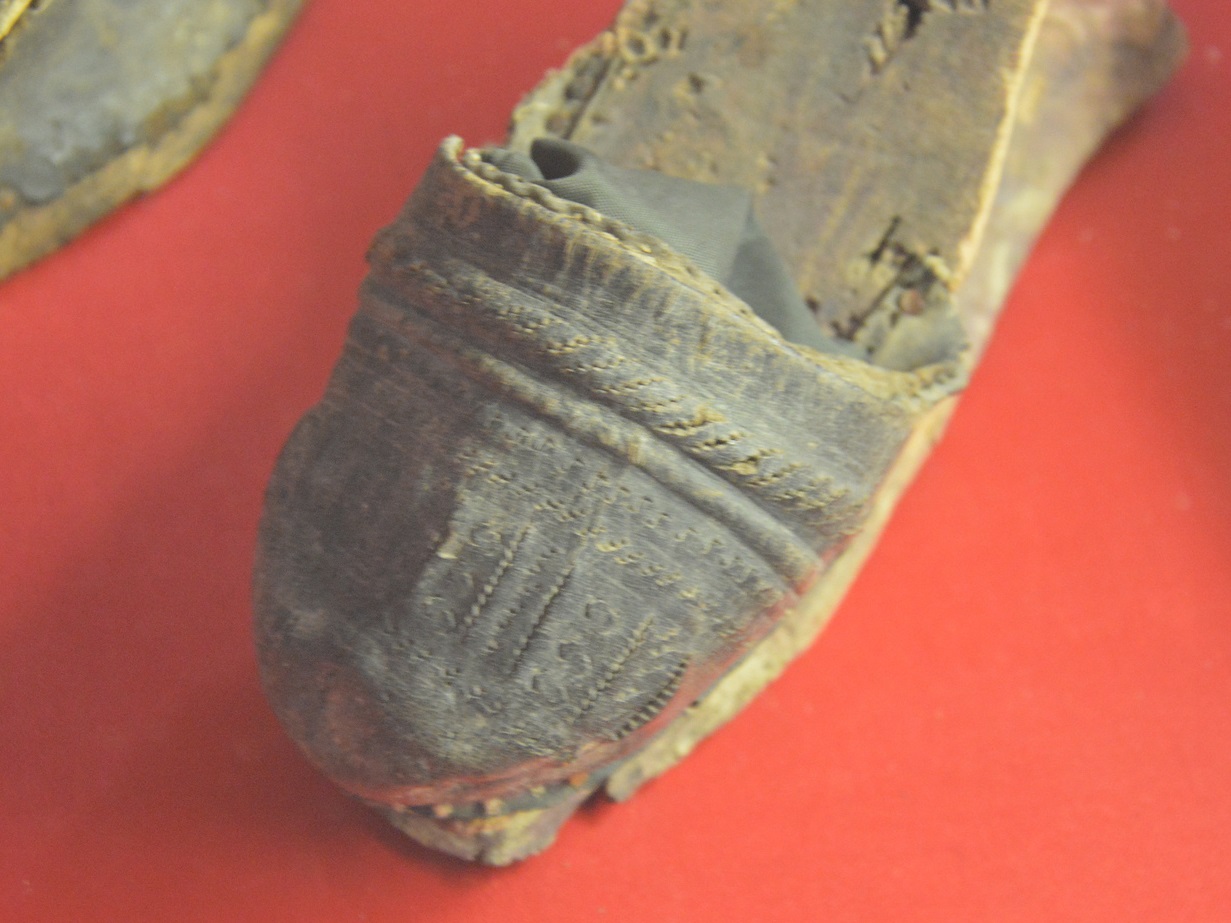
Let me first give you a couple of shots of my inspiration. The first few images were ones I took when I was visiting the Museum of London about ten years ago – long time to wait! But, make no mistake, useful research is useful research. Notice the wood core, the material covering the core, the upper edge which has been tacked into a lining, and the stitching on the outsole.
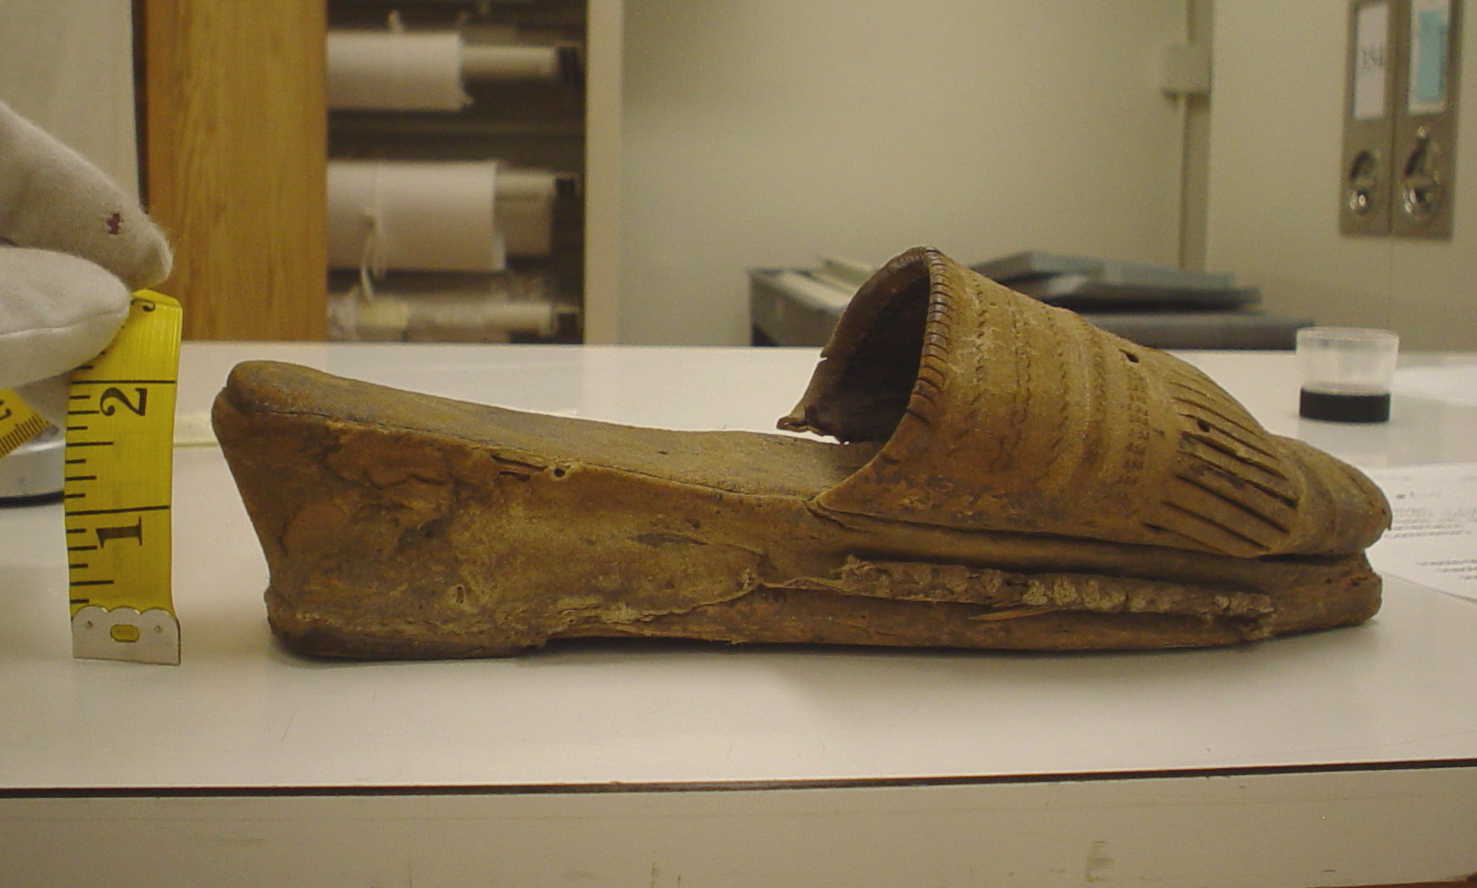
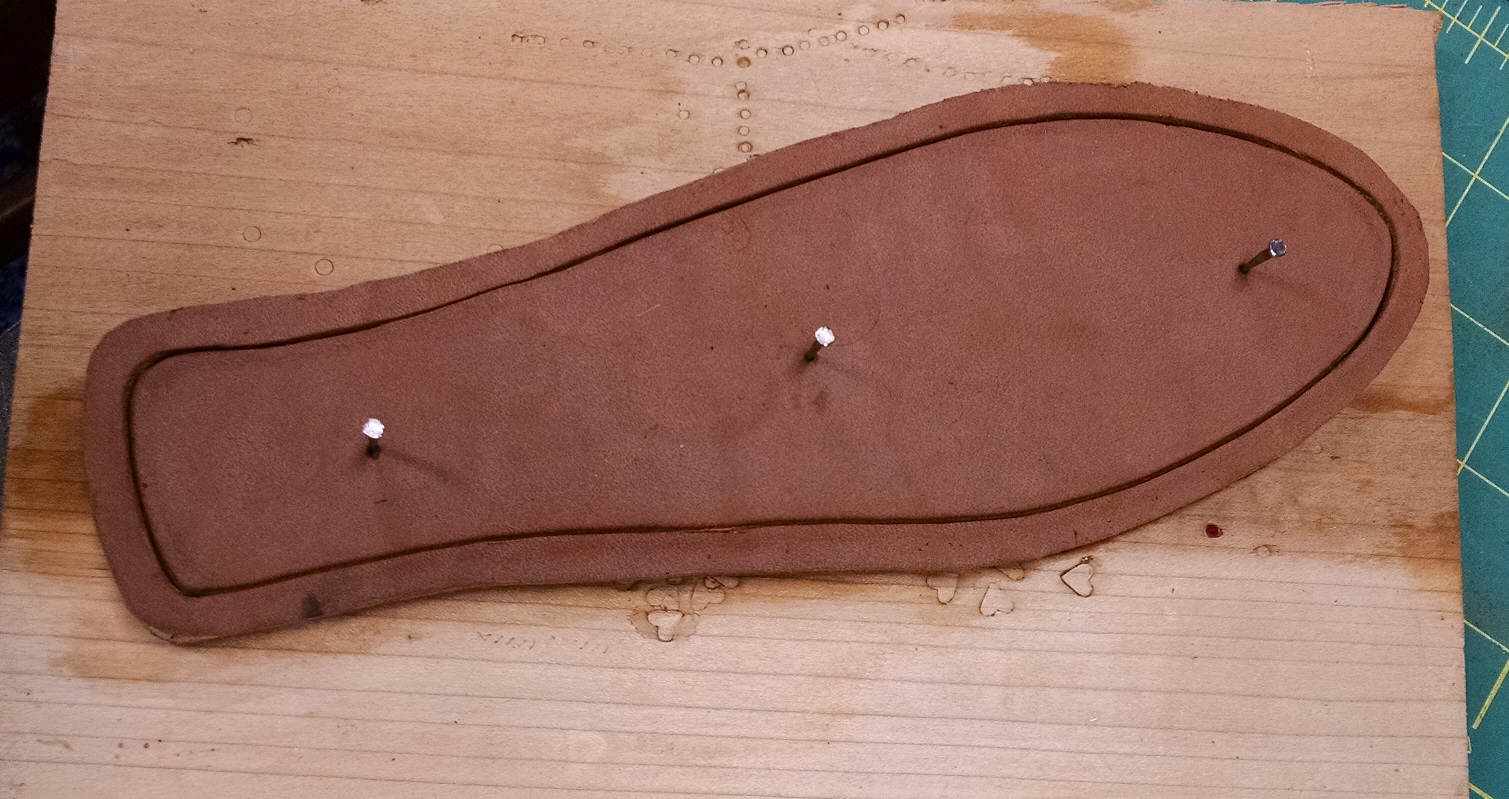
In the below, you can see the “fish-tail” insole construction, along with a lasting hole, and the fine decorative scorings on the upper. You can also see how waisted the core is carved, to make it look delicate, likely also to remove as much material as possible.
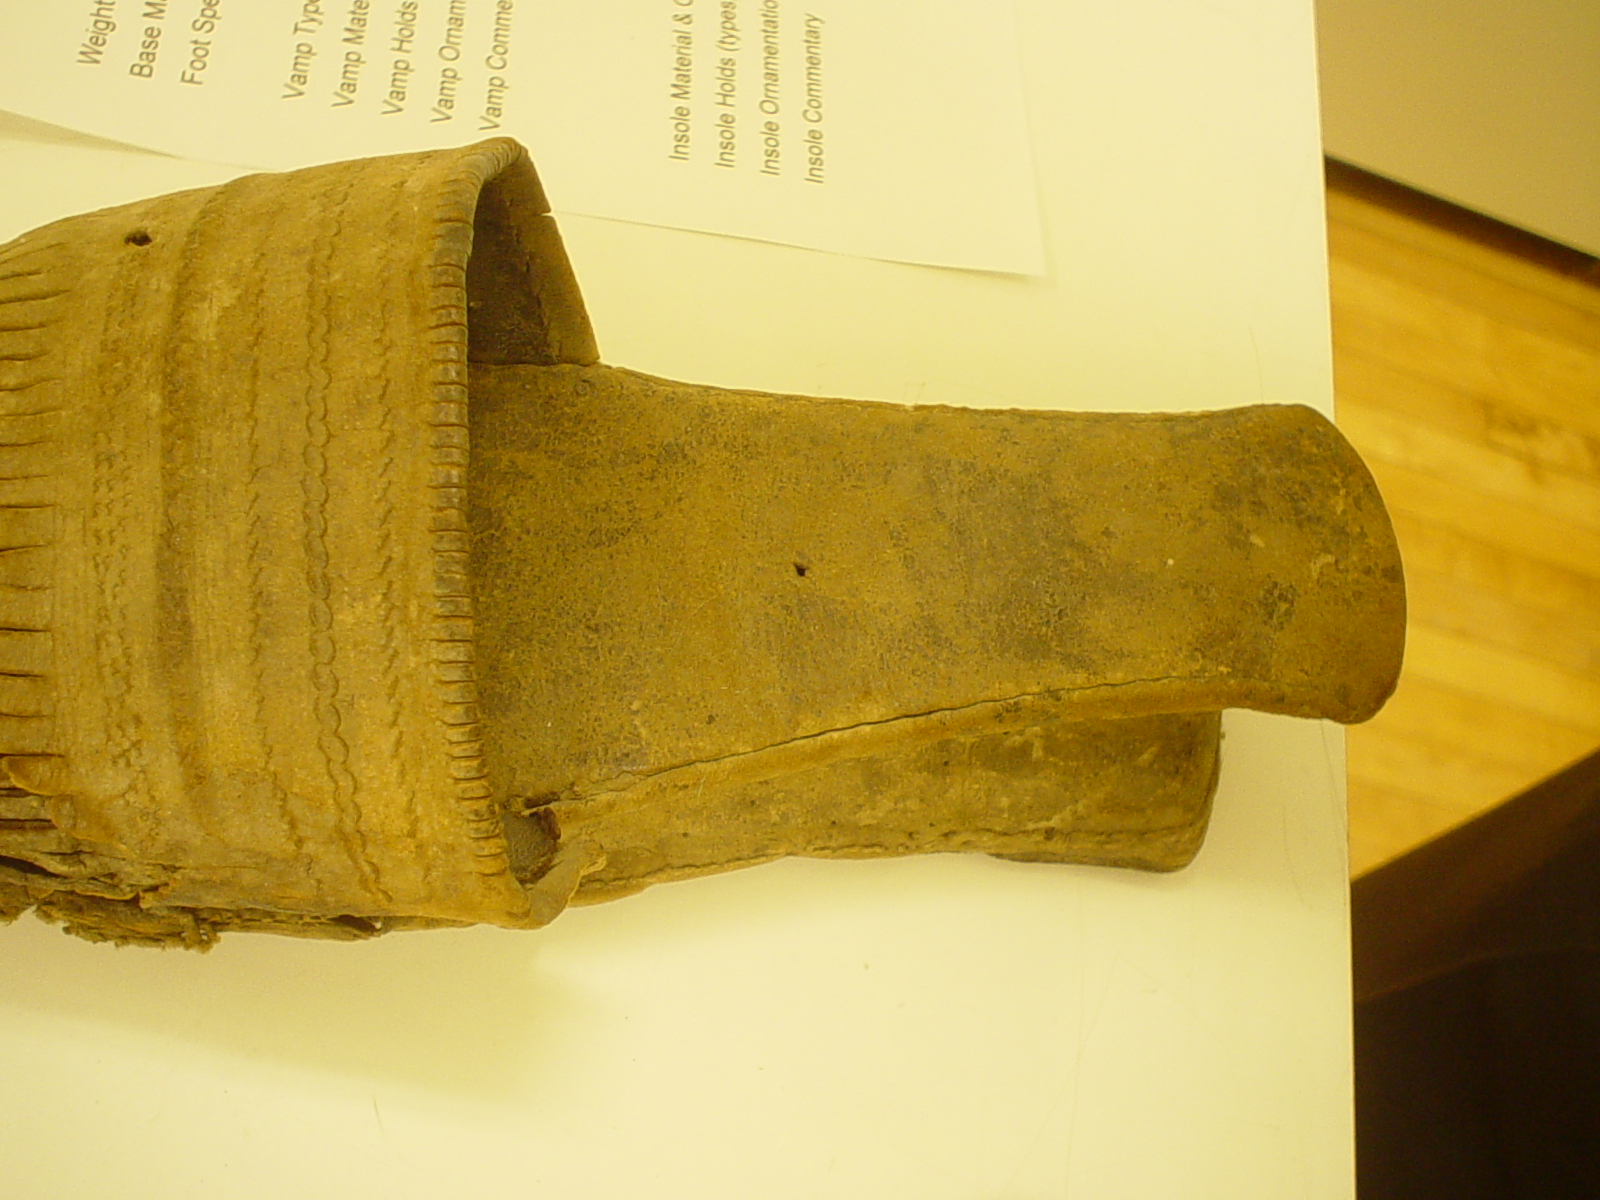
The basic construction seems fairly straight forward, but let us consider now another set of images, coming to me from about two years ago. I have them labeled as “Carloni Boccaccio,” but I honestly cannot recall who sent them to me, so my apologies for such an imprecise thanks. Although these are incomplete, with only the upper and wooden core remaining, the decoration is stunning and wonderful.
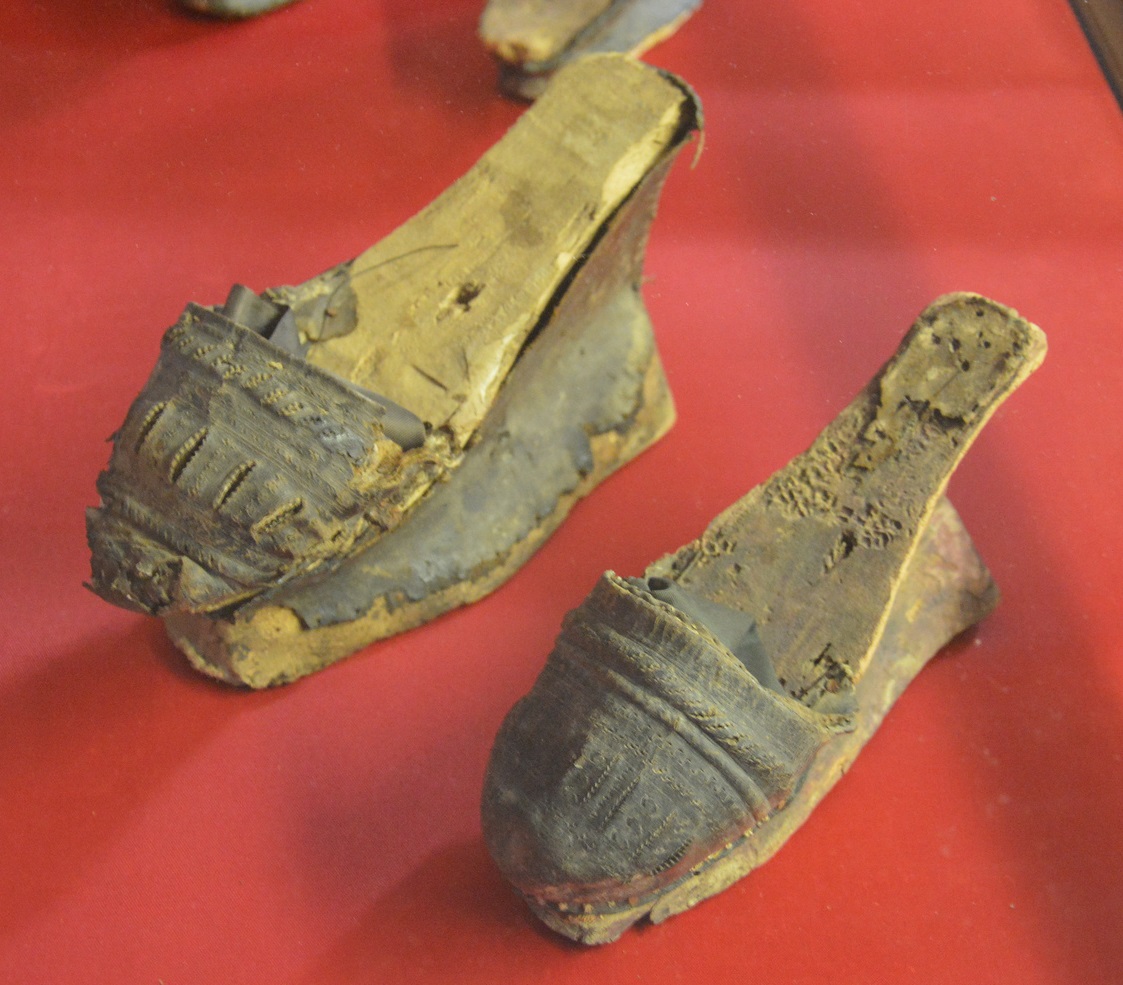
A close-up of the two of them shows delicate scoring, zig-zag cutwork, lines and what appear to be quatrefoils, and some raised ridges along the upper. Absolutely lovely pieces. One thing also to note – look how small the upper is compared to the rest of the pantofles. In the previous example from the MFA, the upper takes up almost half of the linear length from toe to heel. In this case, it is more like one third. Perhaps this is due to the greater angle of the pantofle which naturally makes the foot press into the toe, or perhaps just a different design philosophy. Either way, I opted for the longer upper and the smaller height.

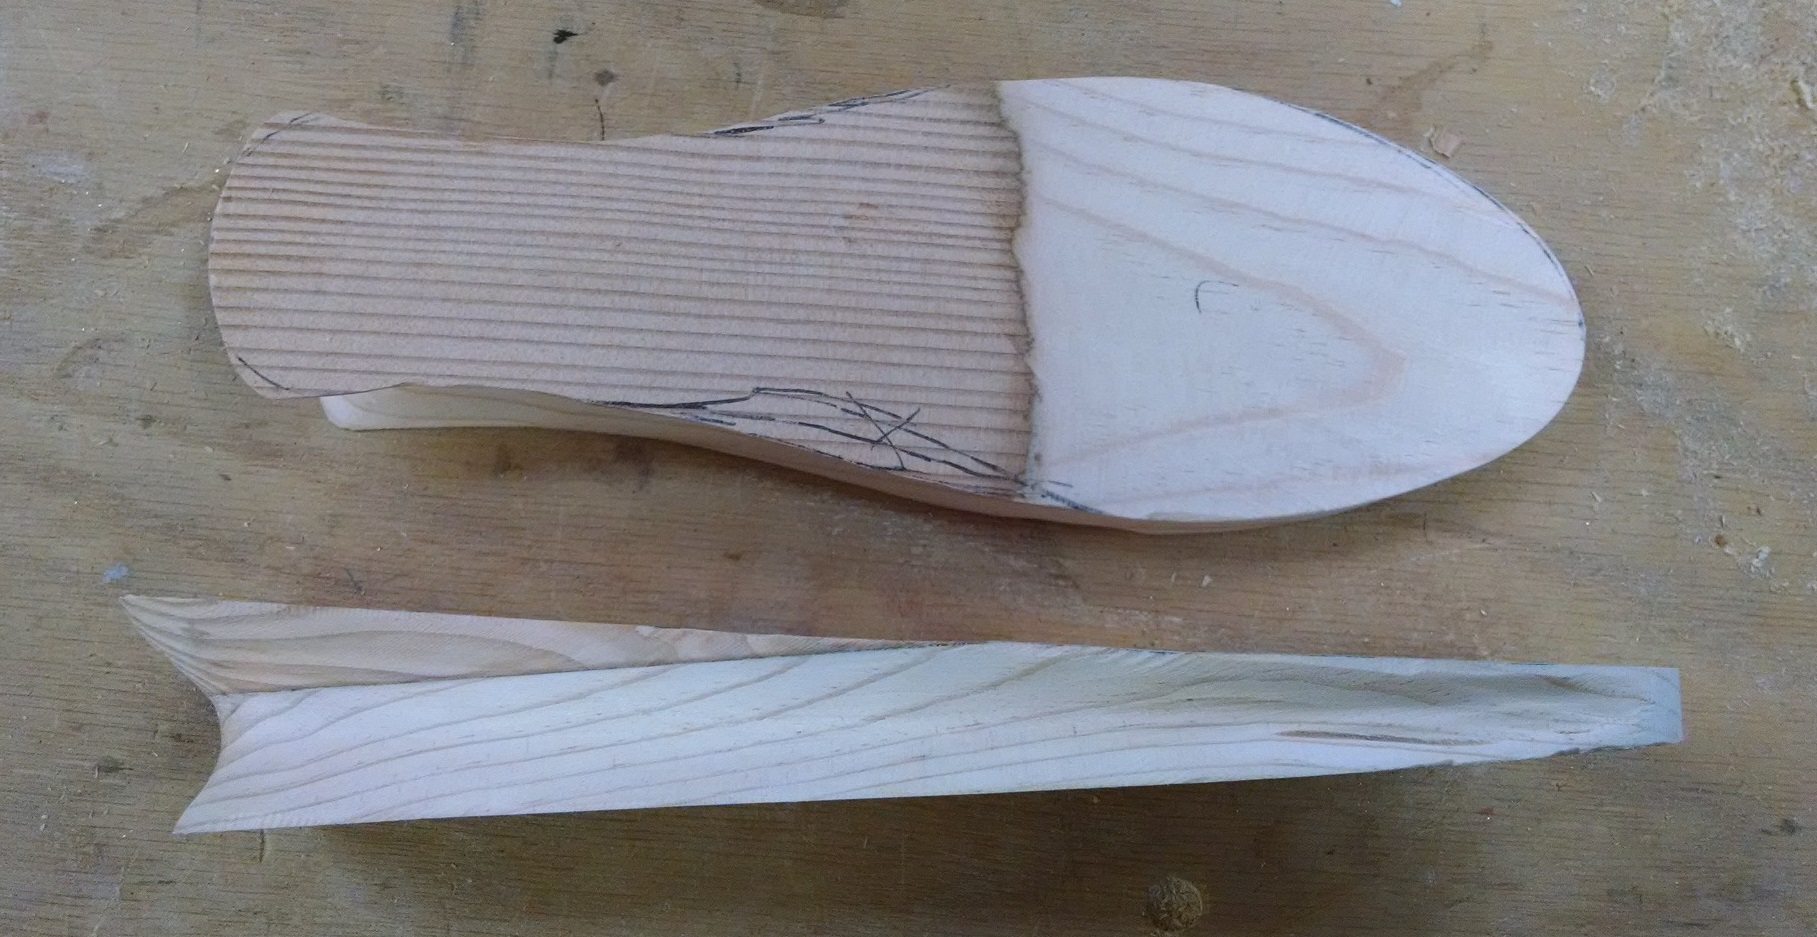
Originally, I had planned to make the cores just under two inches tall, so I glued a piece of wood to another that was 1.5″ to make up the difference. However, upon reflection, I ended up making the core just about 1.5″ tall, so the extra piece was not really crucial. Another thing to note – I used lightweight pine for the cores. This is important, because if one were to use a dense hardwood like oak, the pantofles would be far heavier than normal. I could not identify the type of wood from the images, but a description of an Italian chopine in the reference section discusses the use of fir, so I felt justified in this.
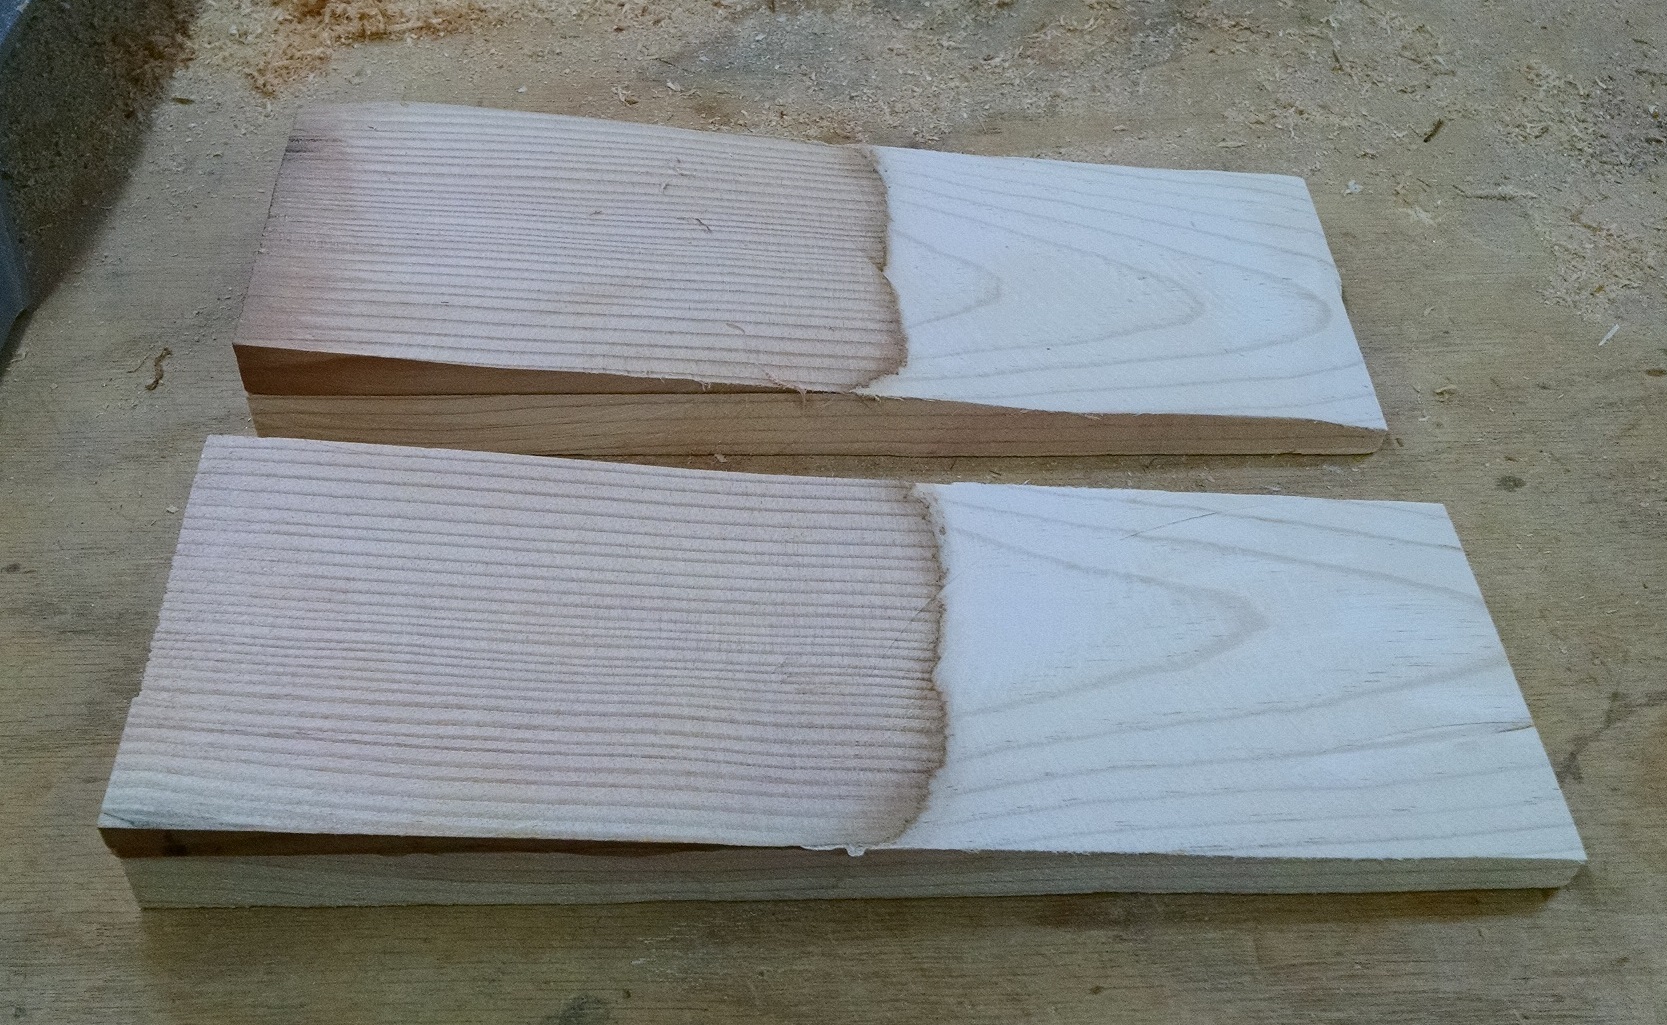
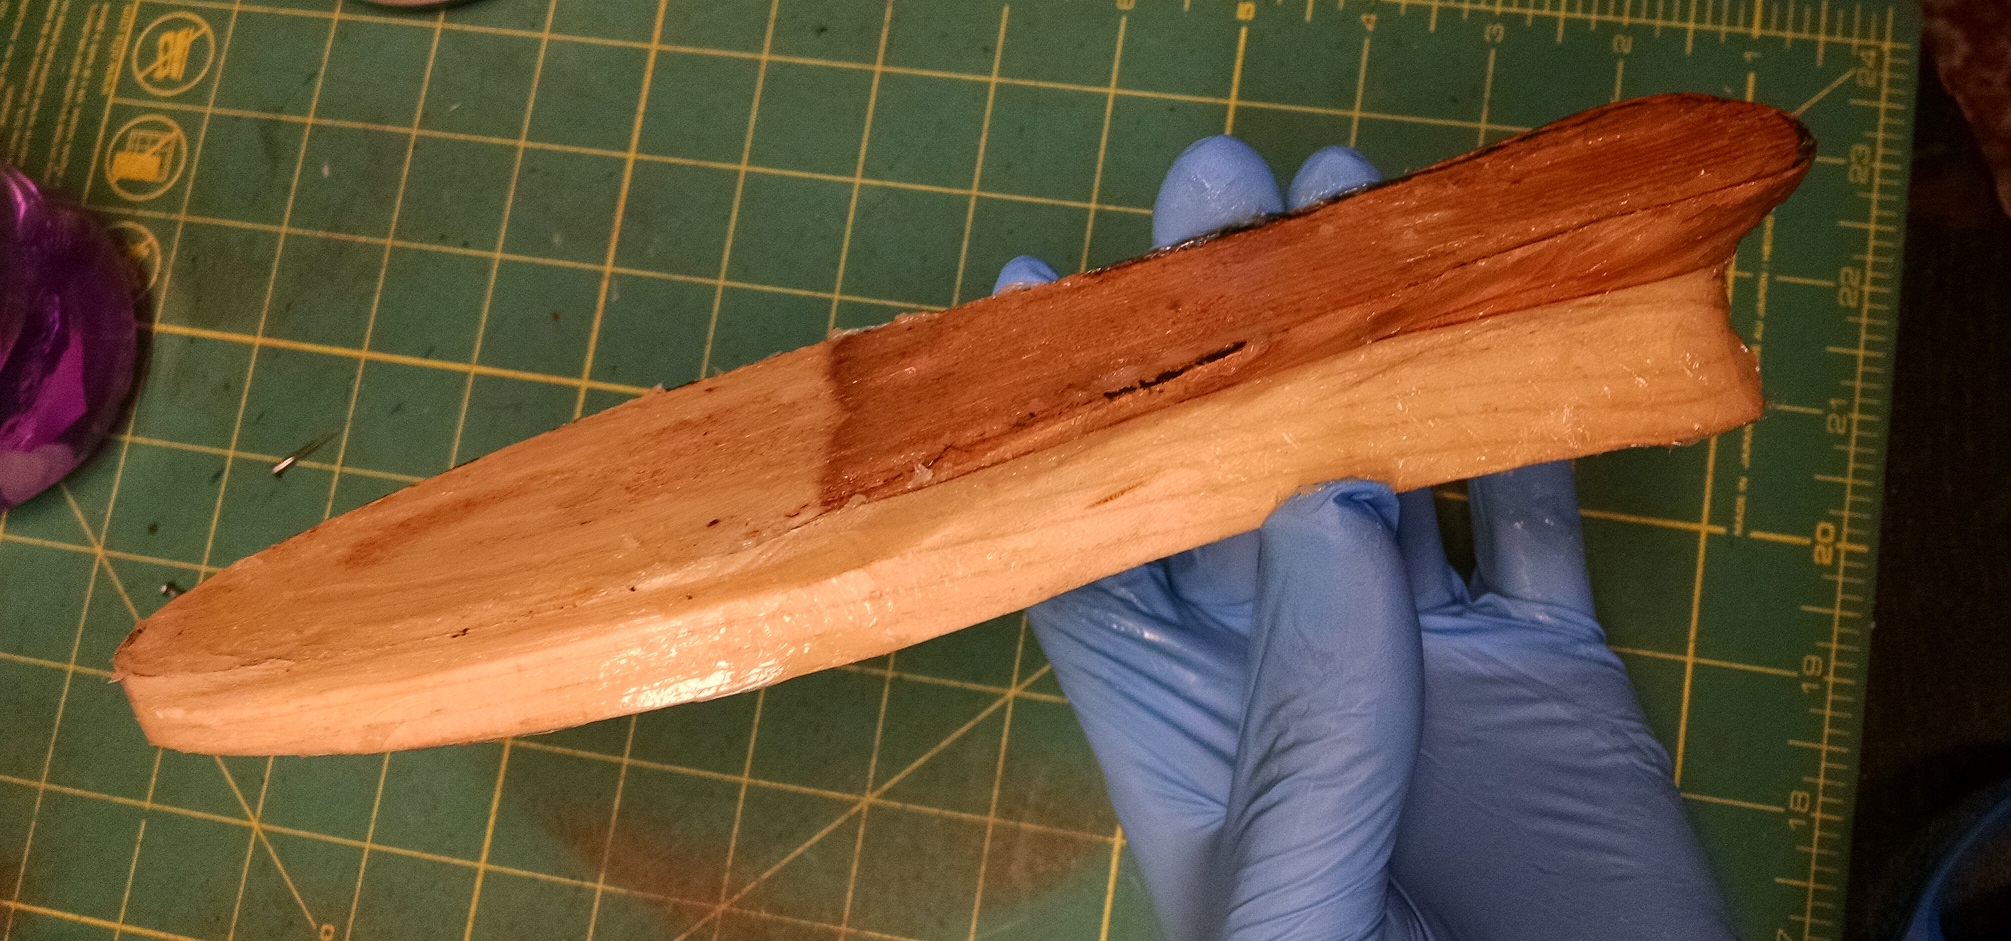
The shape was roughly hewn out, primarily using power tools (because I’m lazy, and you can’t really tell the difference when you’re done).
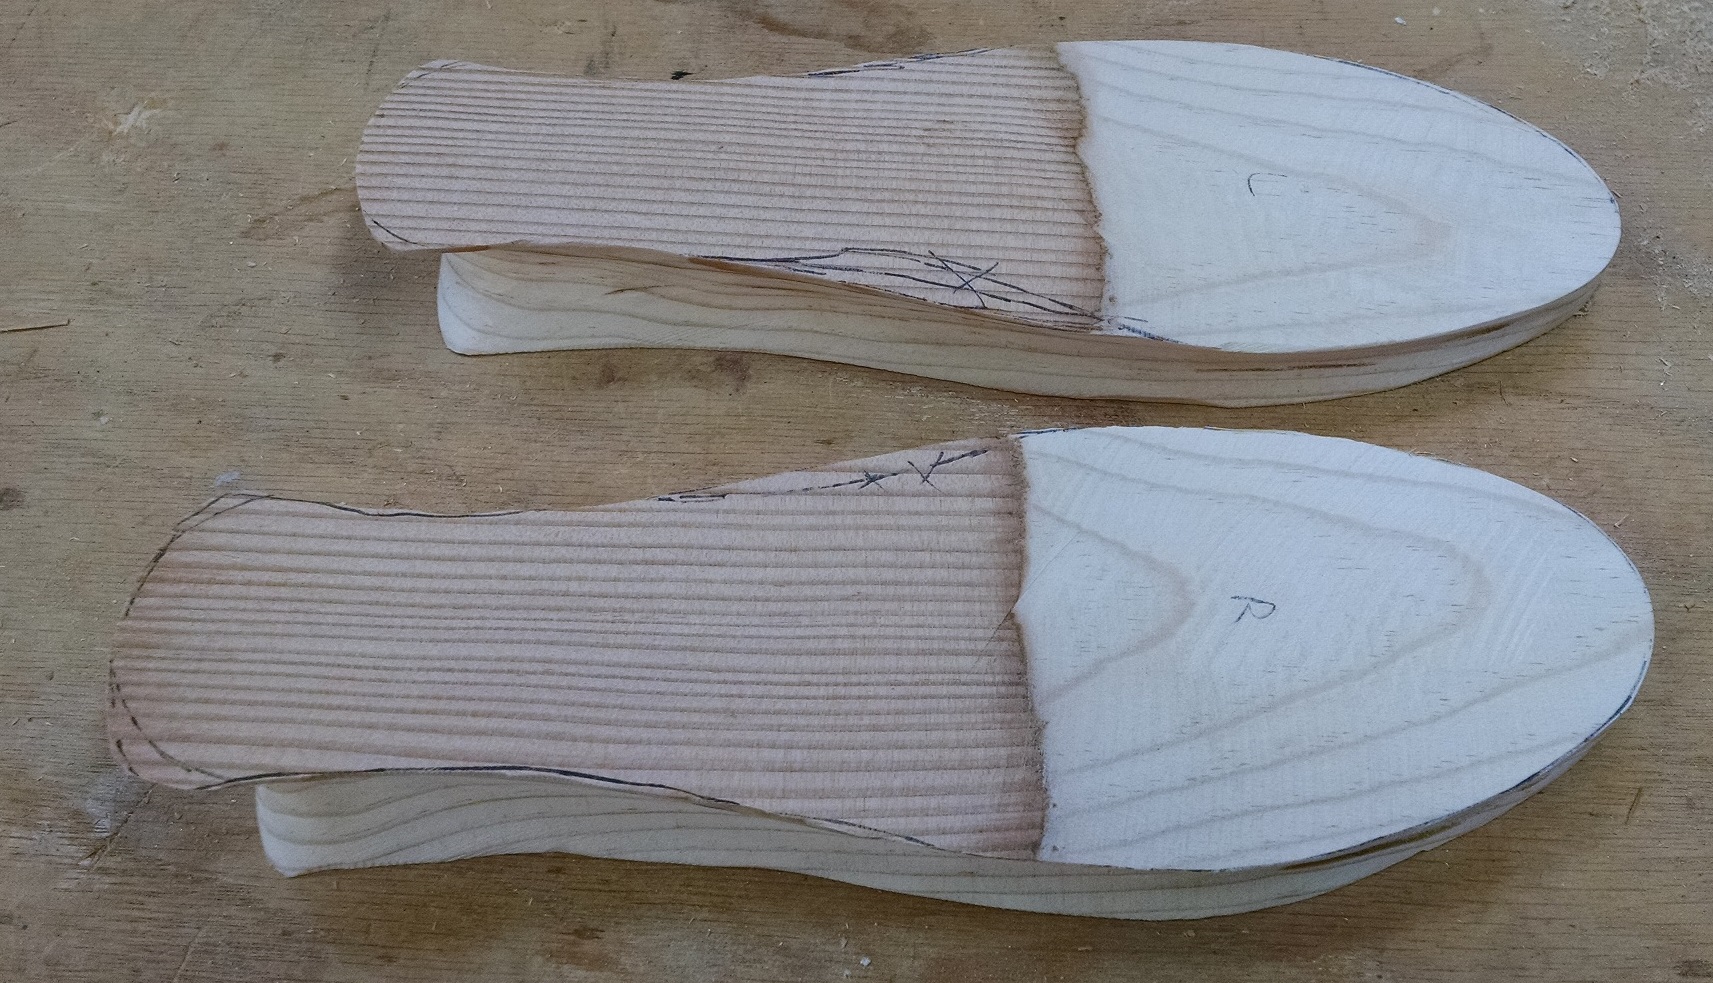
The original from the MFA appeared to be made straight, i.e. without a distinction between left and right, but the lasts I was using were left and right, so you will see a slight crooked nature to them, even though I tried to even them out somewhat.
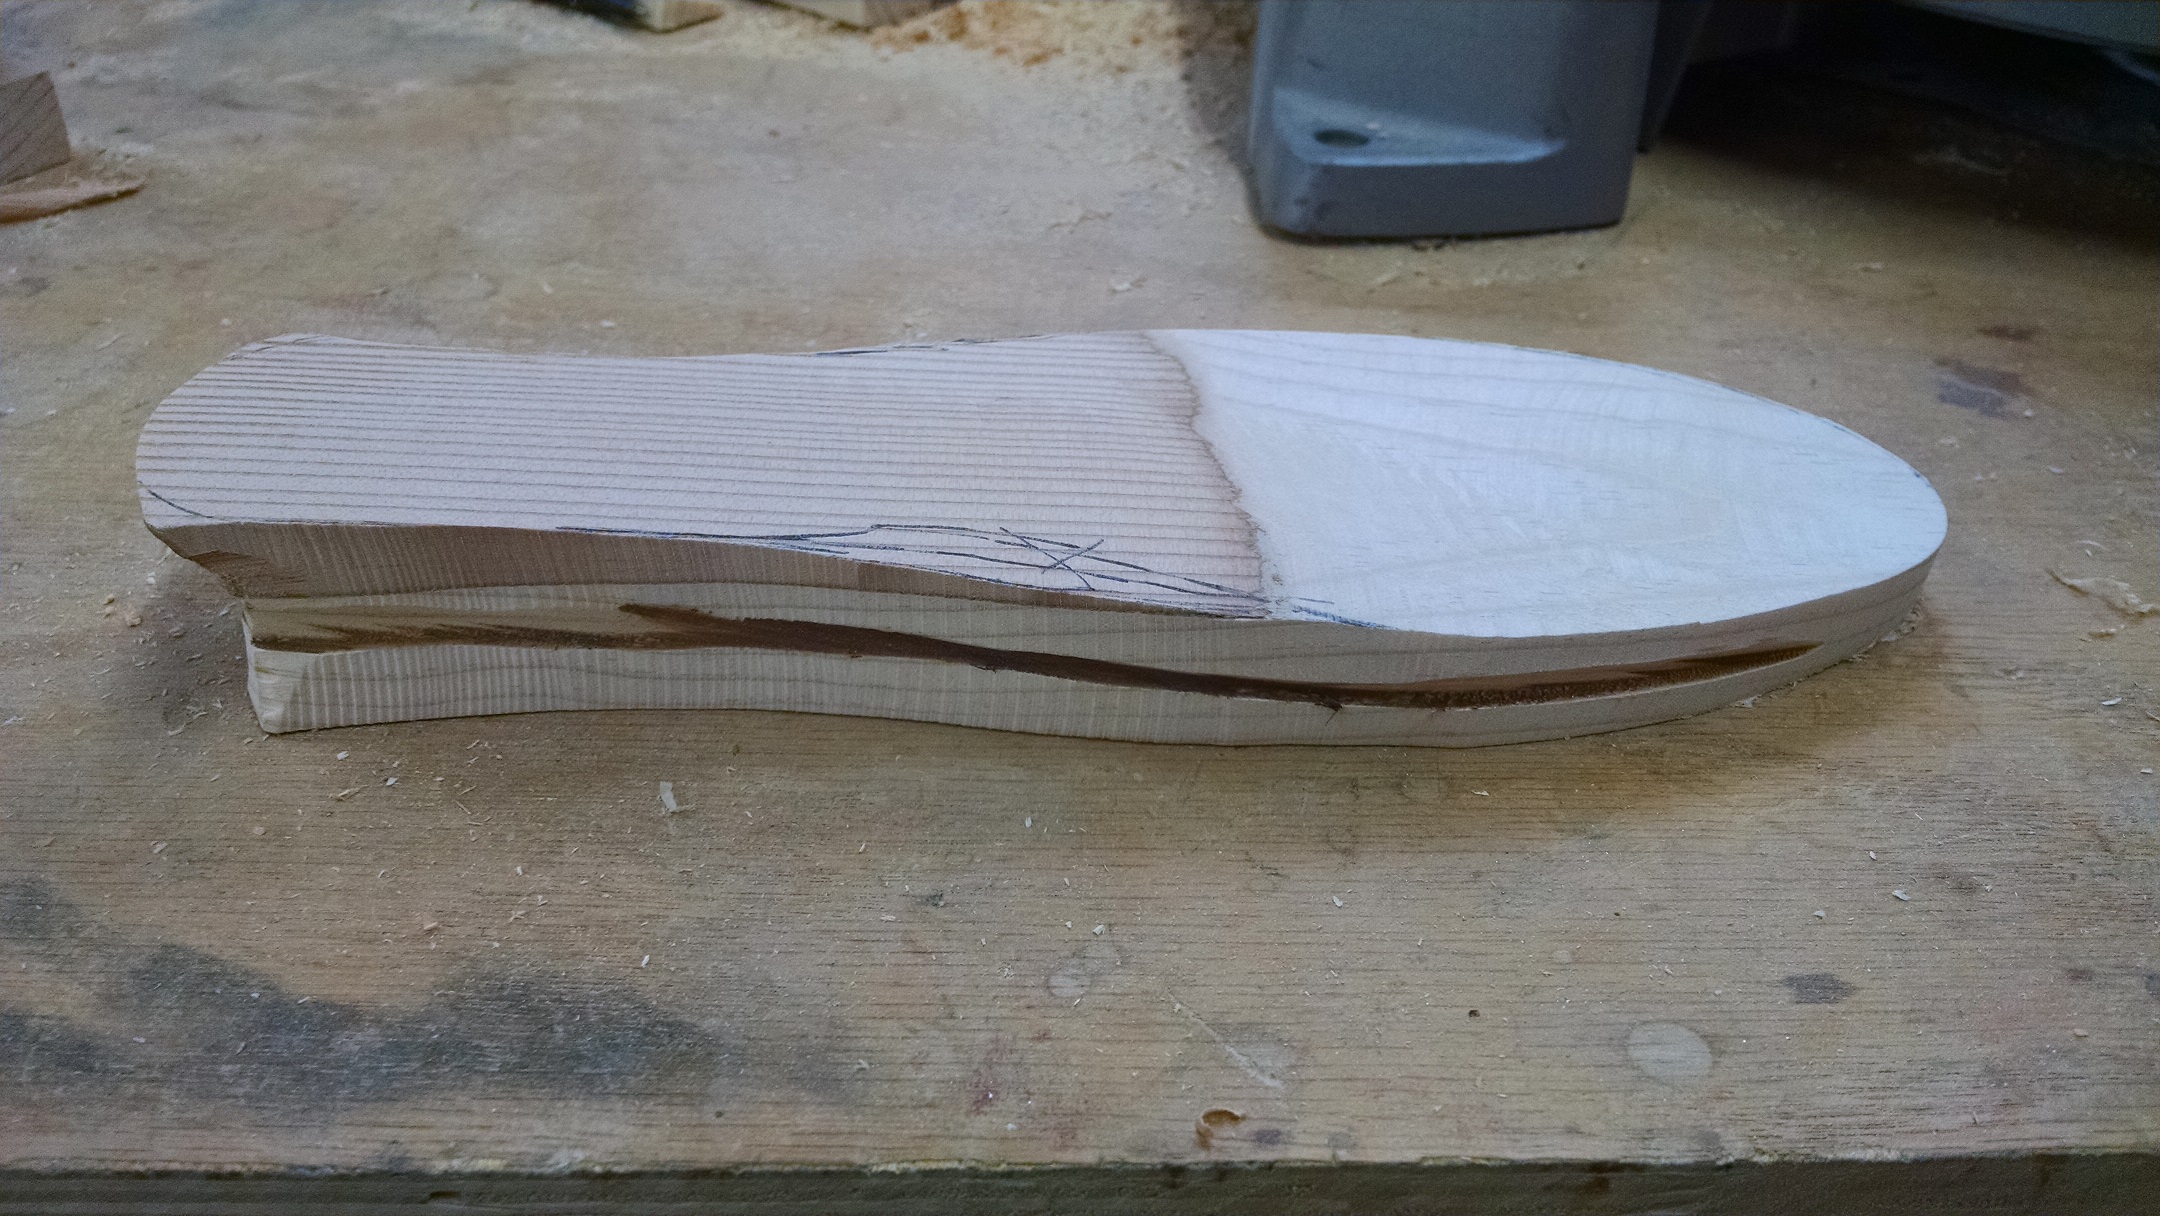
A close-up of the profile of the cores – you can see that the “groove” goes almost all the way to the toe, again based on the extant pieces.
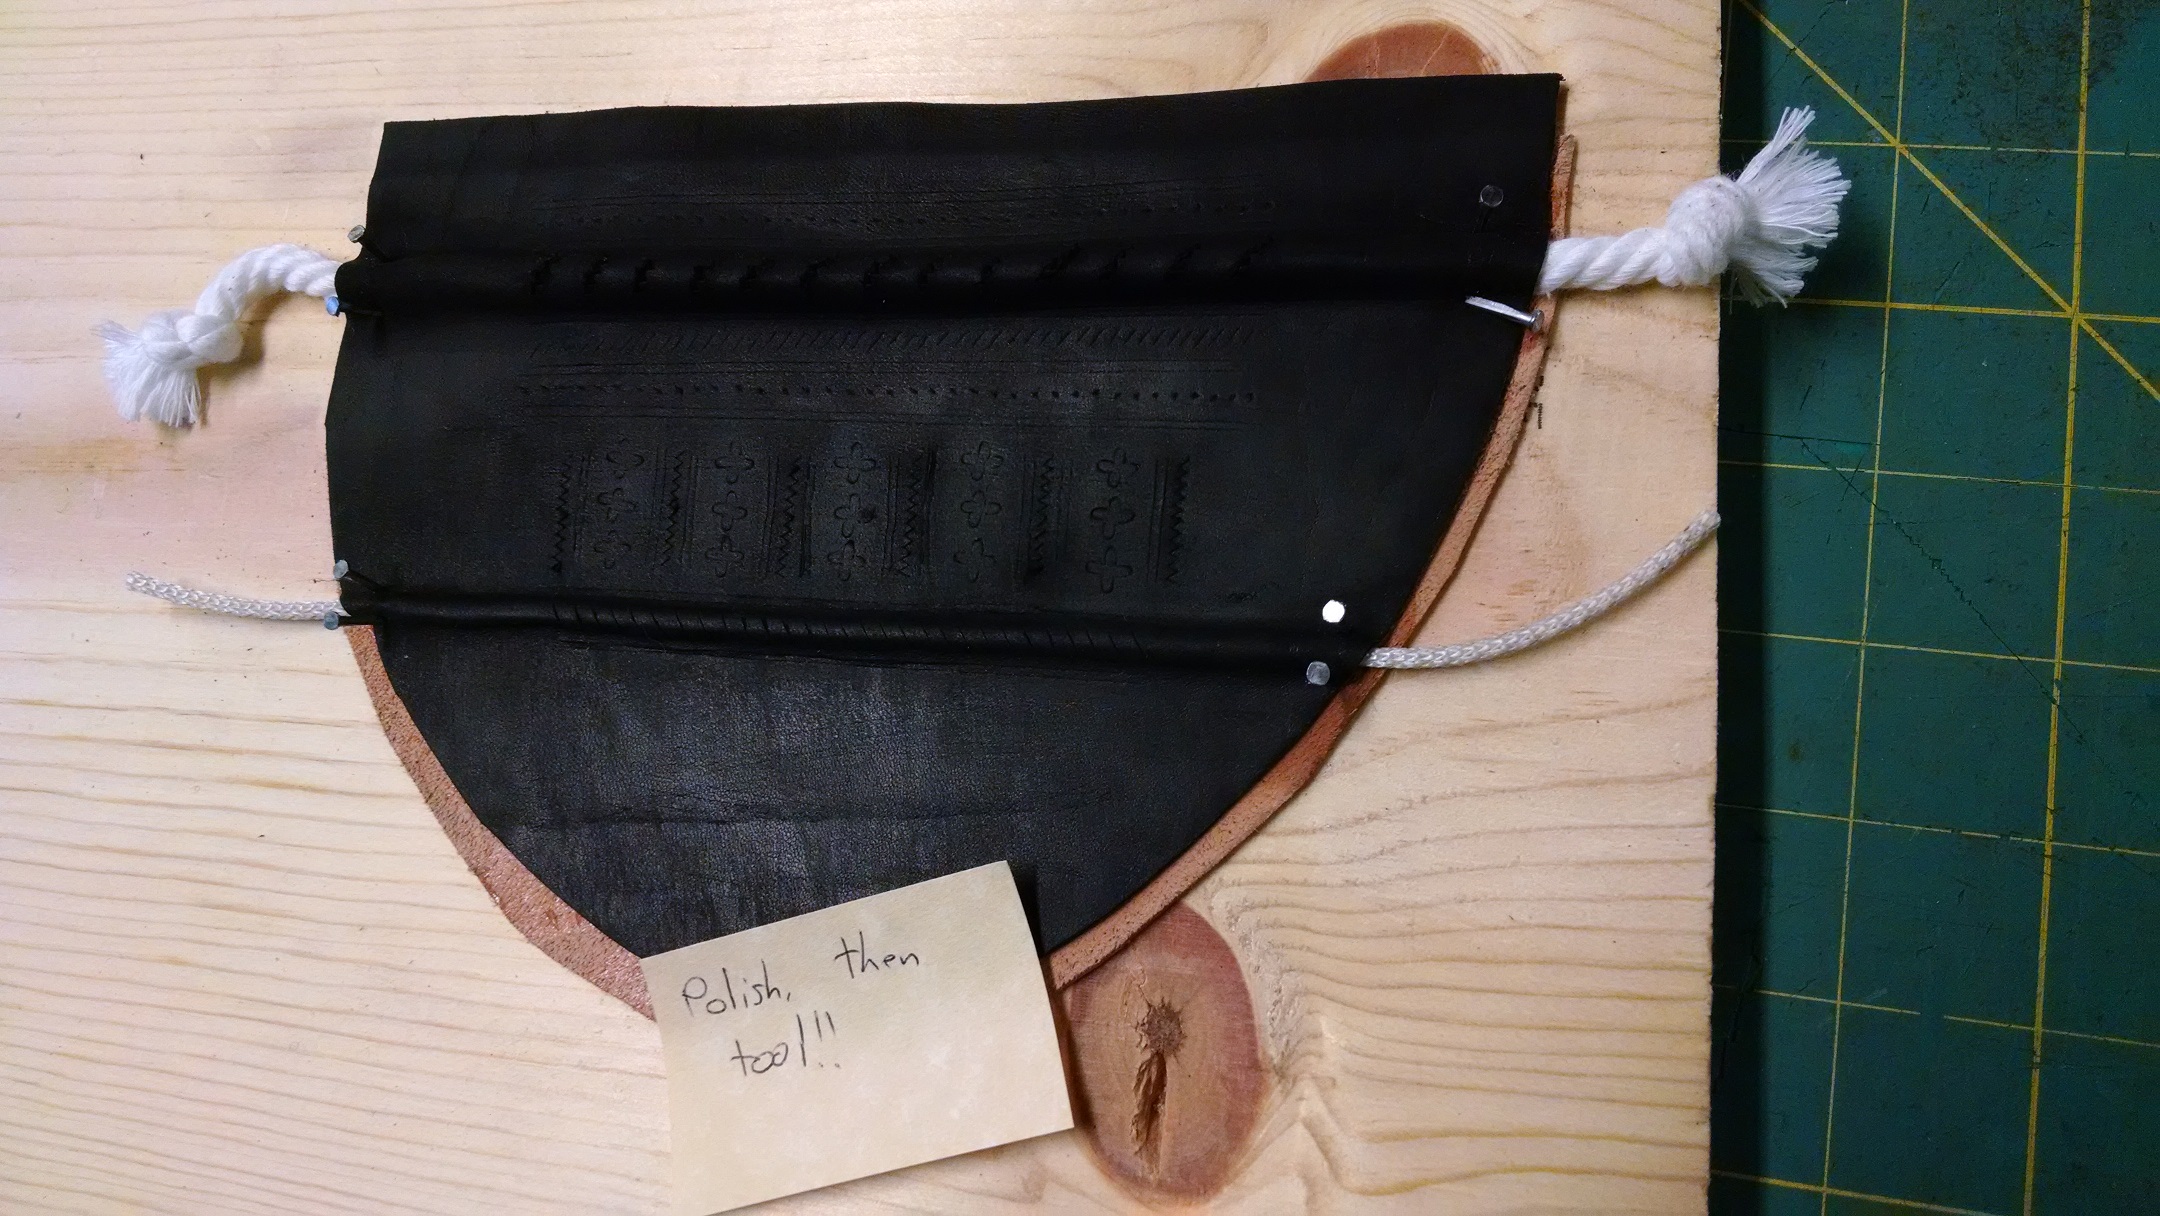
Now, we need to figure out how we get the ridges into the upper. I had some ideas on this, and after confirming with Dr. Volken from the Musee de la Chaussure, with whom I had spent some time with, I ended up experimenting a bit with different weights of leather. I used only medium and very thin weight leather, cut with a decorative pattern, and then tossed in a bucket of water. I then laid a layer of paste onto a lining and placed cords on top of the pasted lining. Paste is not glue – it is a wheat or potato based starch paste which will dry quite hard, but can be removed when wet again. Retrieving the sample pieces, I then placed them on top of the lining, pinching the cord into place in between the lining and the upper. I then tacked the edges down, and smoothed them with a fiddler. Though the ridges are prominent in all of them, the on on the far left had the best definition, because the upper leather was very thin and pliable. However, once the paste had dried, the combination of the two felt like a nice, sturdy leather. In some cases, I am told by Dr. Volken, the cord was sewn into the lasting margin to reinforce the upper. Since the upper, once dry, was very sturdy, I ended up pulling it out, because the white cord was seen beneath the slashes.

Armed with this, I cut both lining and upper leather, making the upper longer than needed to account for the amount used to form the ridge, as well as when it needed to be tacked down to the lining. Unfortunately, I made the error of cutting and scoring/pinking the upper before dyeing – the dye I used, a Fiebings spirit dye, left a residue on the top surface of the leather. Although it burnishes off, while burnishing, I wounded some of the finer scoring, so I recommend to you to dye, polish, and then score/pink the leather in this instance. I will note that normally, one tools and scores prior to dyeing, and although it all worked out in the end, I was fighting it a bit.
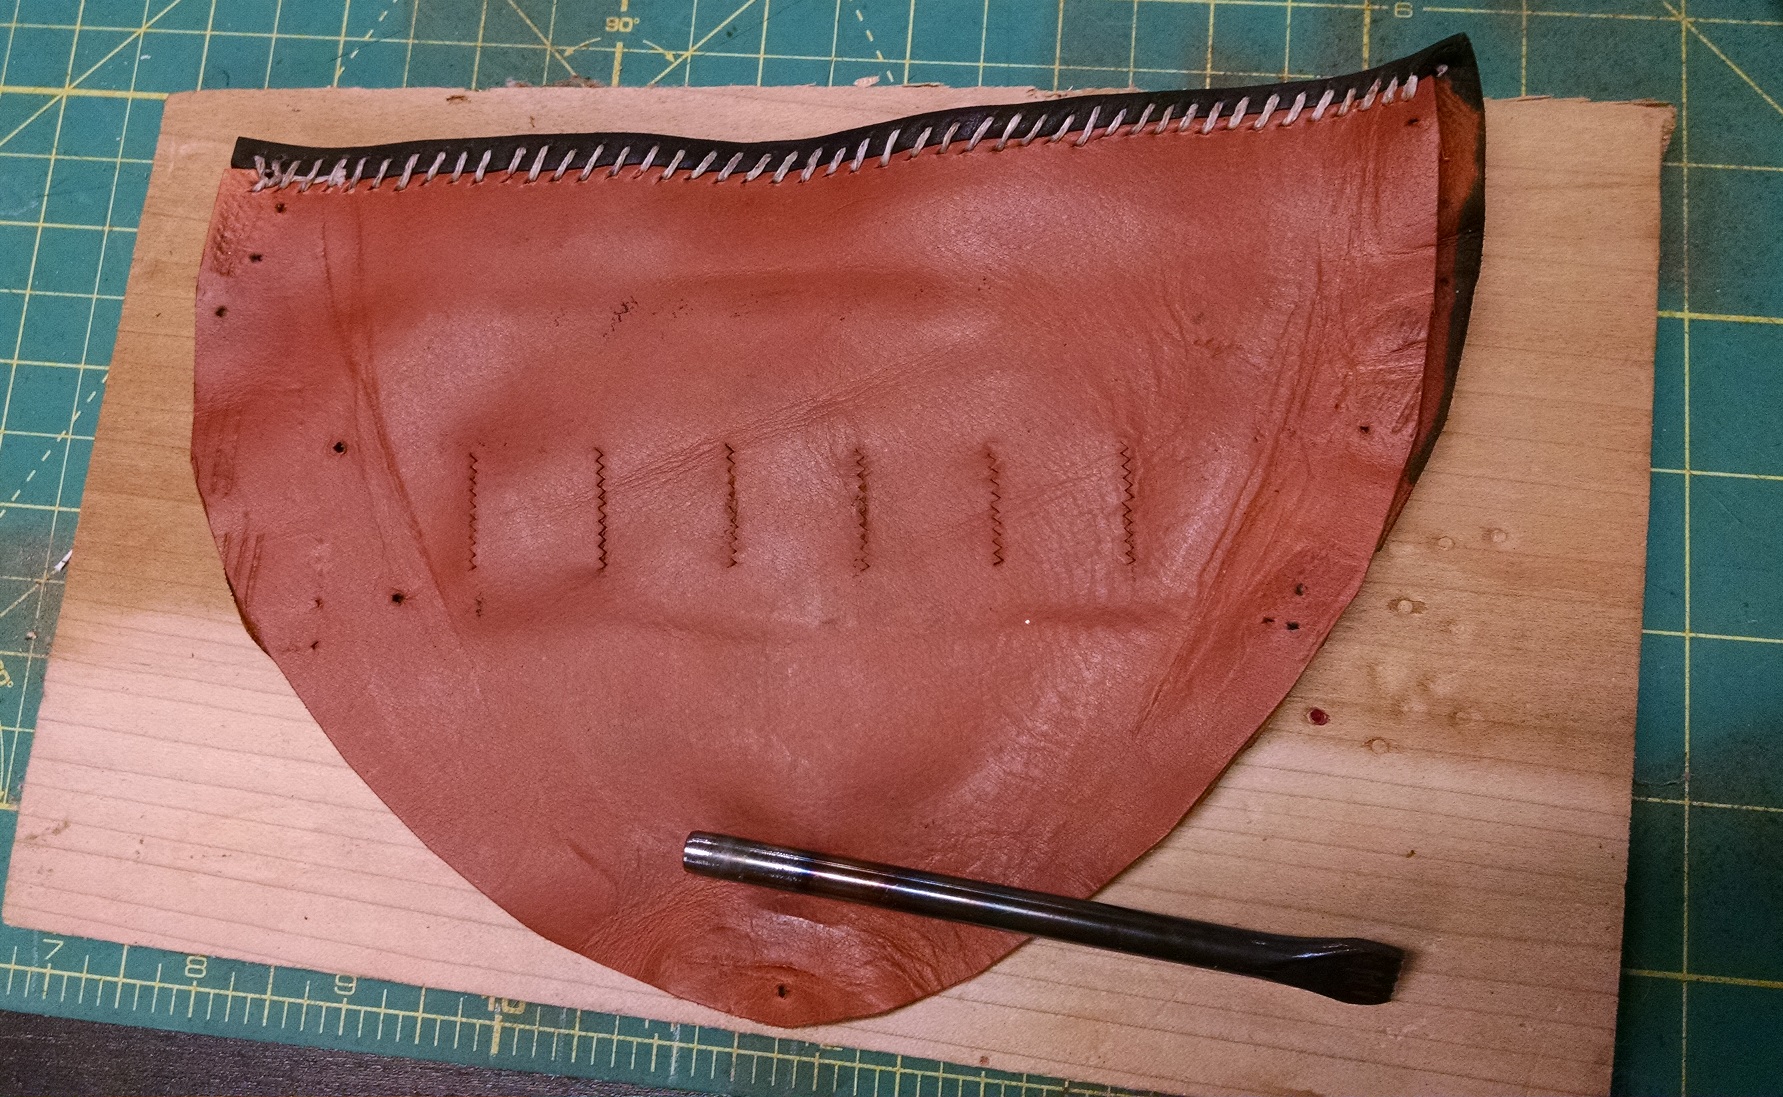
Once the upper was pinked and scored, I soaked it, and laid it on top of the pasted lining and pinched the uppers along the cords. They formed ridges quite well, and I was very pleased with them, though I dare say that I could have made the top ridge a bit smaller. Don’t forget that you need to re-punch any work that went through all the way – In this case, only the zig-zag pinking needed to be cut through again.
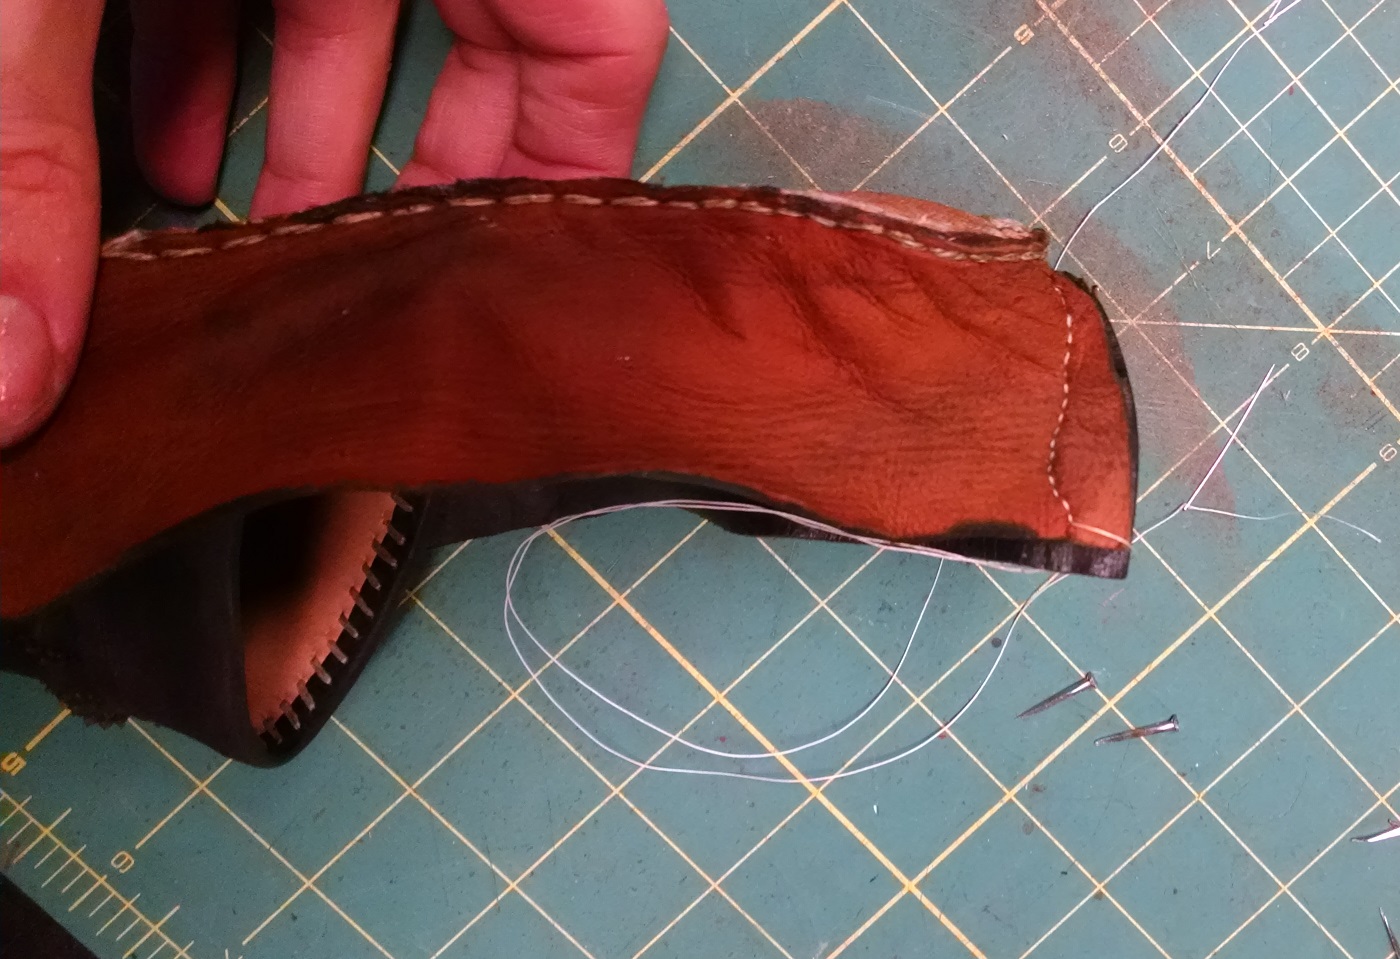
The insole, upper, and envelope were all sewn in a manner consistent with the Lesson 2 Writeup. I used lasts here, with the insole tacked to it, to keep it in place while I worked. Though the lasts are not shown, they are important to make sure that the pantofle is properly sized to the wearer. It’s also important to have the sole of the last as flat as possible. I would also recommend using a fairly sturdy upper leather so as to minimize the visual impact of the stitching – although several examples do show impressions due to the stitching, the vast majority show no evidence of stitching, indicating a very robust insole and/or very fine thread.
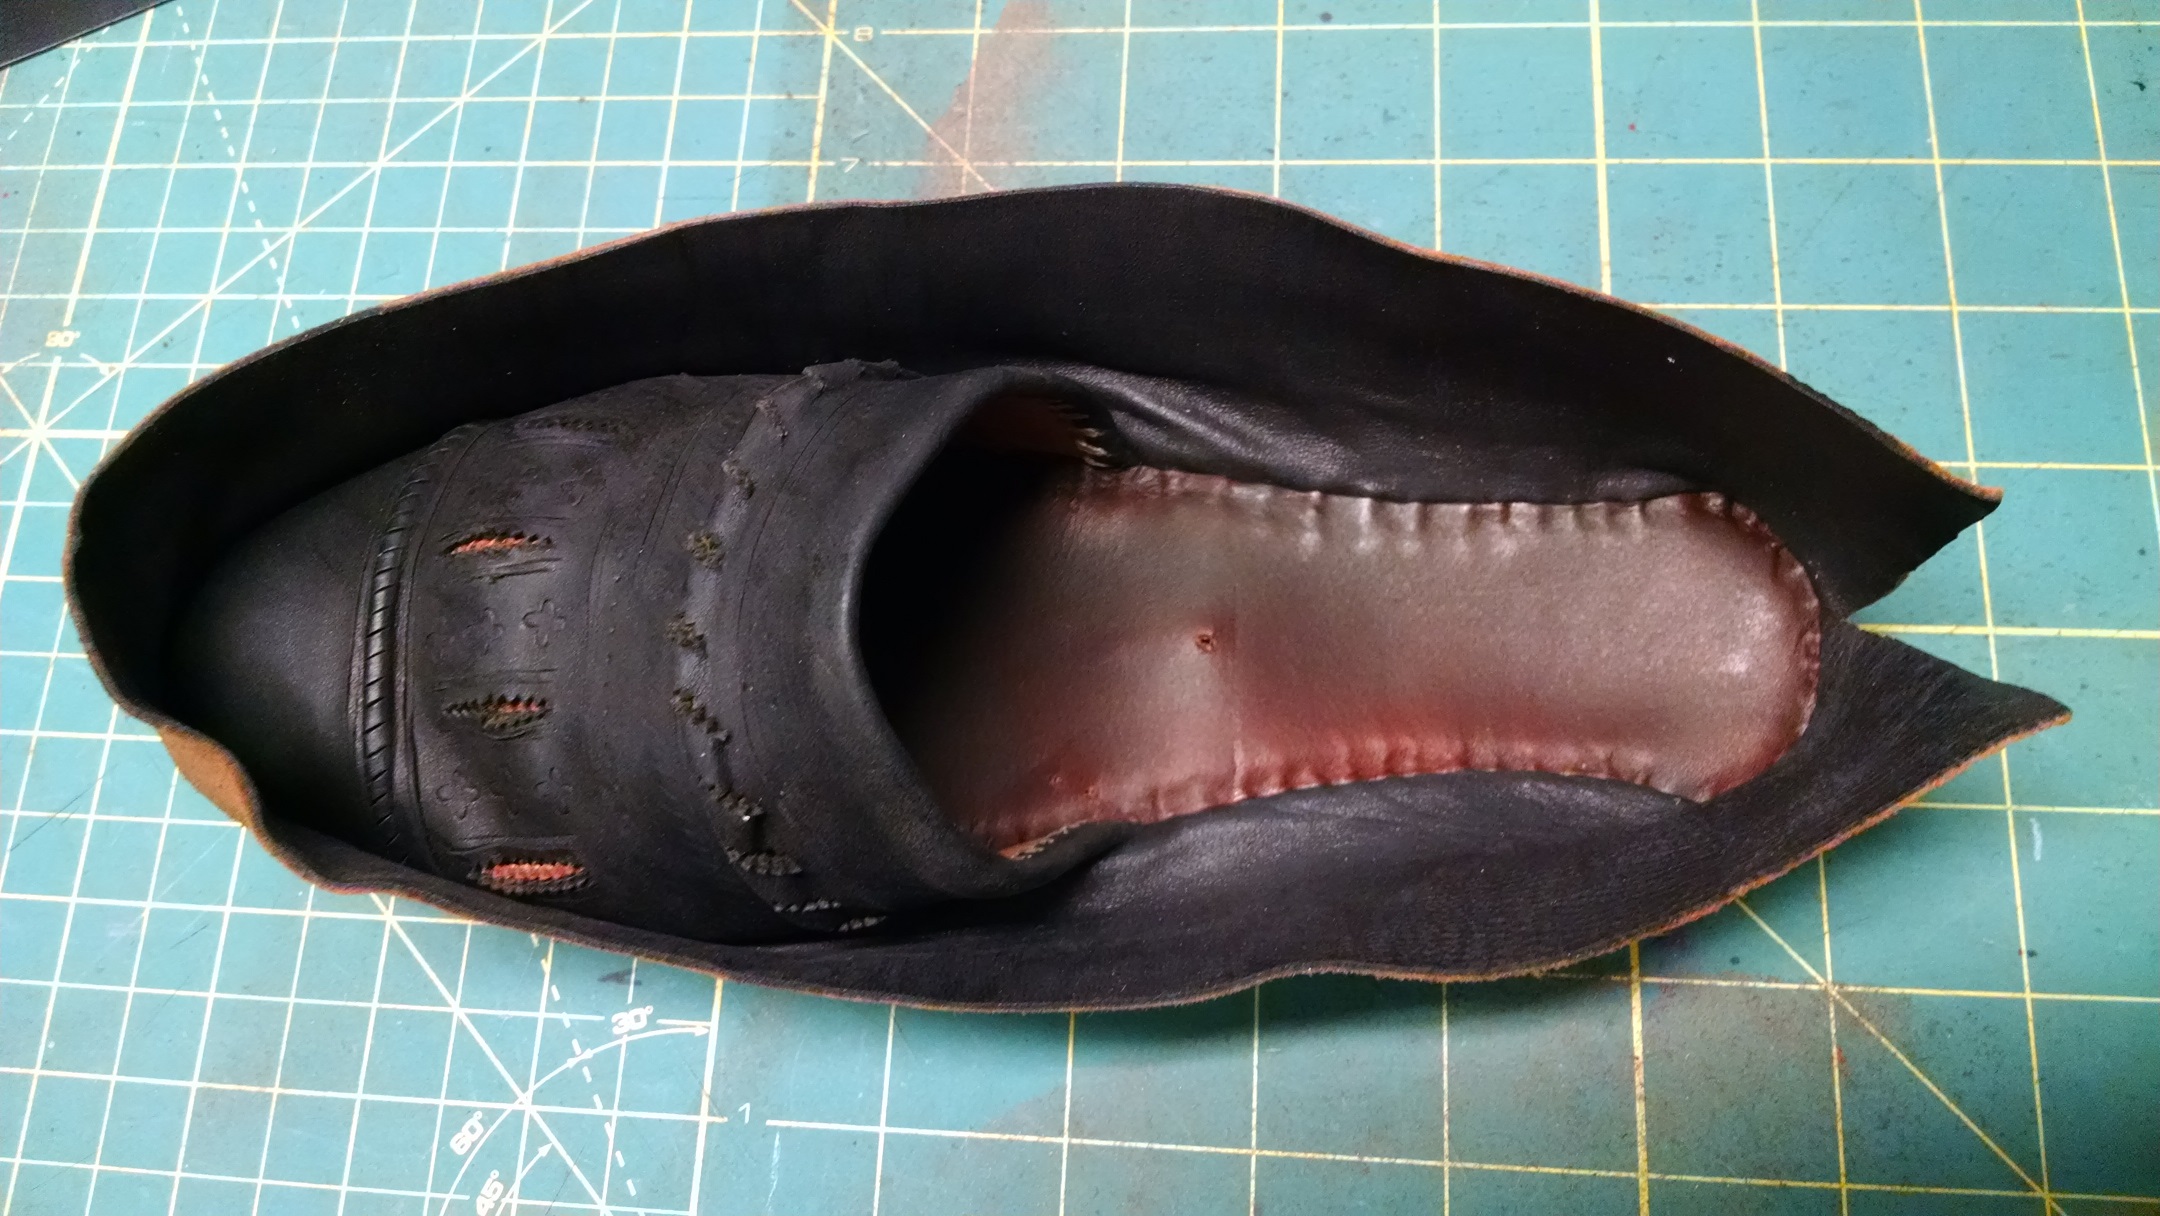
The join of the enveloping material also needs to be sewn. I found that I did not sew nearly enough and ended up having to re-work it once I had it on the core (a difficult task, to say the least). This is the part of the process that I was least pleased with – more thought and research is needed.
The entire upper and insole is ready to be attached to the core. However, this is a bit harder than it looks. Starting with a generous helping of paste on the top and the sides of the core, we prep the core to receive the upper.
Placing the upper down onto the core, we fold down the enveloping material. At first, it looks like an ugly mass. Note that the envelope has been dampened to allow it to more easily fold and take the curves of the core.
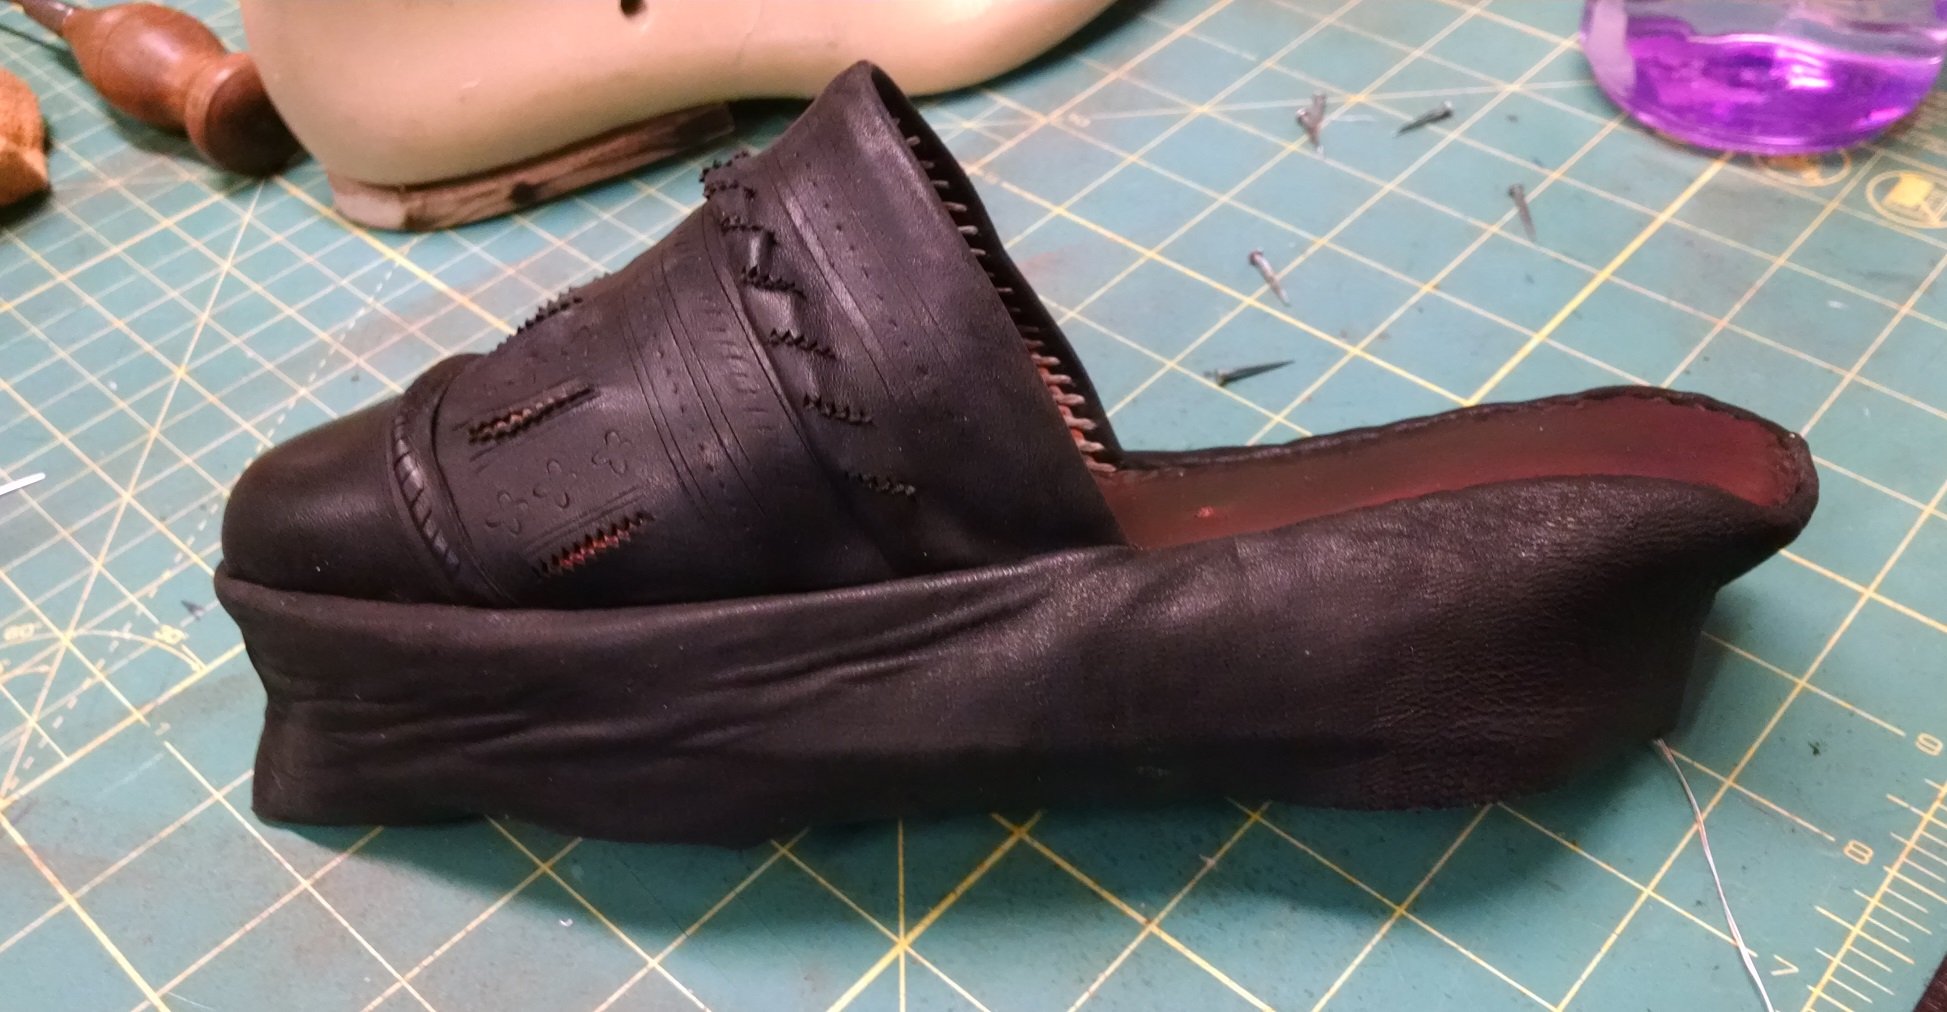
But, after massaging, and rubbing, and forcing, and cursing, and coaxing, the paste and leather begin to dry and adhere better, and the pantofle begins to take form.
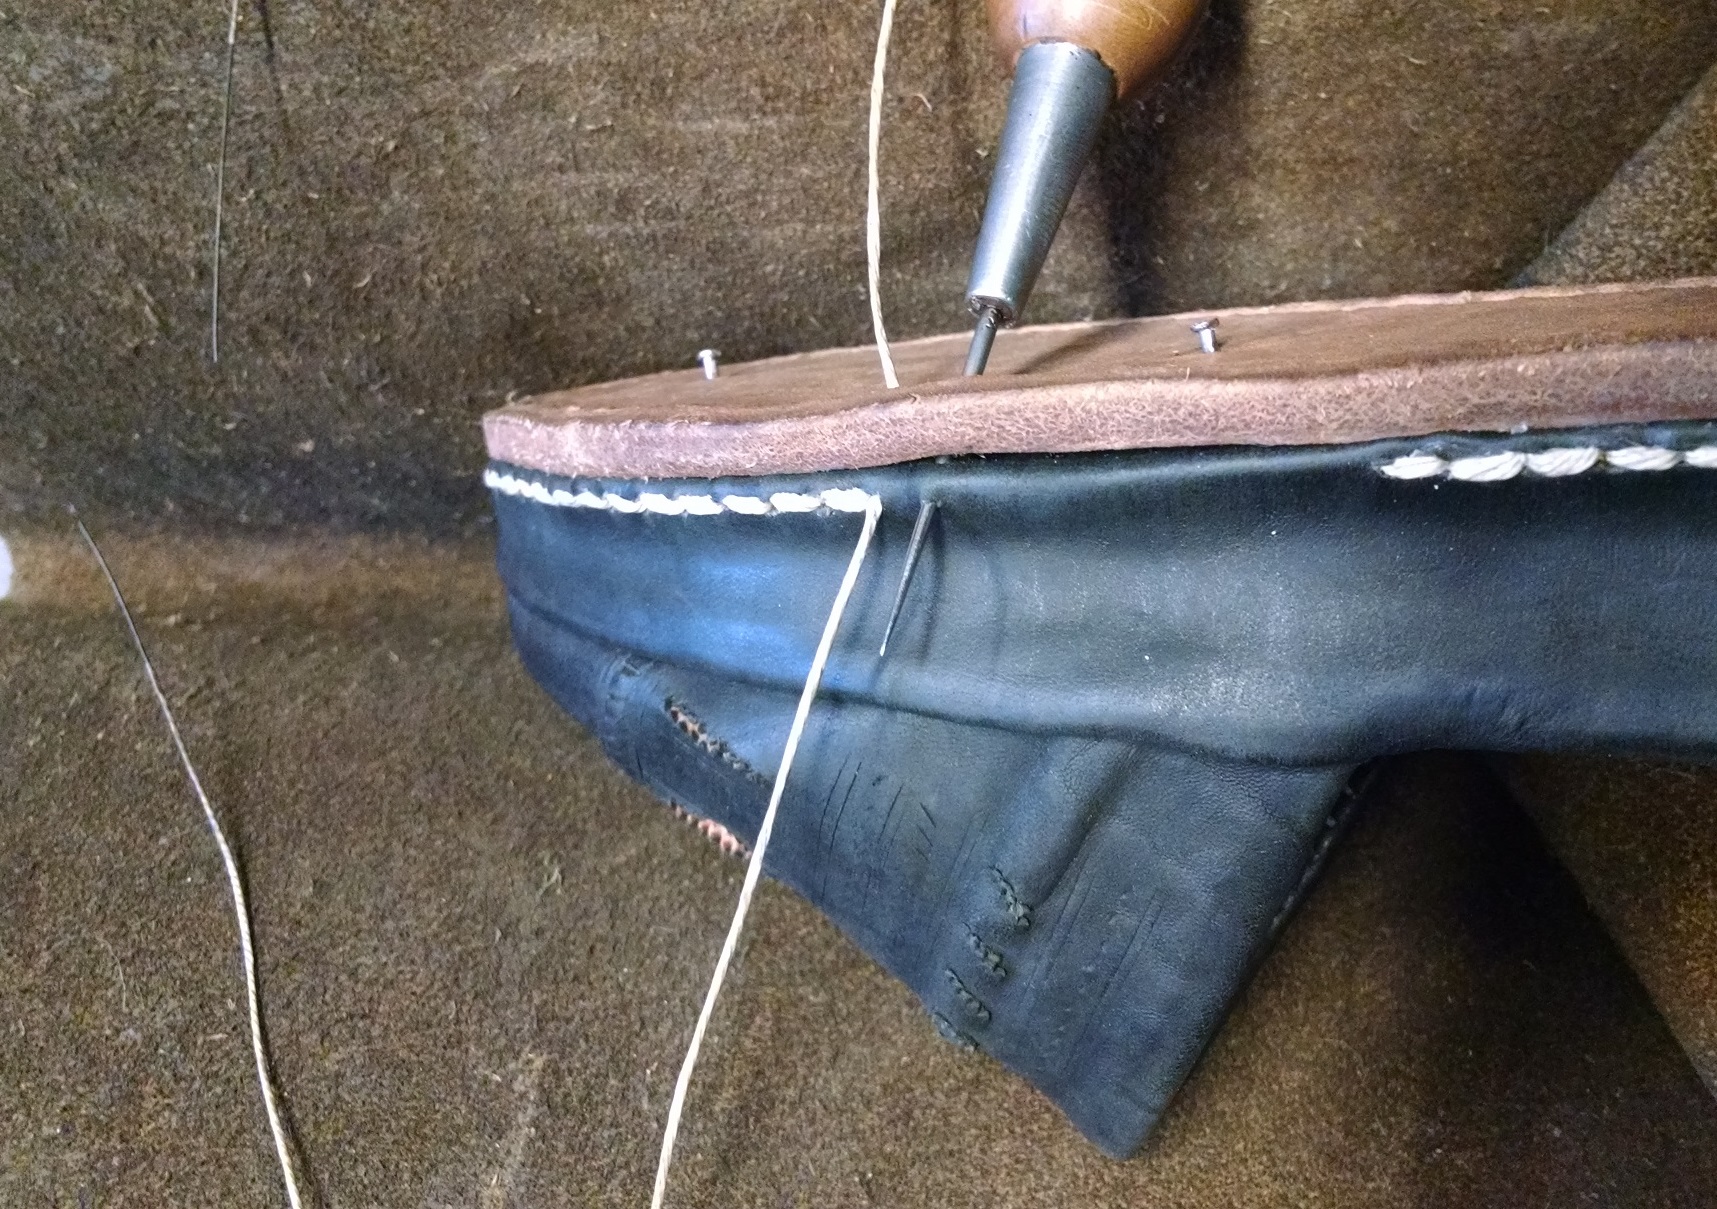
Now, we’re ready to attach the outsole, the last step of the process. After cutting the outsole to shape (although you can certainly cut it larger than needed and trim it afterwards), we cut a deep groove into the material and widen it.
Don’t forget to paste the core for best results – I do this from now on for all of my double-soled shoes, as it prevents “squeaking” as you walk. Technically, since the core doesn’t bend in a pantofle, this is not a problem, but if and when the stitching wears through, it’s nice to keep the sole on even so.

Outsoling as has been done before. However, I give you a very important lesson here. If you have removed the cord holding the ridges in place, take great care while you sew the outsole on. If you use your stirrup and hold it firmly to your knee, you will squash and flatten these ridges. Instead, you can simply hold the piece gently between your knees while you sew. This goes for tacking the upper to the lining material as well.
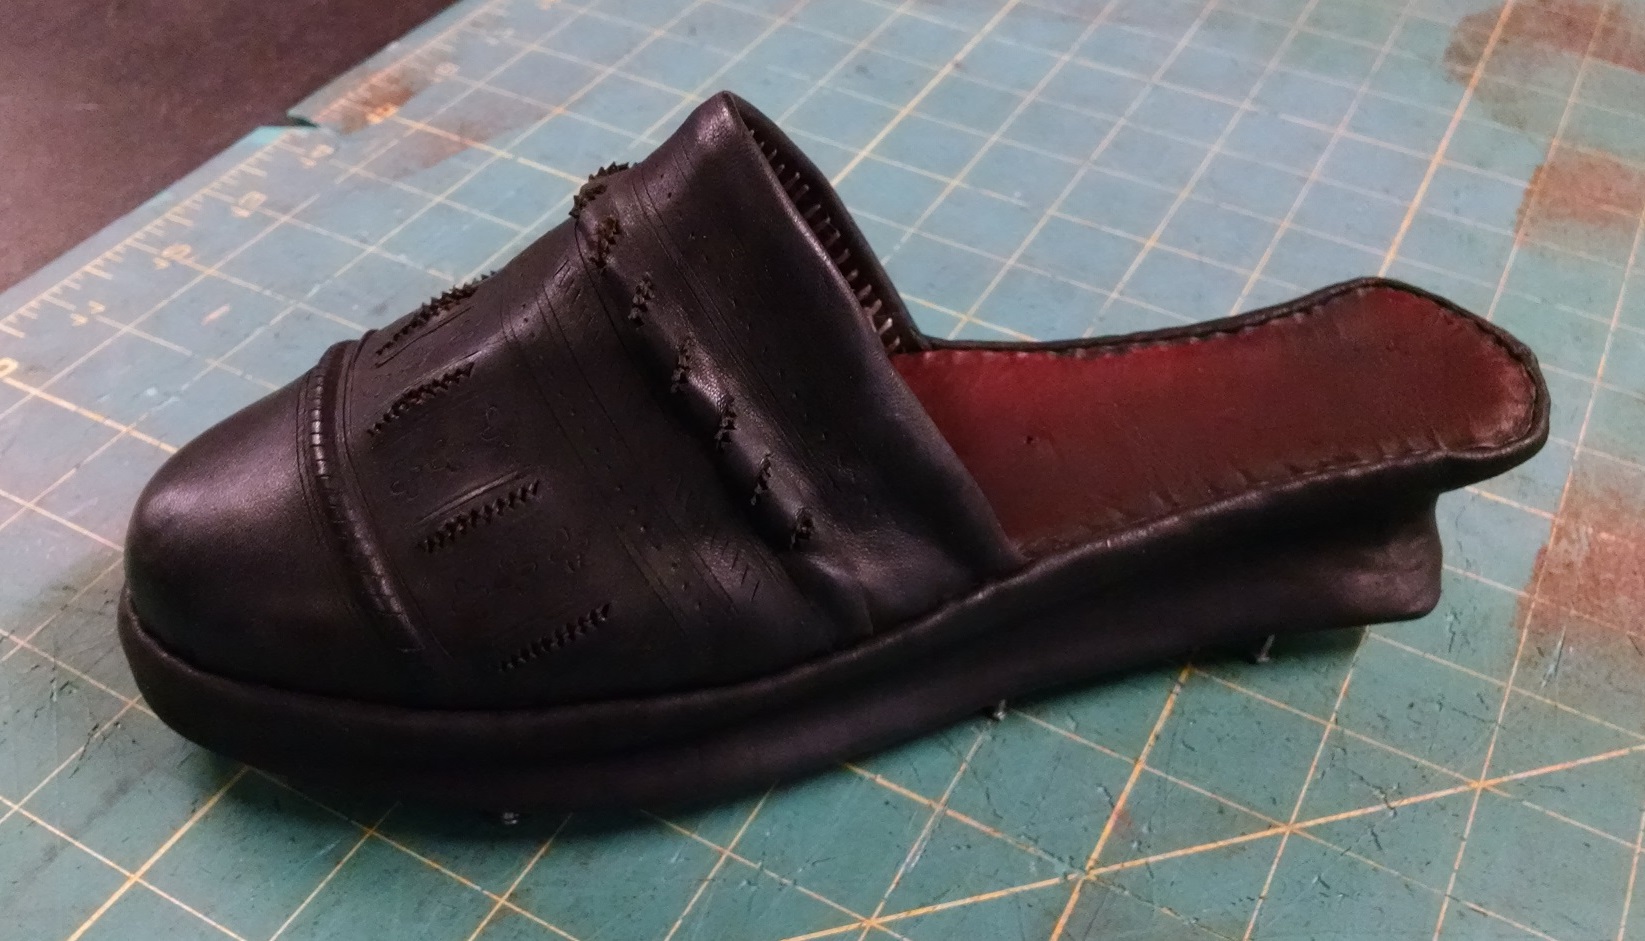
At the end of the day, you have a finished pantofle – tap the groove (carefully!) to close it and hide the stitching. Now on to the second one!
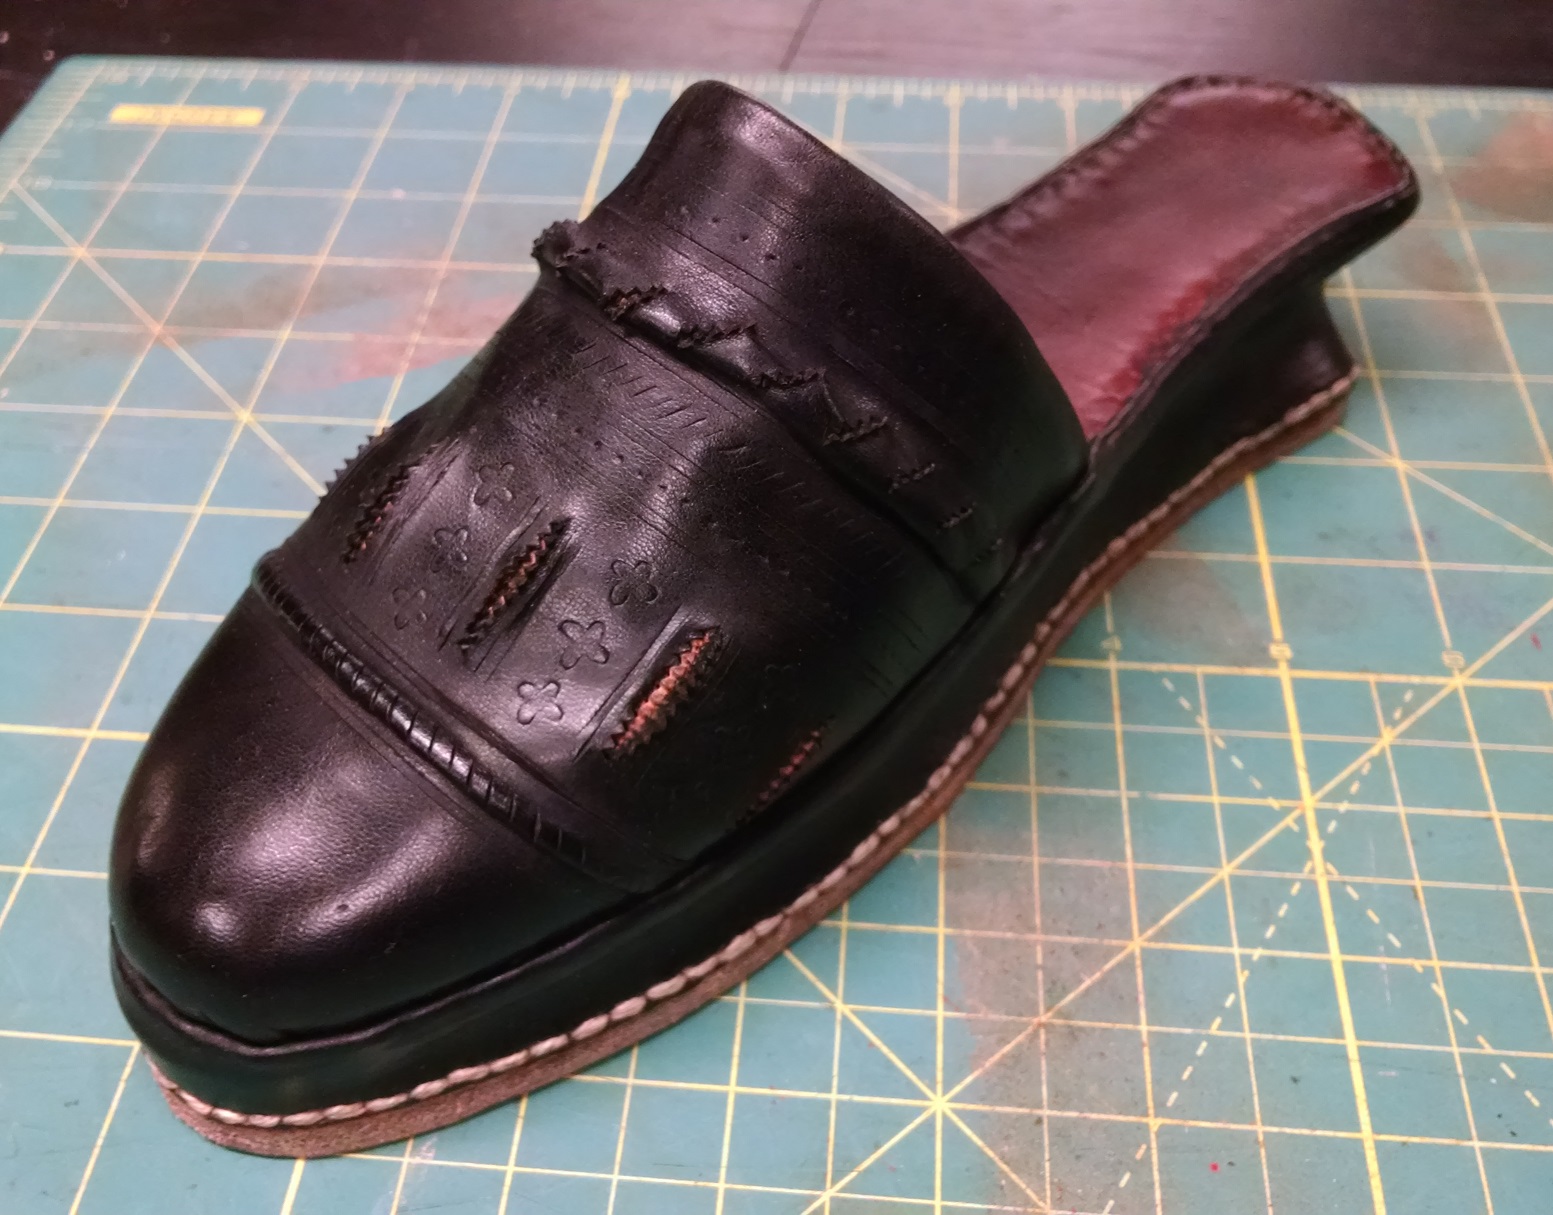
All in all, I was well pleased with this pair – I believe that I might have made the uppers a bit too large, as I inserted wedges of leather in an attempt to make the last more flat, but in doing so, it make the overall circumference of the last at that point larger than intended. With luck, they will still fit. Or, I will have to make a pair of shoes to be placed inside these pantofles (which was certainly done).
I’m so impressed ! Excellent Tutorial ! I look forward to your next Thank You
Absolutely great project and details! The result is excellent and makes my fingers itch … 🙂
Thanks very much! These were an interesting pair to make, and I’m pretty keen on how they came out.