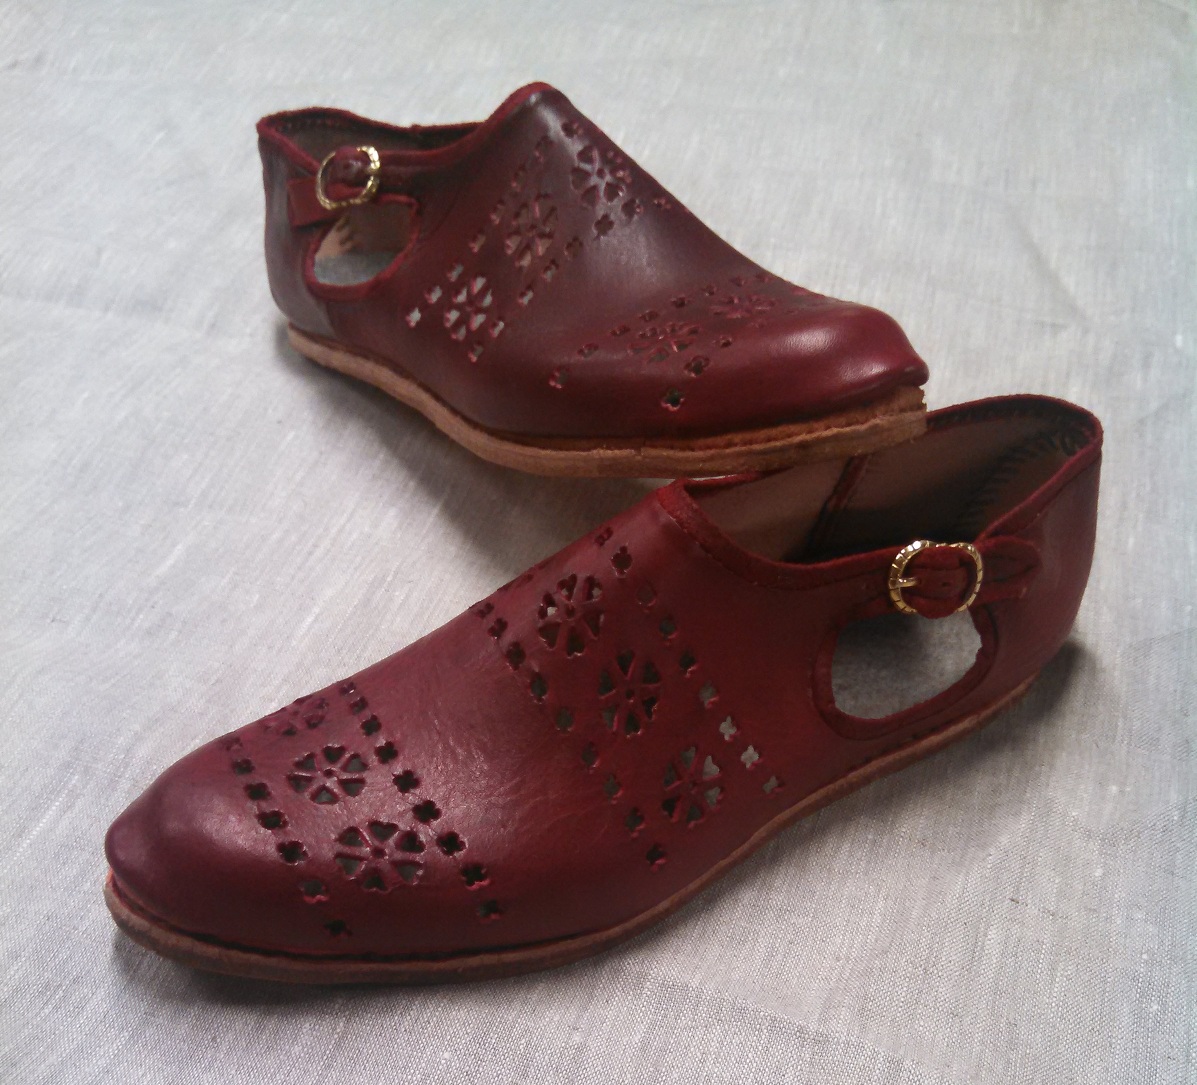
This pair is based on a 1350s extant piece documented in “Archeological Footwear” authored by Dr. Marquita Volken. The pattern comes from an unusual extant shoe which has an oval cutout on the inside of the shoe, along with a buckle strap to close the shoe around the foot. This shoe also has a binding strip all the way around the shoe including the strap, and is quite a pretty example of a medieval shoe. A few points of note – the original has the buckling on the inside of the shoe (it is easier to buckle your shoe this way while sitting down or standing up), but it unfortunately hides the pretty cutout and the buckle. As a result, the recipient asked that the buckle be placed on the lateral (outside) of the foot, rather than the medial side. Further, you will notice a rather thick sole – this was constructed as a turn-welt shoe, even though that particular style doesn’t really start to come about until the third quarter of the 15th century. I took several cues from Dr. Volken’s book in the construction of this pair, and I’m particularly pleased with the way they worked out. The decoration is inspired by several extant 14th century pieces with lines of decoration across the vamp of the shoe.
Let me share some of the techniques that I tried, starting with the binding strip. Although I’d done binding strips in the past, this was the first time that I’d done it in this manner.
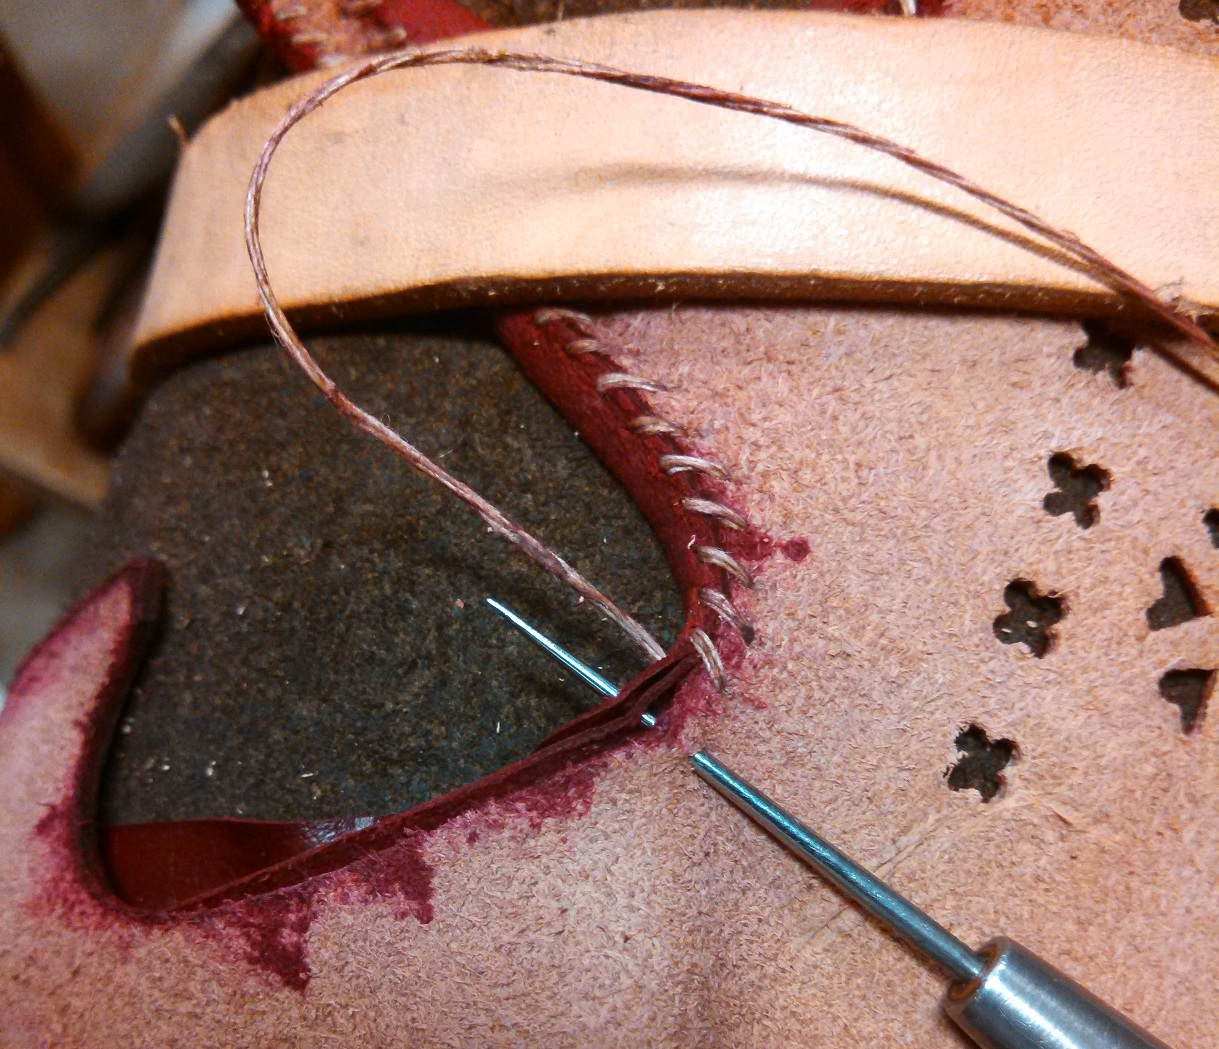
Previously, I had pierced the holes in the upper first all around the opening, and then used a needle to whip the binding strip in. This time, I made a waxed end to whip the binding strip in, and used a straight awl to whip the strip. It worked incredibly well, and I intend to whip in stiffeners and binding strips in this manner in the future. The left hand is used to arrange the work (in concert with the stirrup) and the right is used to both pierce the hole with the awl, pass the bristle tip through the hole, and then pull the stitch tight. The picture below shows the piercing step. Notice how the binding strip is folded up and that the awl does not pierce all the way through the upper – this is essential to try and minimize the amount of stitching that is seen. Note that the upper leather is damp and mellow, but not sopping wet. The binding strip is also mellow.
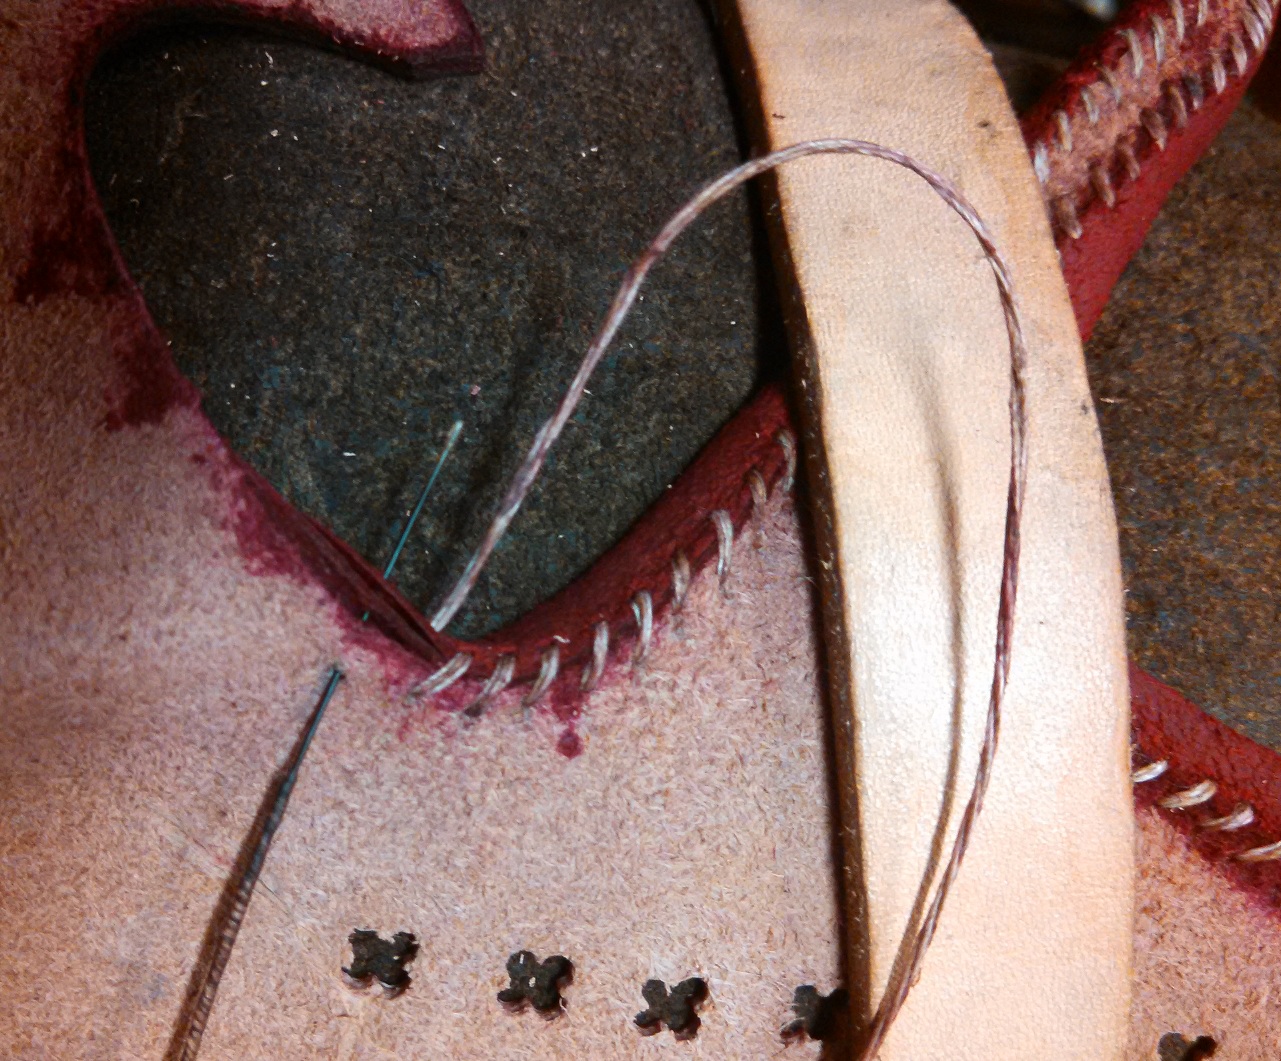
Here, you see the bristle tip being passed through the hole that was just made. The bristle is gently but firmly tugged on to get the linen through the holes, and then pulled tight, but not so tight so as to tear out the leather of the upper. Getting a happy medium takes a bit of practice.
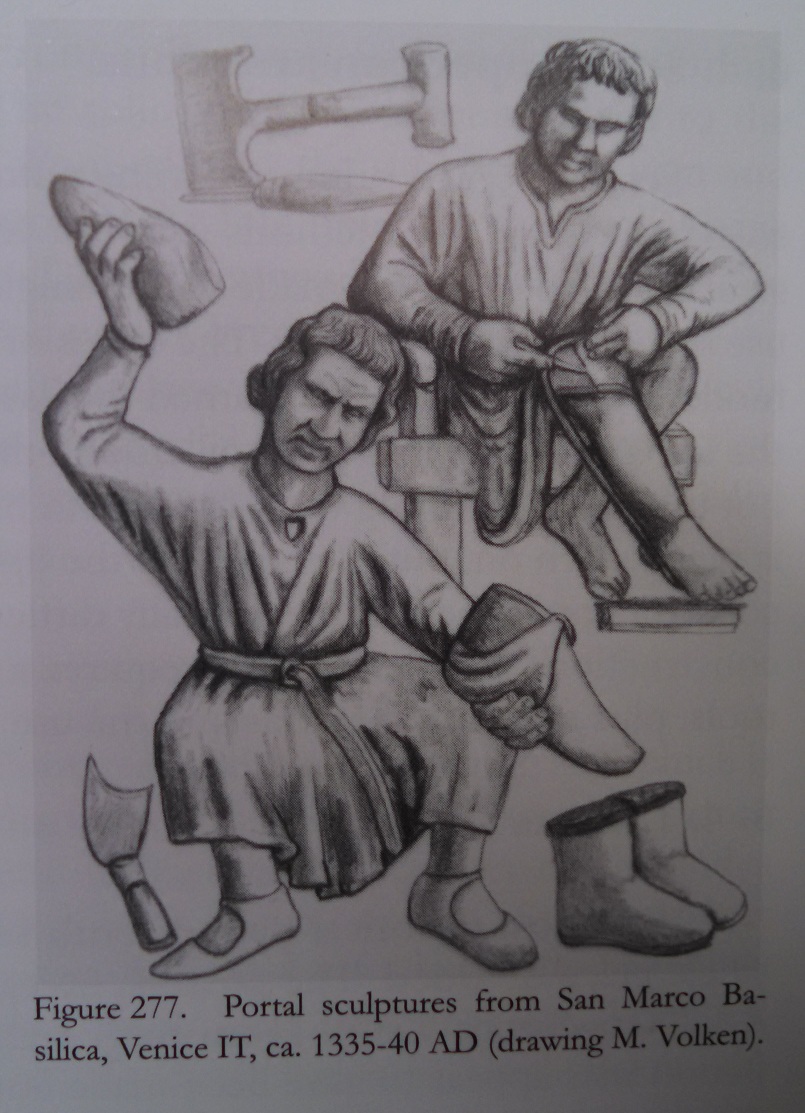
Normally, once the upper is closed, I would last it, tugging it tight to the last and tacking the upper around the last to make the shoe take the last’s shape. However, I took a significant departure in this case. Based on recommendations from Archeological Footwear and Dr. Volken’s paper “Examination of Medieval Soles for Technological Data” (Interne Rapporten No. 19 from the Rijksdienst voor het Oudheidkundig Bodemonderzoek), it indicates that there were only two or three lasting tacks in the sole of the shoe, those that held the insole on – that is, medieval shoes did not show evidence of of lasting in the manner that is modernly done with an array of tens of tacks holding the shoe onto the last. As such, I only tacked the insole down to the last, centered the upper over the last, and started sewing about an inch or two away from the toe on the lateral side of the shoe. Then, I sewed towards the toe, tugging the upper along as I went. This had the effect of giving the upper a general fit to the shape of the last. Because the upper was being tugged firmly (by hand, not with a lasting pliers), once the shoe was fully sewn, there was a little bit of “play” in between the upper and the last. So, when both shoes were finished and turned, I was able to jam the last back into the shoe by hitting it with a rubber mallet. There is a portal sculpture from the San Marco Basilica in Venice dated about 1335 which shows them doing exactly this with another last (Fig 277, Archeological Footwear).
For many years, I’ve struggled with the fact that the shoe loses a size or so when it is turned. In order to get the shoe to take the shape of the last, I normally use a last a size smaller than what I used to sew the shoe together. In this case, I allowed a little bit of play in sewing the upper to the sole, and then was able to get the last back into the upper, giving it the lovely shape that you see in the first picture. It really looks more like a shoe than a sock, far better than I’d ever gotten a turn shoe to look before. It also eliminates the need for trying to “anticipate” the size difference when turning – the same last is used to sew the shoe together as is to shape it after it has been turned. I find this to make a great deal more sense yet also arrive at a much better looking piece!
I know this is an old post, but I have a question. Did you still wet the upper before putting it on the last, even though you didn’t stretch it, or did you leave it dry?
Absolutely, I wet the upper, but it is not sopping wet. It’s damp so that it takes to the form somewhat, but not so much that it’s a floppy mess.