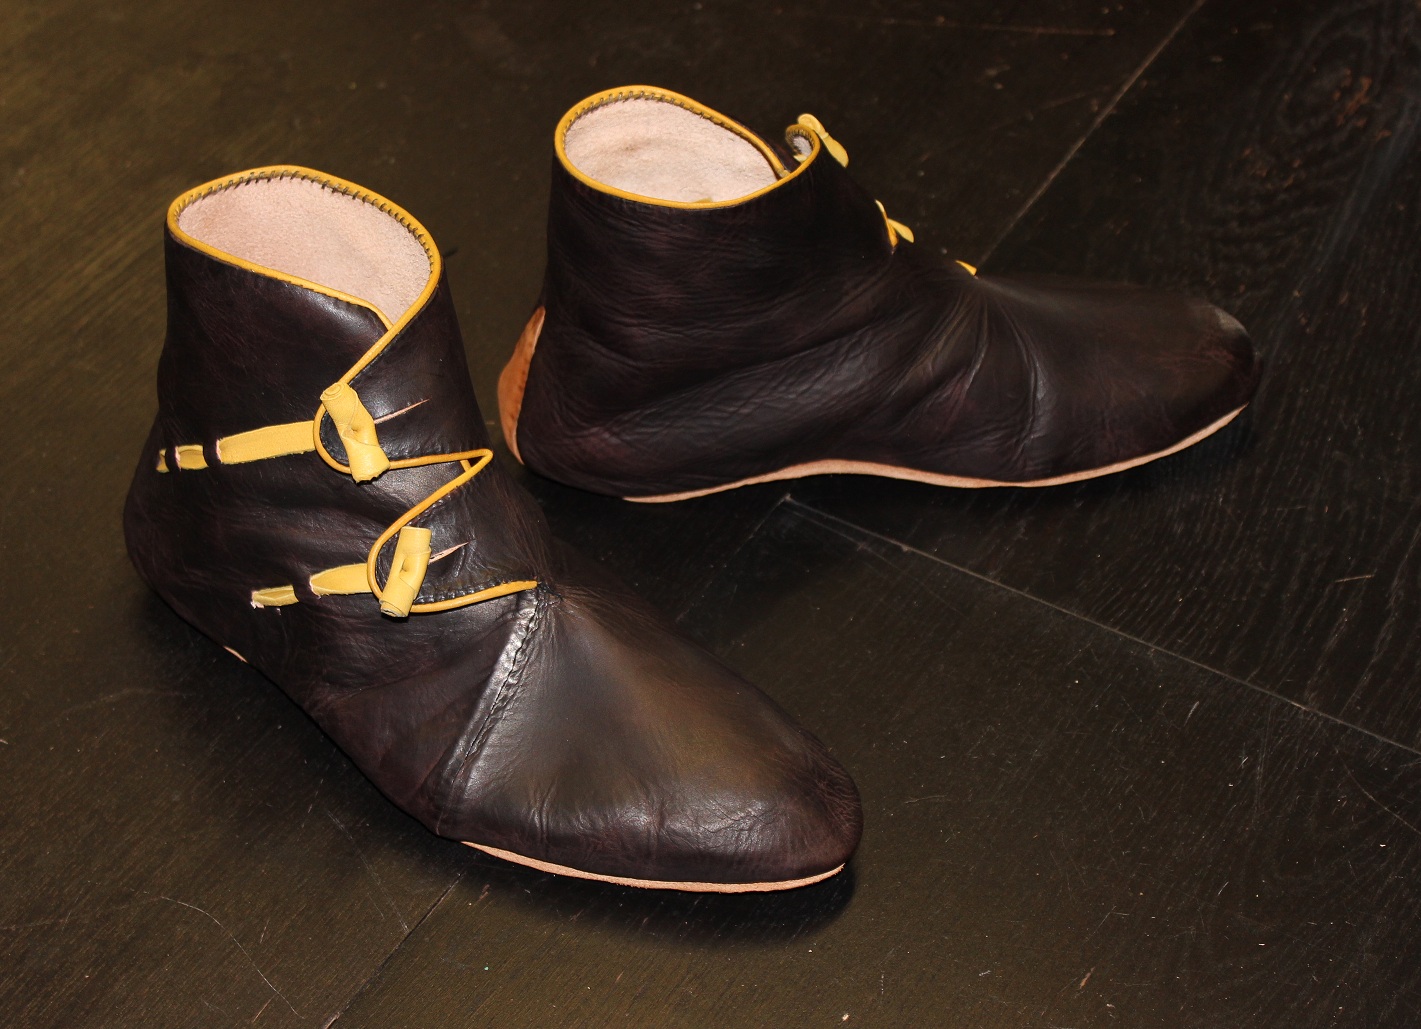
I promised a pair of shoes to Rodney W., in a nice rich cordovan leather. At the last minute, I also decided to bind the edges. Typical overlap construction, two toggle, with the ubiquitous “A” where the sole continues upwards at the heel. I tried some new construction techniques on these shoes, and I was surprised with how effective they were.
From “Leather and Leatherworking in Anglo-Scandinavian and Medieval York,” we are told that Ankle boots of this time were primarily made in one of two ways.
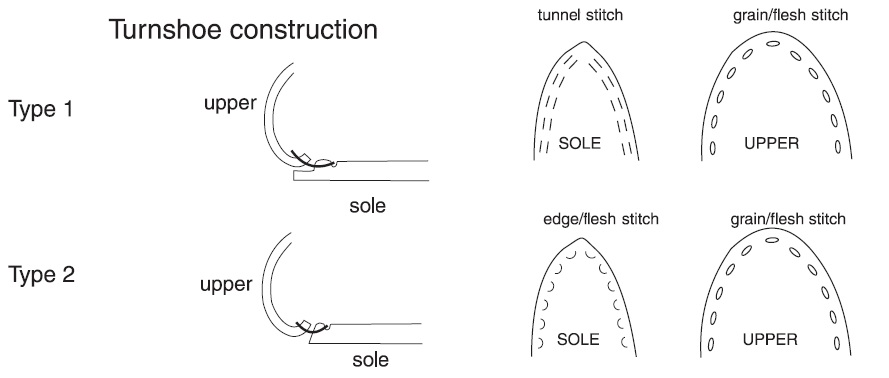
As shown in the picture below (p3269), Type 1 construction and Type 2 construction. Type 1 construction involves the use of a “tunnel” stitch in the sole whereas Type 2 construction exits out of the side of the leather. Generally, Type 1 was more common in earlier periods whereas Type 2 became the standard method of construction as time went on.
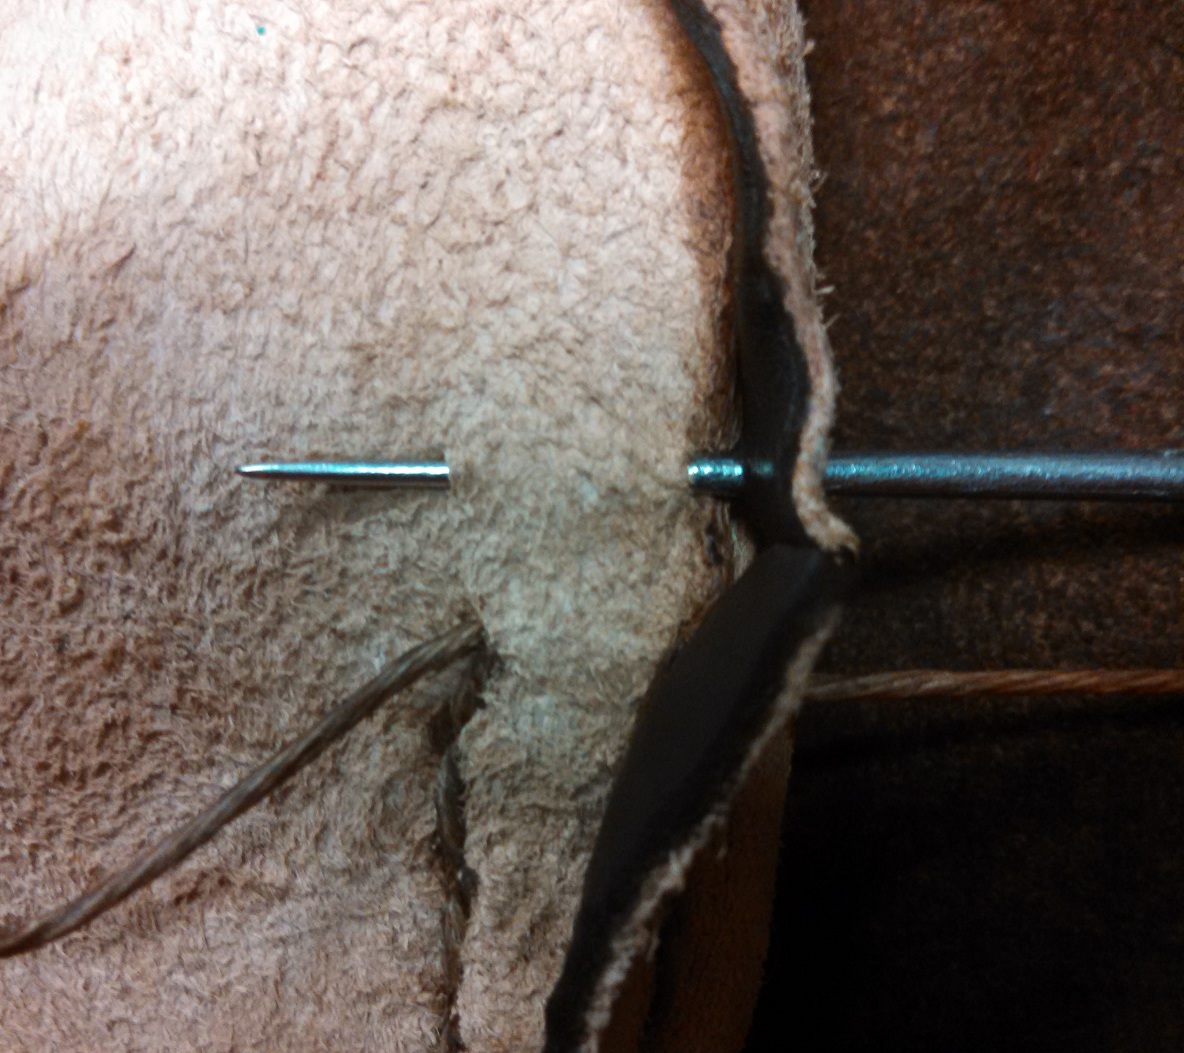
Somewhat on a lark, I decided to attempt this with Type 1 construction. After the upper is closed, wet, and placed on the last, stitching is done from the outside of the shoe with a straight awl. Piercing first through the upper and then creating a tunnel stitch with the awl, we can achieve this construction as shown below. It was surprising how effective the technique was.
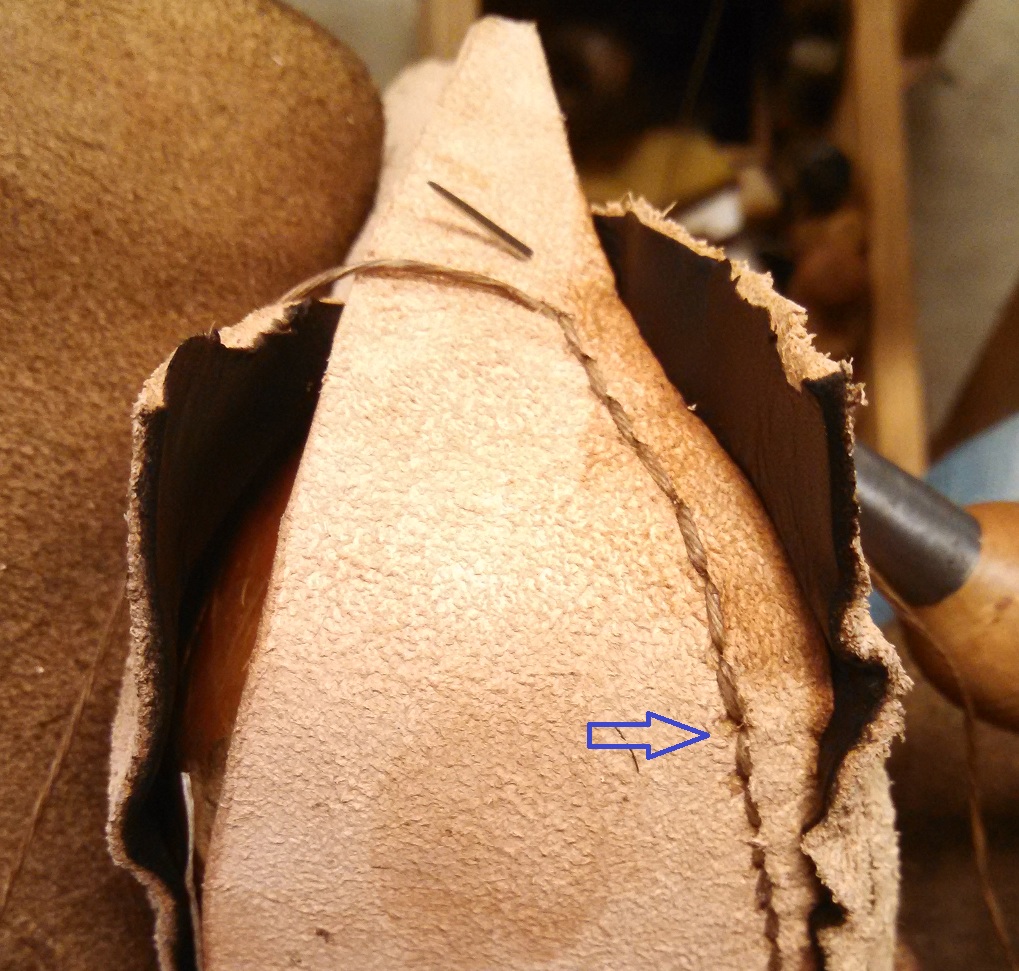
Note that I pegged the sole on first, and the sole includes the point in the back which will eventually be turned upwards and sewn to the upper. Stitching started at the toe and continued to the point where the sole starts to turn into the heel. At that point, the construction changes from Type 1 to Type 2, just for the “A” portion of the heel. You can see this in the image below, where the blue arrow points to the last stitch made with Type 1 stitching. Note that you do not slit the upper to form the V until you’ve sewn at least half of the shoe! Otherwise, your cut will not be in the right location. I simply made a vertical cut *shorter* than the length of the heel, and as I stitched, I cut a little more and more until it was just perfect.
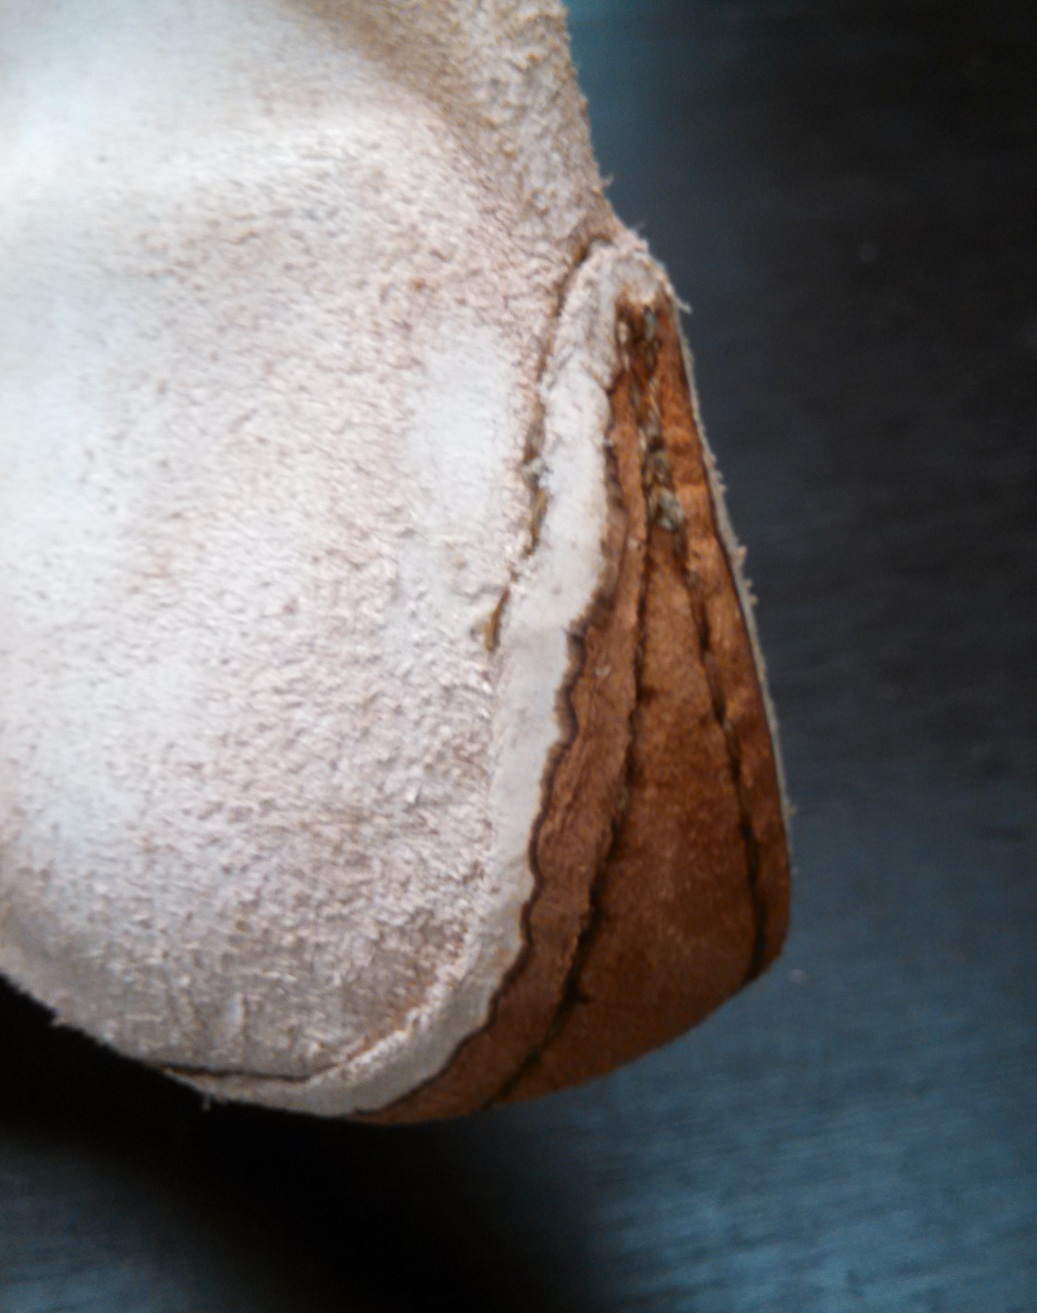
One might think this a little uncomfortable, but one would be forgetting that the extra leather is trimmed off, wet, and then tapped flat with the hammer or with a folder. This results in a fairly flat heel seam, as you can see.
The end result is a comfortable shoe without a very noticeable sole seam (due to the Type 1 construction), complete with a built-in heel stiffener. One can’t help but wonder why this style of shoe ever went out of fashion, but fashion itself is a fickle master. =) A couple of concerns with the actual result – you’ll notice more wrinkles than normal in the finished work this time around. This is due to the style of last that was used. A modern last without a “shover” makes it very difficult to get the lasts out of these shoes. This shover is essentially a piece of wood or leather that takes the place of where the top of the foot begins to increase in height. In the future, I may slice off the top of the last and tie it on for construction, but when the time comes to remove the last, the shover is untied, removed, and then the last can be easily slipped out.
Wow, this is kind of freaky. I just got my bundle of hog’s bristles that I ordered from your shop in the mail today, then I went and checked your site and saw this. These are the same style shoes I’ll be making using the bristles I just got! They’ll be my first pair of shoes, made for my wife.
I was always under the impression that fro the type 2 construction the awl blade went into the sole first and emerged through the upper leather for the lasting seam, but you do it the opposite way. Any advantages/disadvantages to doing it either way?
Great blog, by the way!
Thanks for the comments, and clearly, it’s meant to be! Let me know if you have any issues or questions – interestingly, on this one, getting the pattern down took some fine tuning =)
So, the direction of the blade is somewhat of an open question, although many of the images we have seem to show them piercing from the outside of the shoe. When using a straight awl, the reason is simple – you don’t get nearly as much control of the blade when going from the sole first. This is because when you have the upper on your last, your awl haft will keep hitting the sole and prevent you from actually making the hole very easily. Not sure I’m explaining that properly, but once you get your closed upper on the last or sewing form, perhaps it will become clearer. It will be very tricky to pierce your holes when there is a sole and a last in the way. However, if you’re not using a last, then I suppose you could do it either way. I can post a photo if it would be helpful.
Now that you’ve explained it, it seems obvious. I will be using lasts for these shoes so getting the proper angle with the awl would be difficult coming in from the sole side. Thanks!
I’m glad I’m not the only one that had trouble with the pattern. I struggled with setting it up on the last for a while before I got the flaps and the closing to line up how I liked them. I’m not sure I could have done it without the last for a reference.
How did you end up securing the toggles to the shoes? Stepping through time shows them whip stitched in, I think.
Great, good to hear. I actually didn’t attach them – I cut very small slits and just wove the toggles in and out. This allows them to be adjustable as well as stay in place from tension. In some instances, the tip of the tail of the toggle is slit and passed through itself to make a “knot.” So, if it does get tugged on, it doesn’t completely come out.