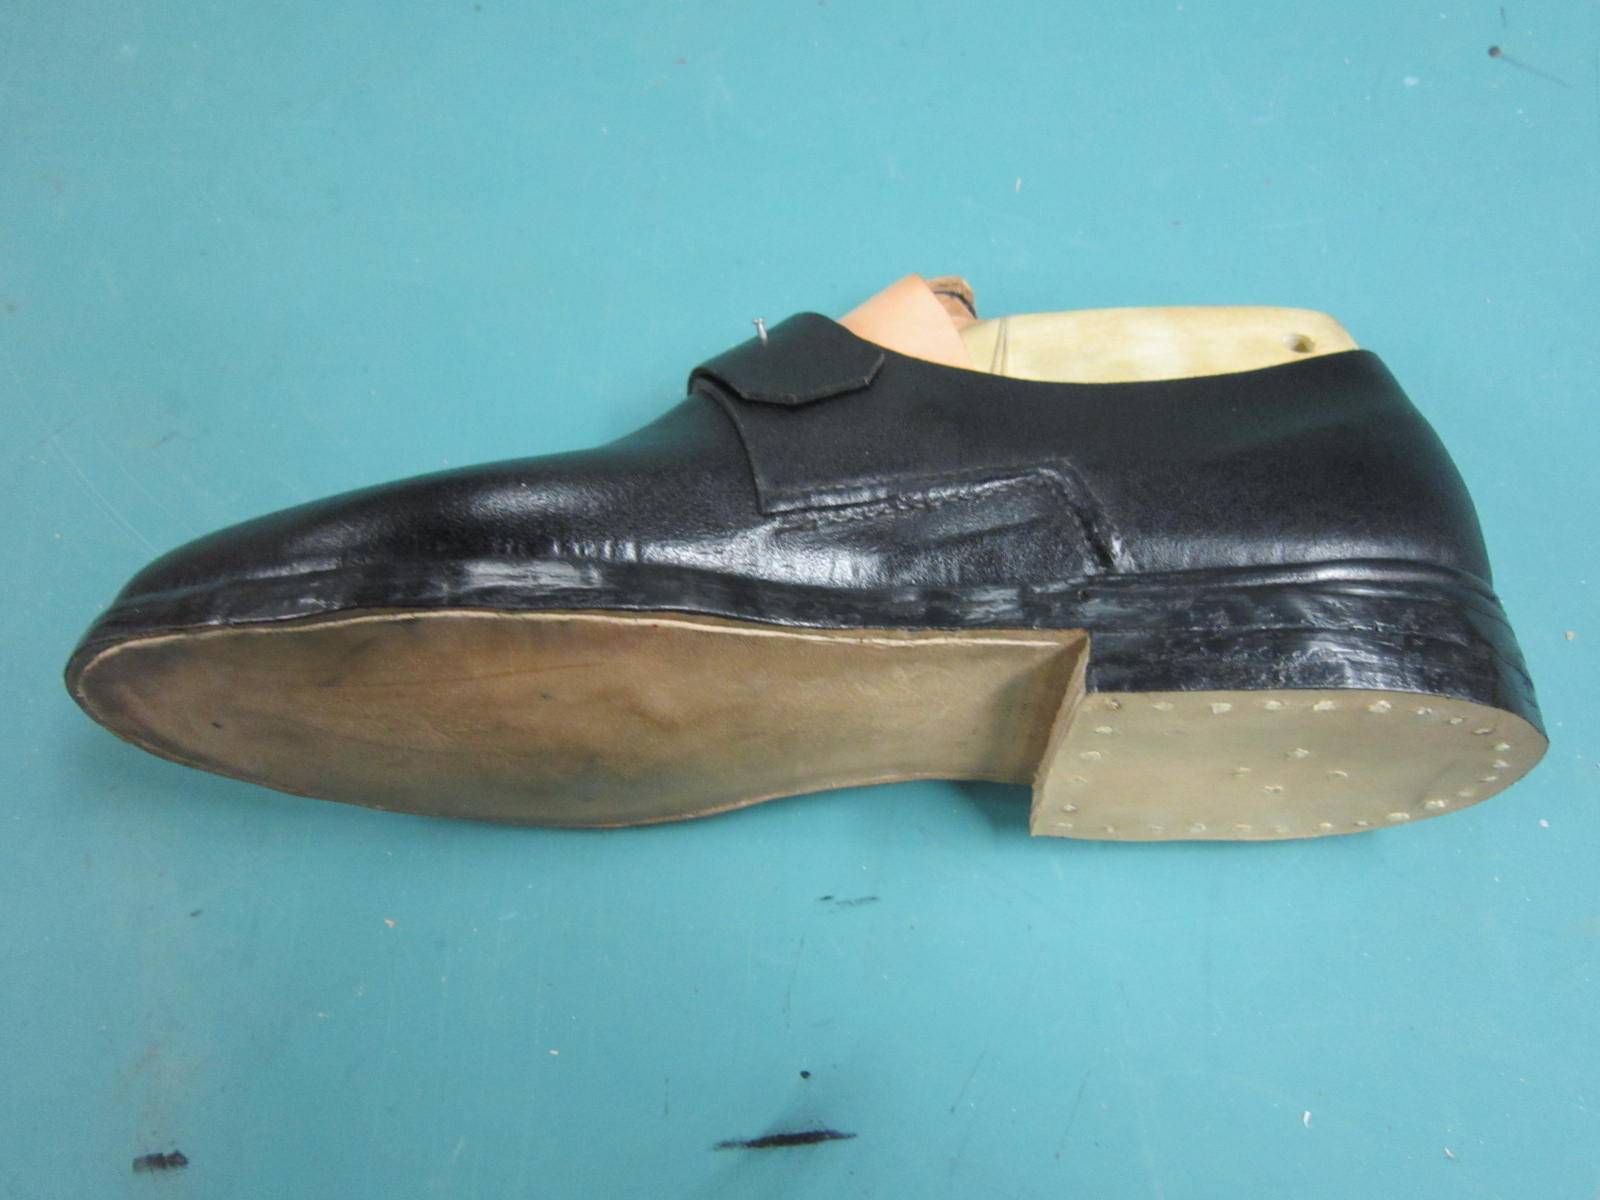
In preparation for an amazing trip (of which you will hear more about soon), I worked up a new pair of 18th century shoes. Similar to the ones I worked up a while back, these ones were actually for me! The basic pattern was similar, but I must note that as it had been over two years since I worked on that past pair, I made some rather newbie-type mistakes. I must also preface it by saying that I visited several museums just weeks after finishing this pair, and as is always the case, one discovers so many things that were done incorrectly. Refer to the original source material in all things! In any event, they look decent enough, though I can’t wait to get my hands on a couple of weeks to make another pair for myself, an even better pair.

One thing about this piece is that I attempted it in a manner consistent with what is described in Garsault’s 1767 work, the Art of the Shoemaker, translated and annotated by the master cordwainer Al Saguto at Williamsburg (available here).
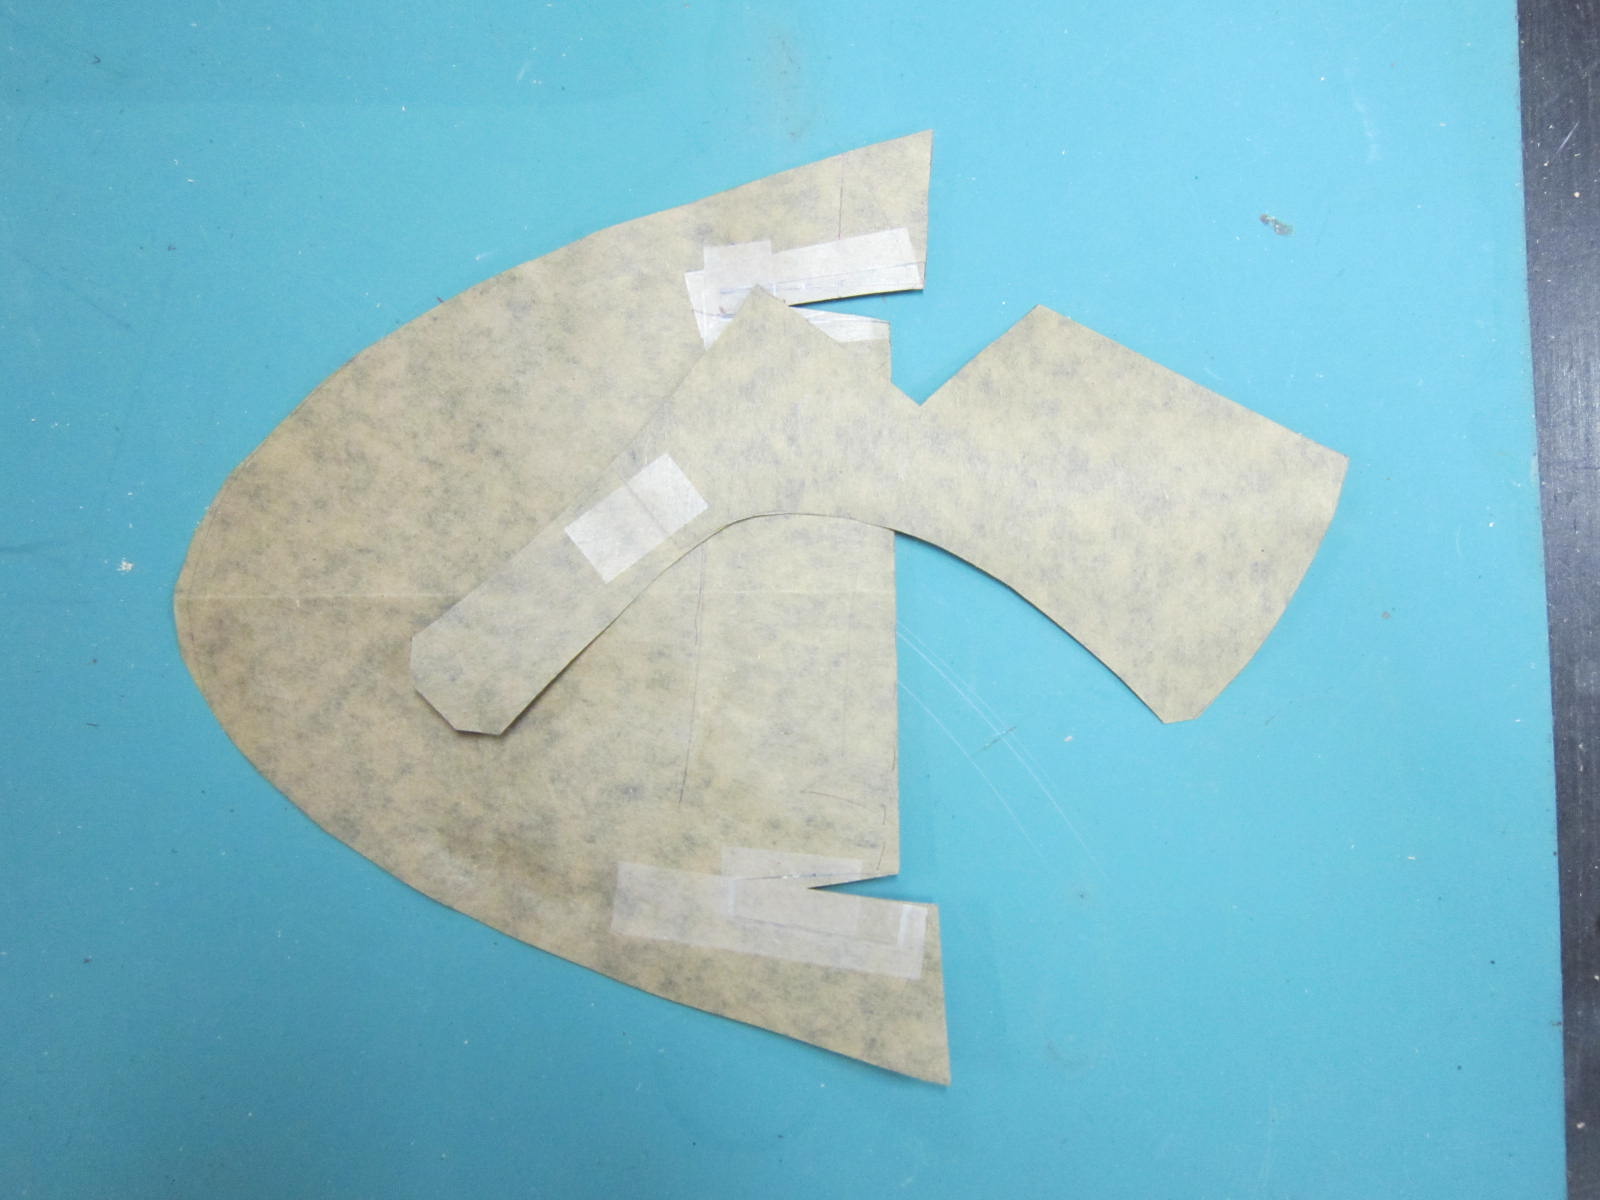
Starting with the pattern, I modified it slightly to more closely match the pattern from Garsault. Although many Dutch shoes have a round curve forming the quarters to the vamp, many of the French and English examples (not to mention Swedish) have a sharp dog-leg seam instead. I opted to go with this design, as the closing is more challenging, especially at the corner (more on that later). Additionally, I also decided to place the stitching on the exterior of the shoe, common in the time period. Black waxed calf (the good stuff!), was the upper material, and sturdy cattle hide was used both for welts, insoles, outsoles, and heel lifts.
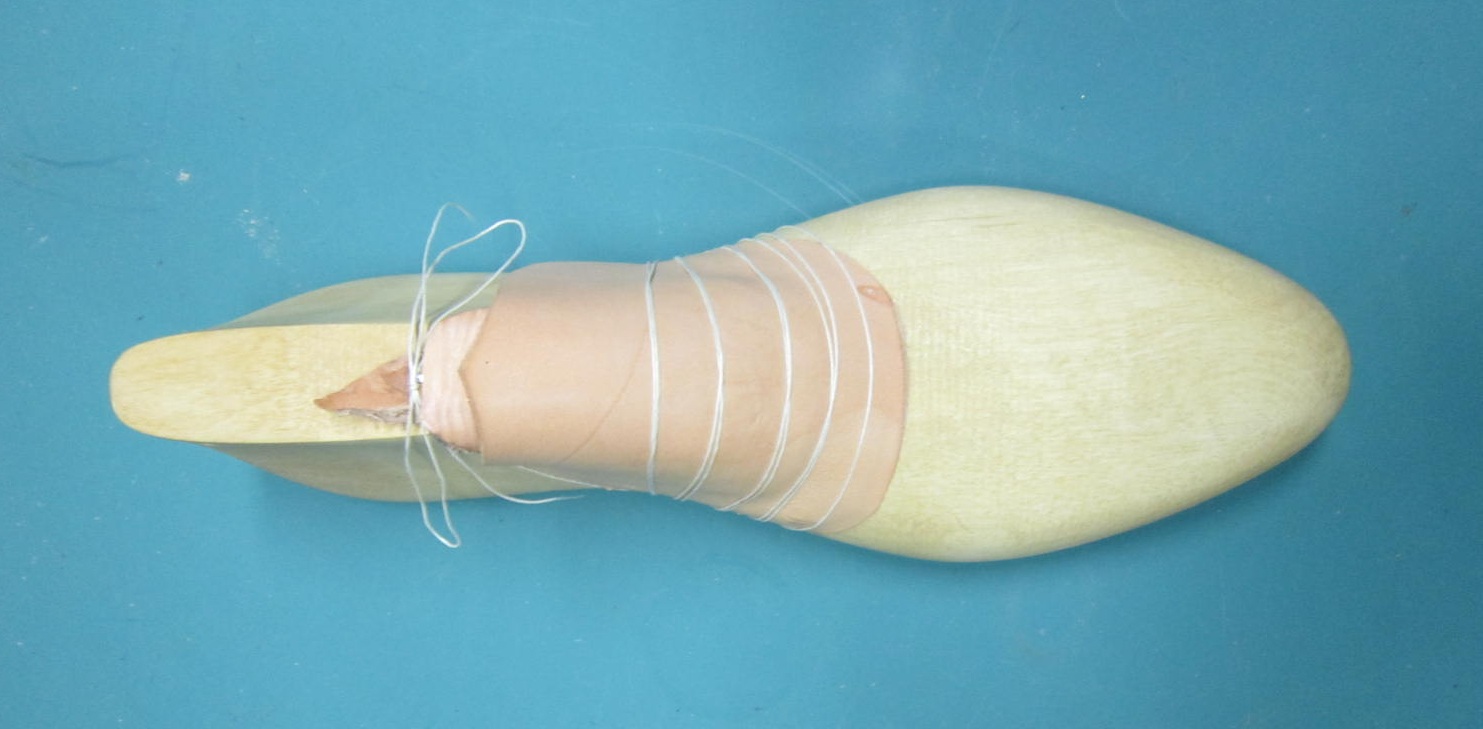
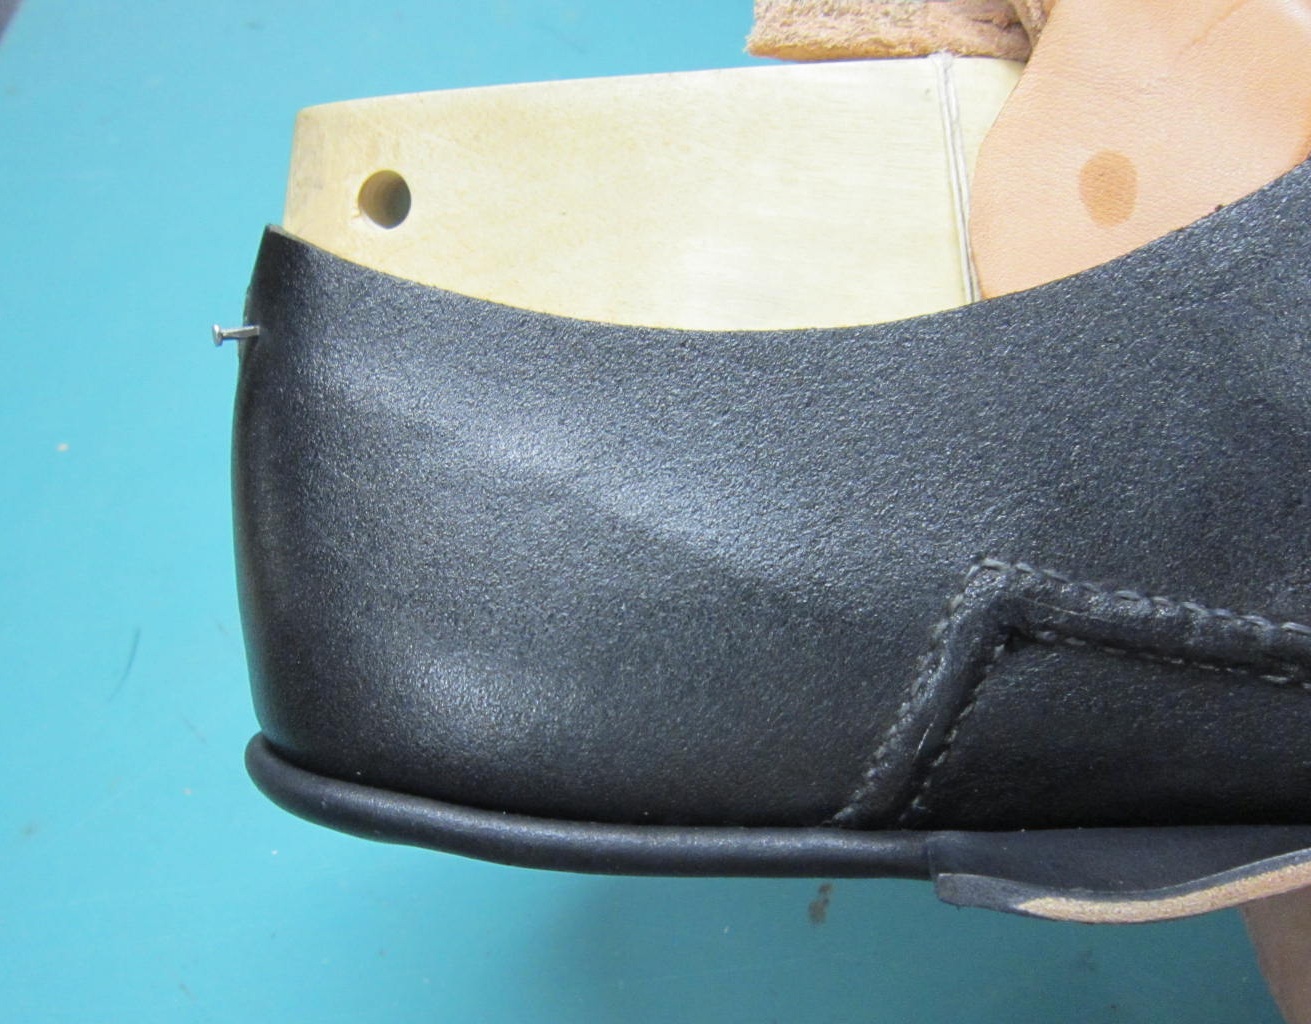
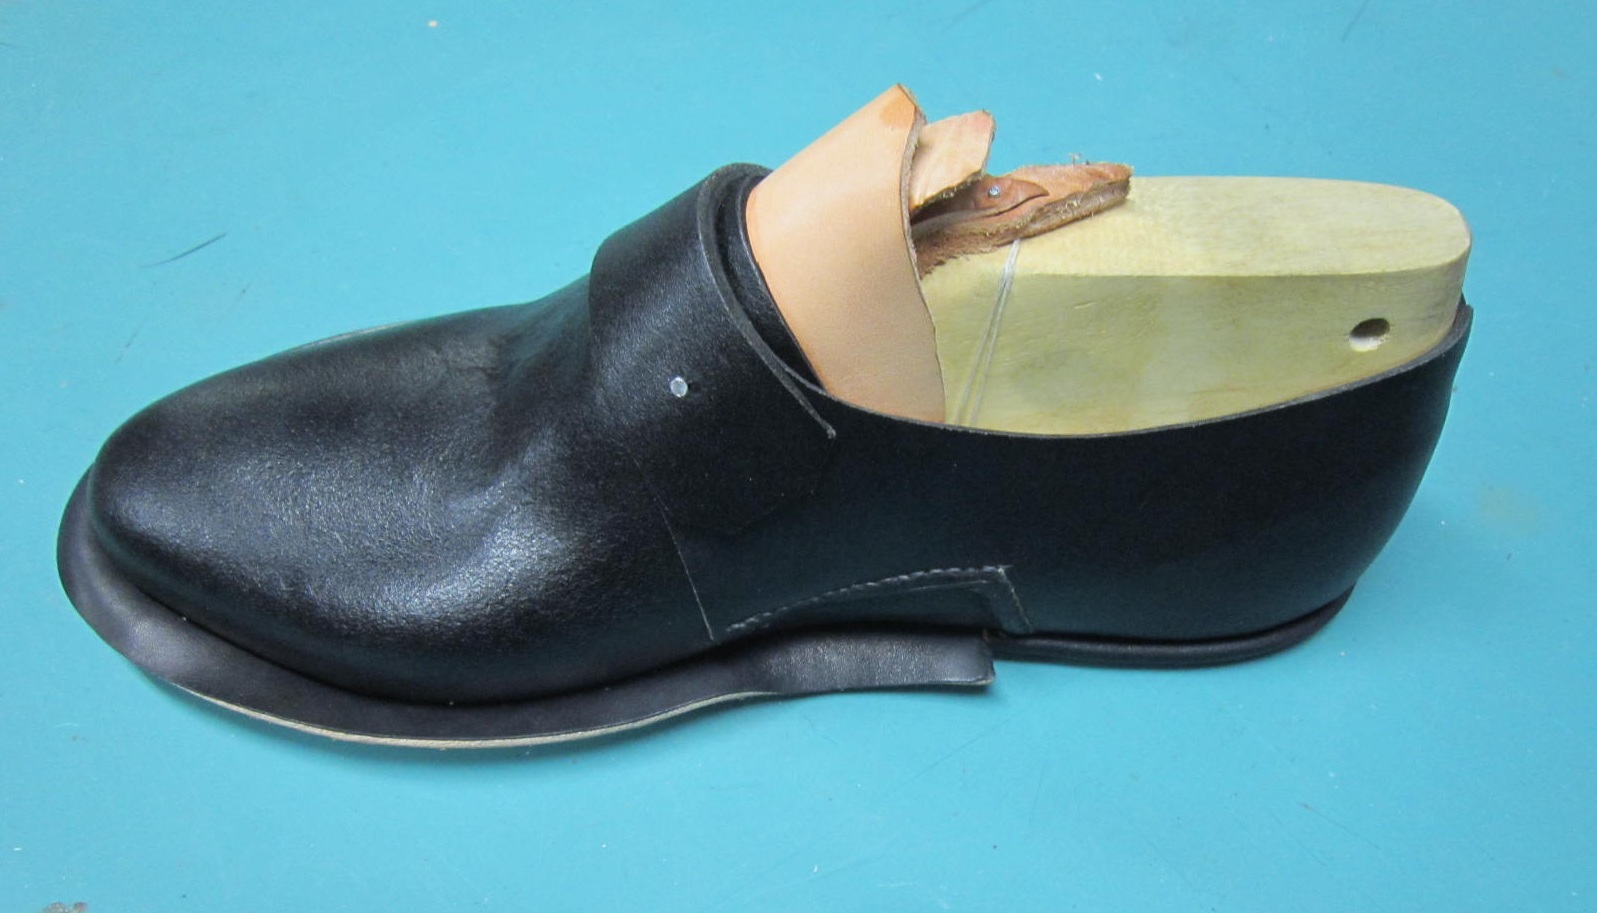
The critical instrument of any pair of shoes is the last. In this case, the last is a straight last, and a replica of an 18th century last which I was so fortunate to get my hands on. You’ll notice here that the shover is tied on in the way described by Garsault.
I shan’t give too much detail on the closing, as that has been covered before elsewhere. However, it must be noted that typical stitch pitch for closing (based on the extant pieces that I viewed in the Northampton Museum and Art Gallery and the Victoria and Albert Museum) was 3/32″ to 1/8″, with quite fine stitching cord. I would estimate 3-4 strands of 60/1 would do it. Unfortunately, I used a pitch of about 5/32″ and slightly thicker cord, again, due to my lack of practice with these types of shoes. I only mention this so that you don’t make the same mistakes, so forgive the constant self-persecution!
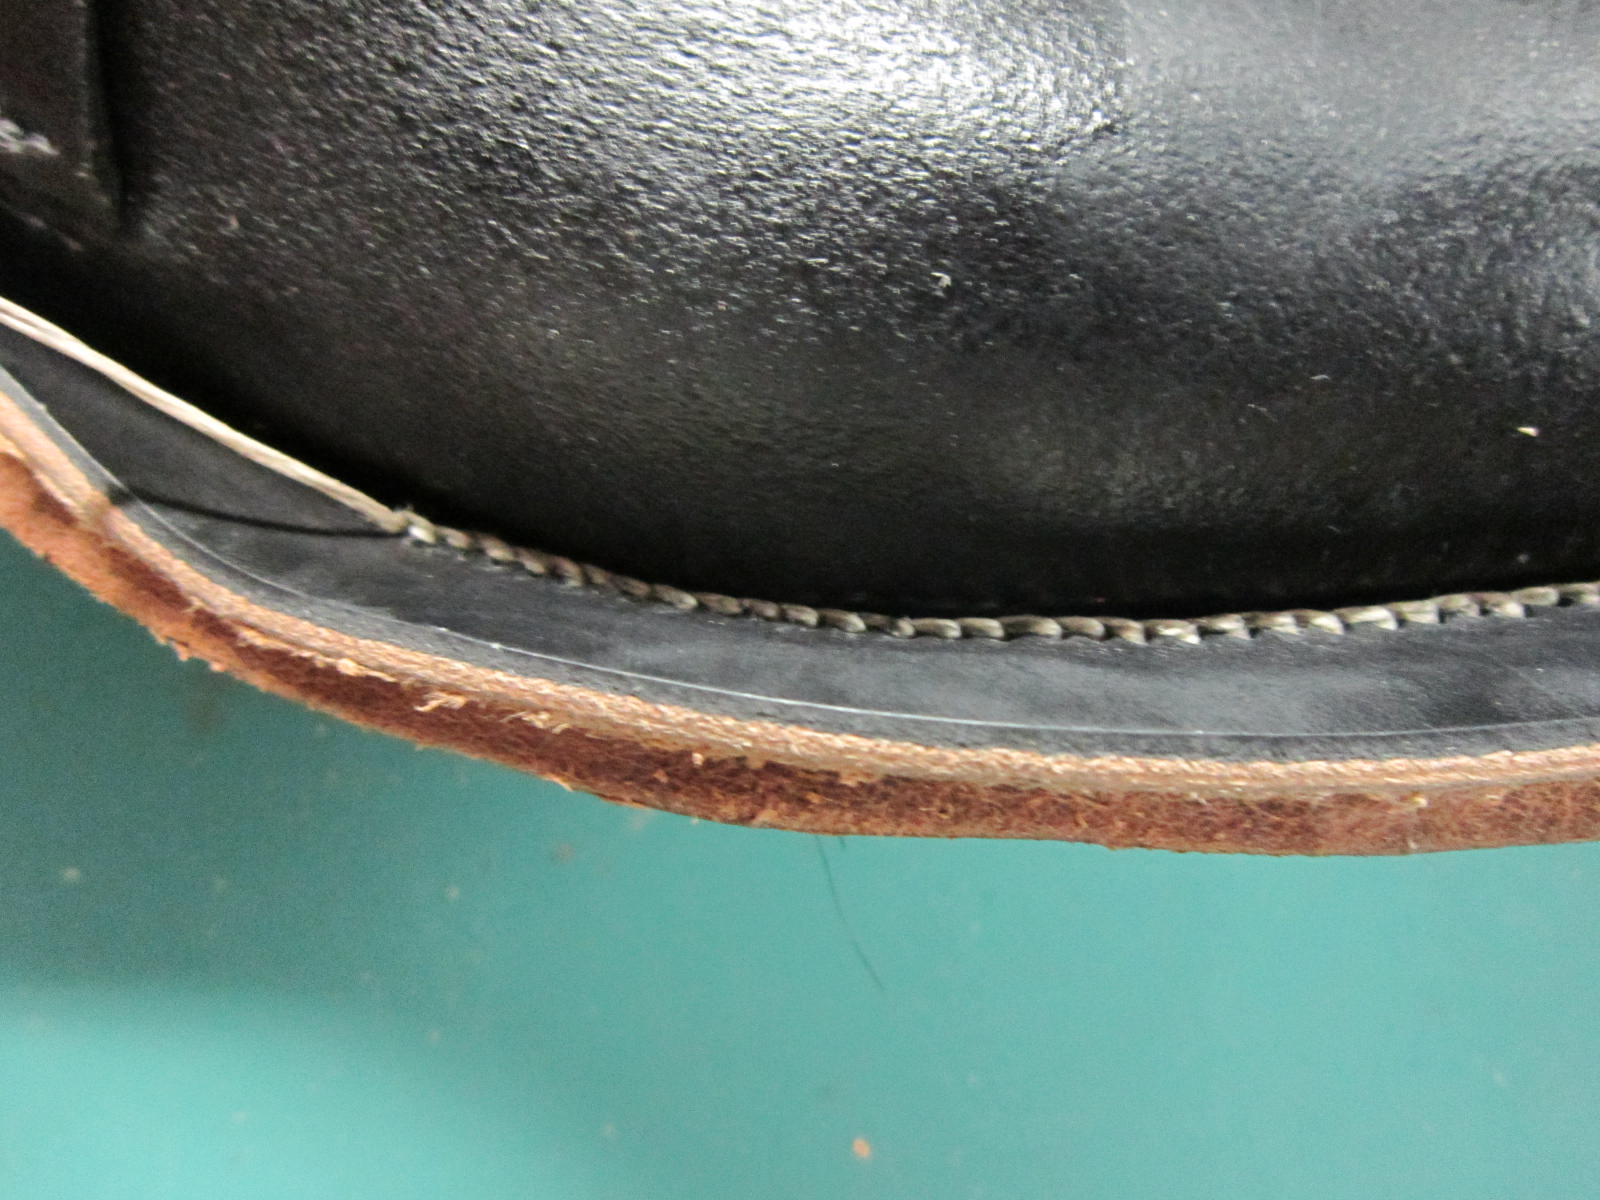
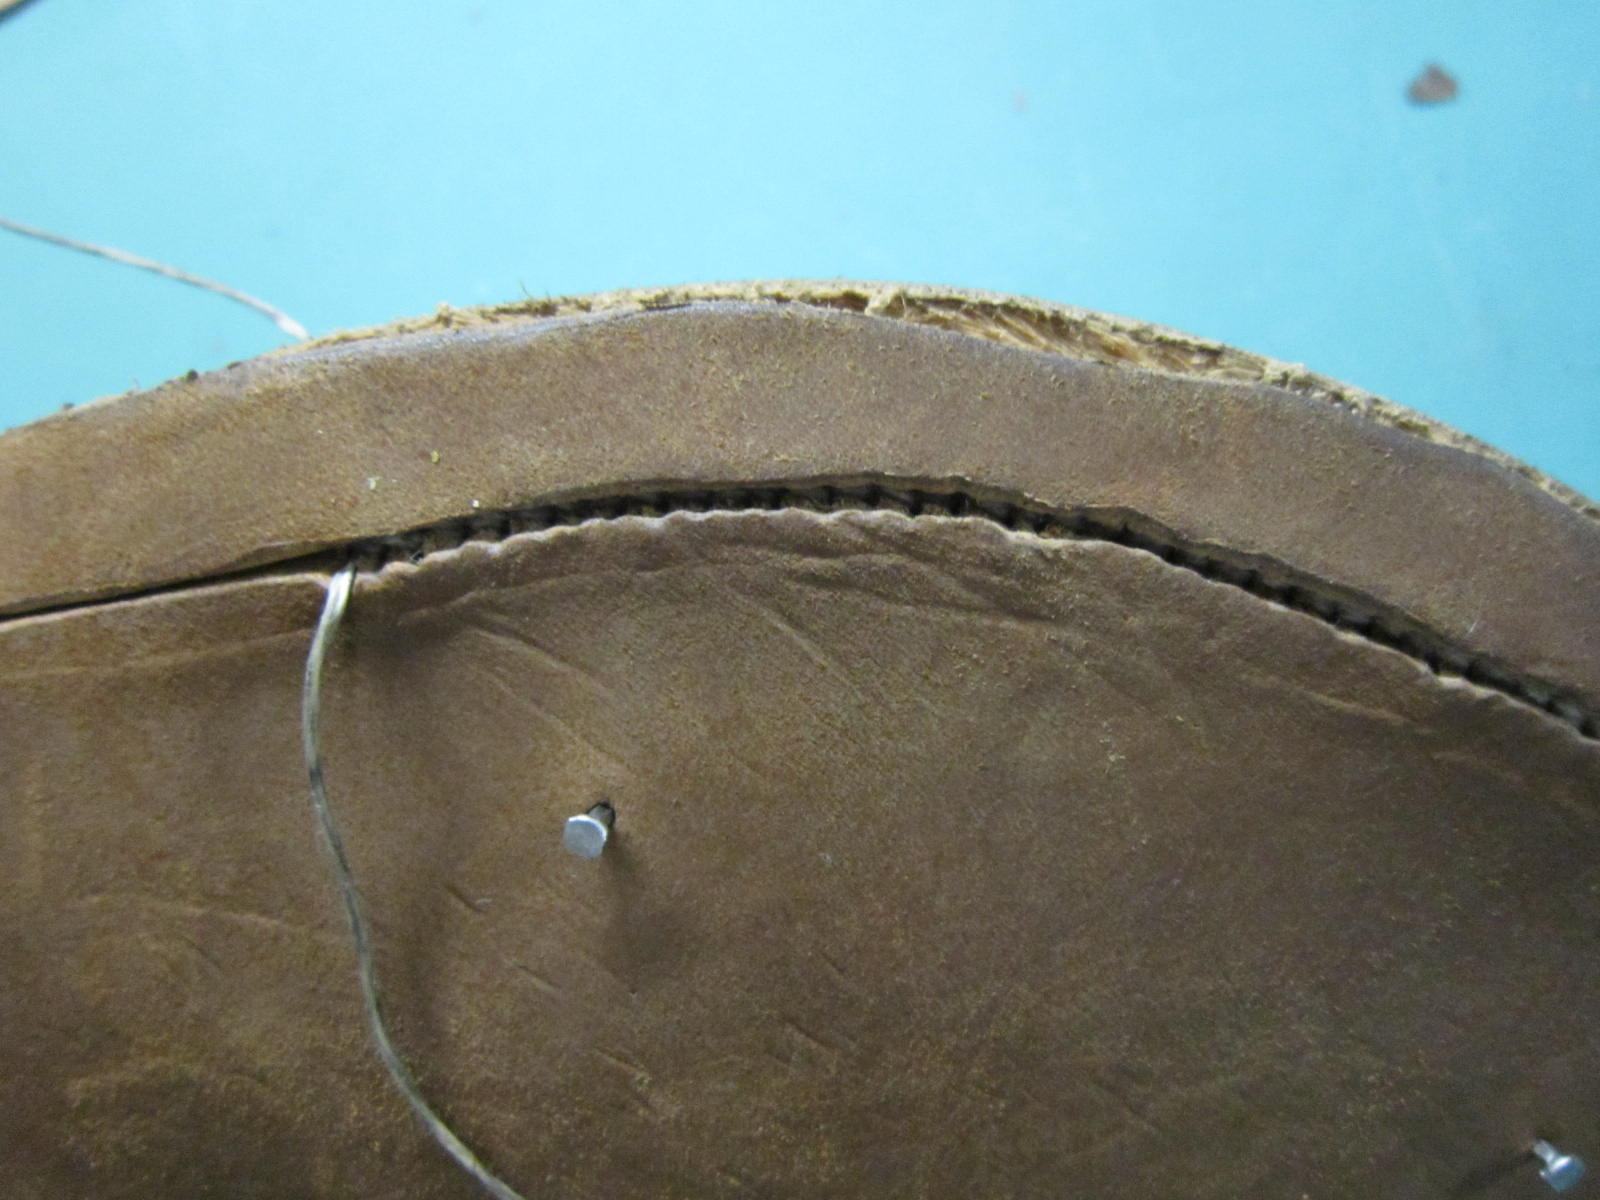
Let me focus on two things regarding the closing, though. The first is how the corner of the dog-leg is handled. In viewing pieces from the museums, it is clear that at the corner, there is a gap where the stitching leaves off and then begins again. This is something not easily viewed from paintings or pictures unless you have ultra-high quality resolution images. For reference, examine these two images side by side. I’ve colored in the stitches as they should be going and crossed out my error shown here. As you can see, the stitching on the exterior travels far enough, and then skips diagonally through the leather to swap places. It’s actually quite clever, because it maintains tension on the corner, yet keeps the shoe together.

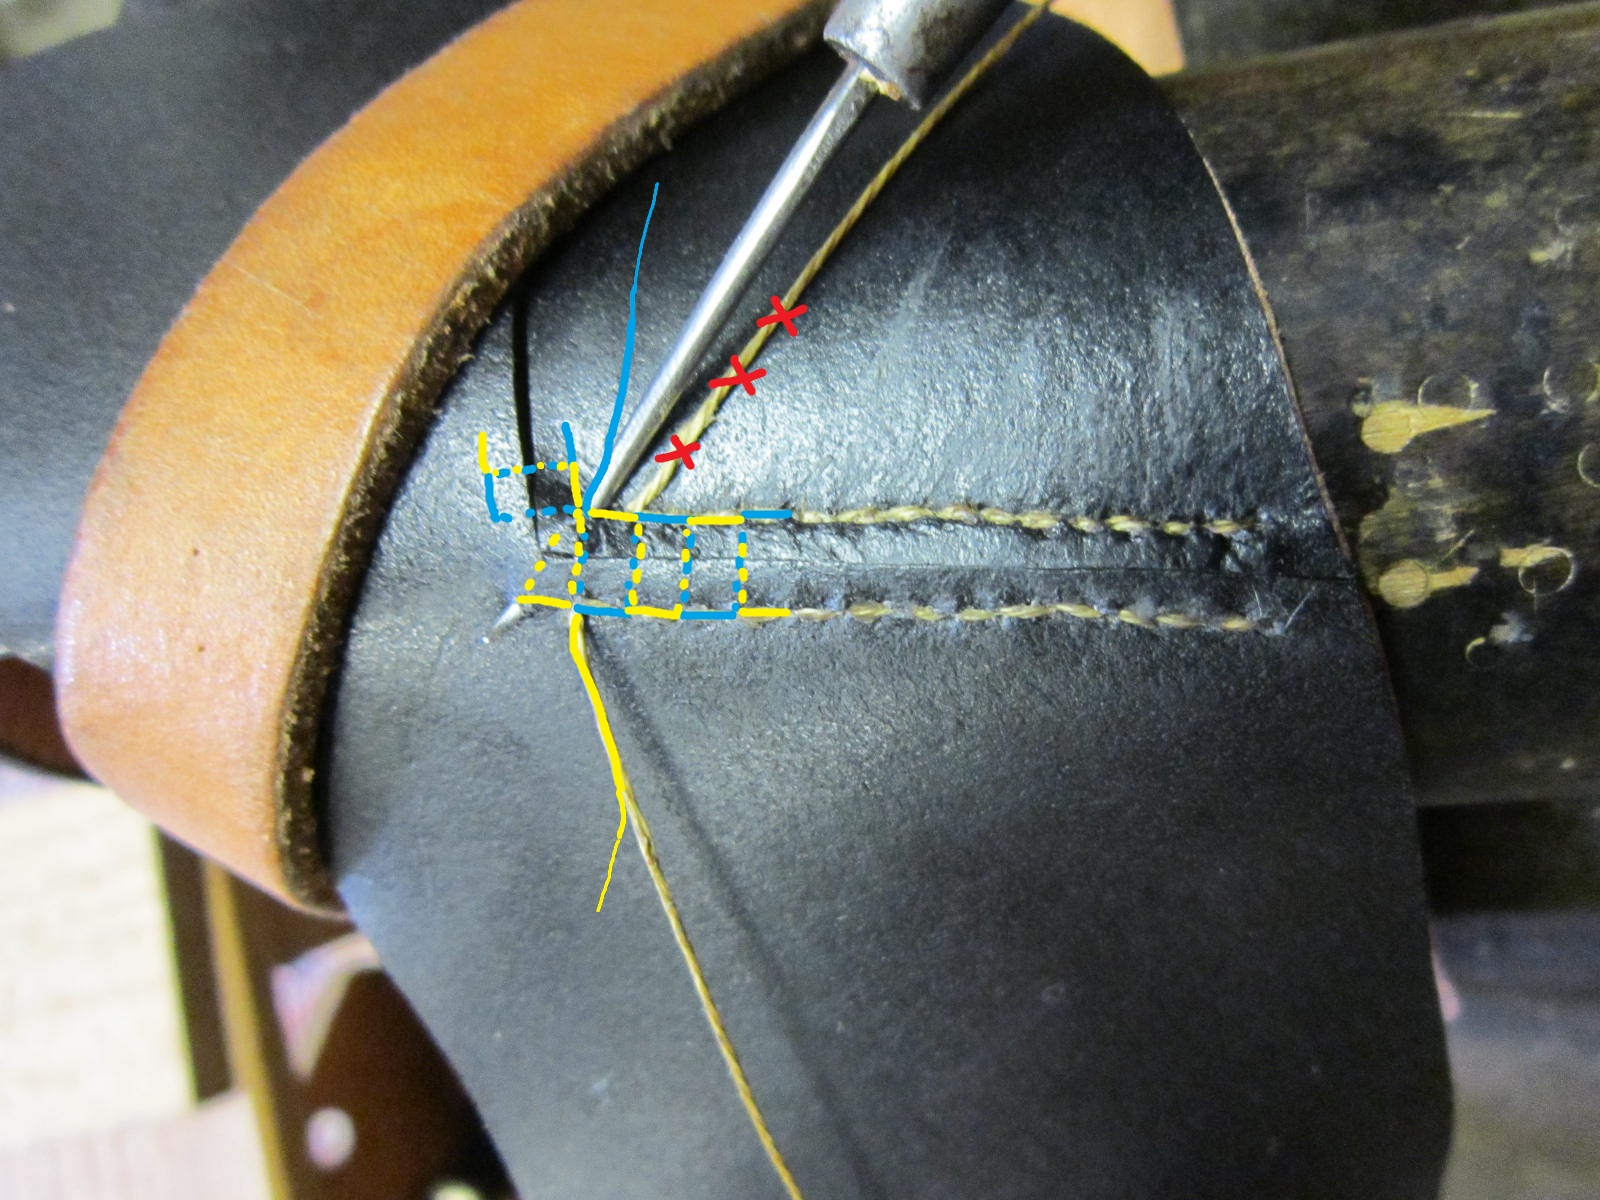
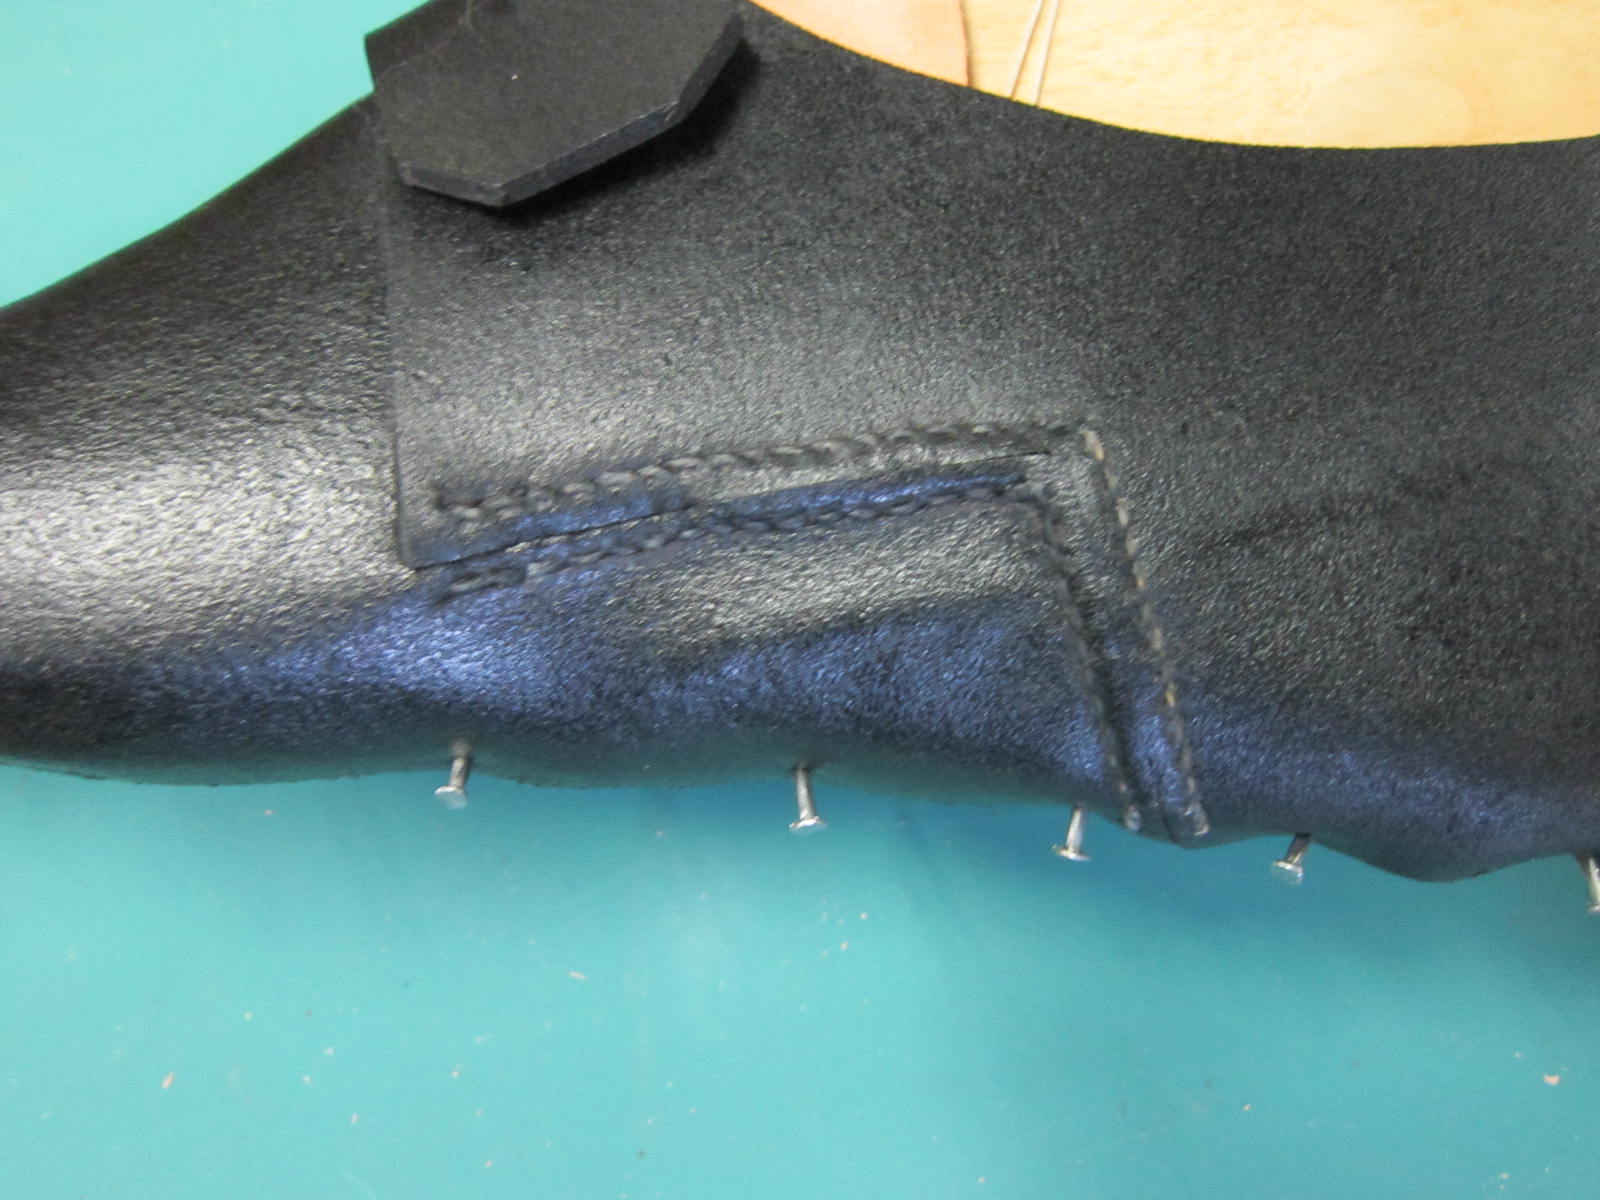
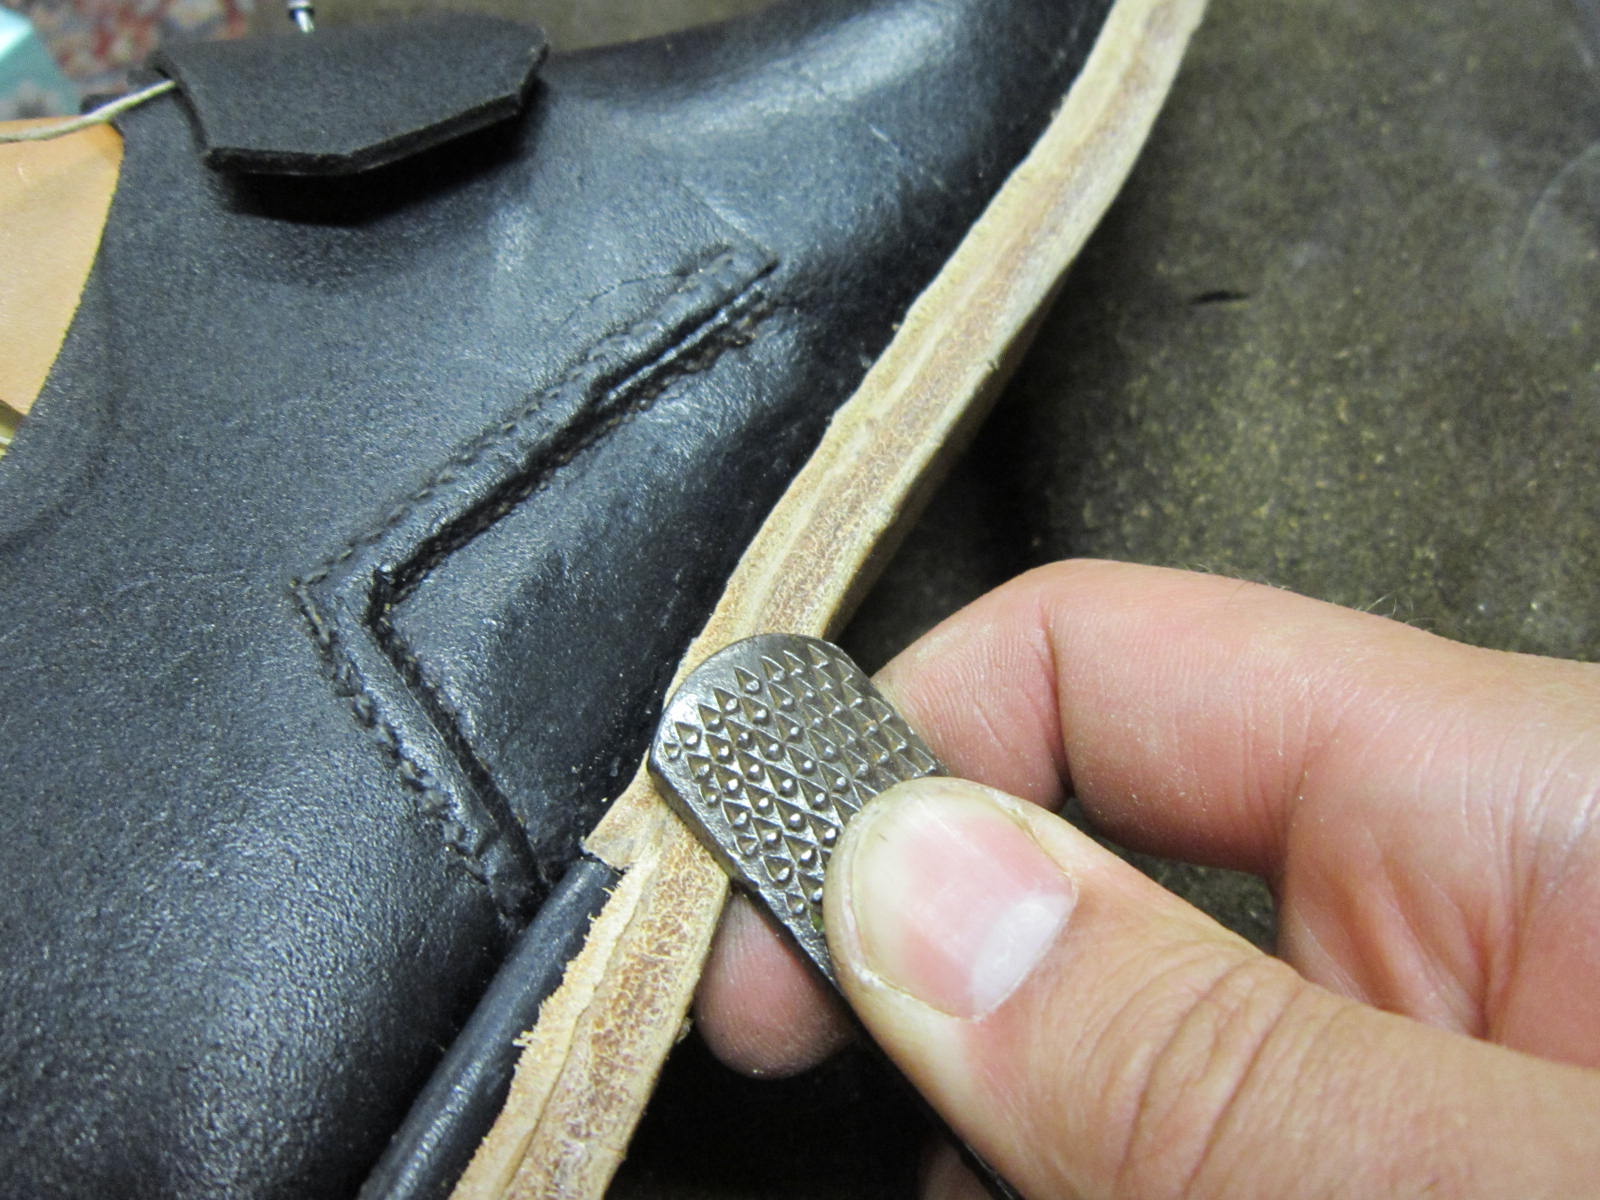
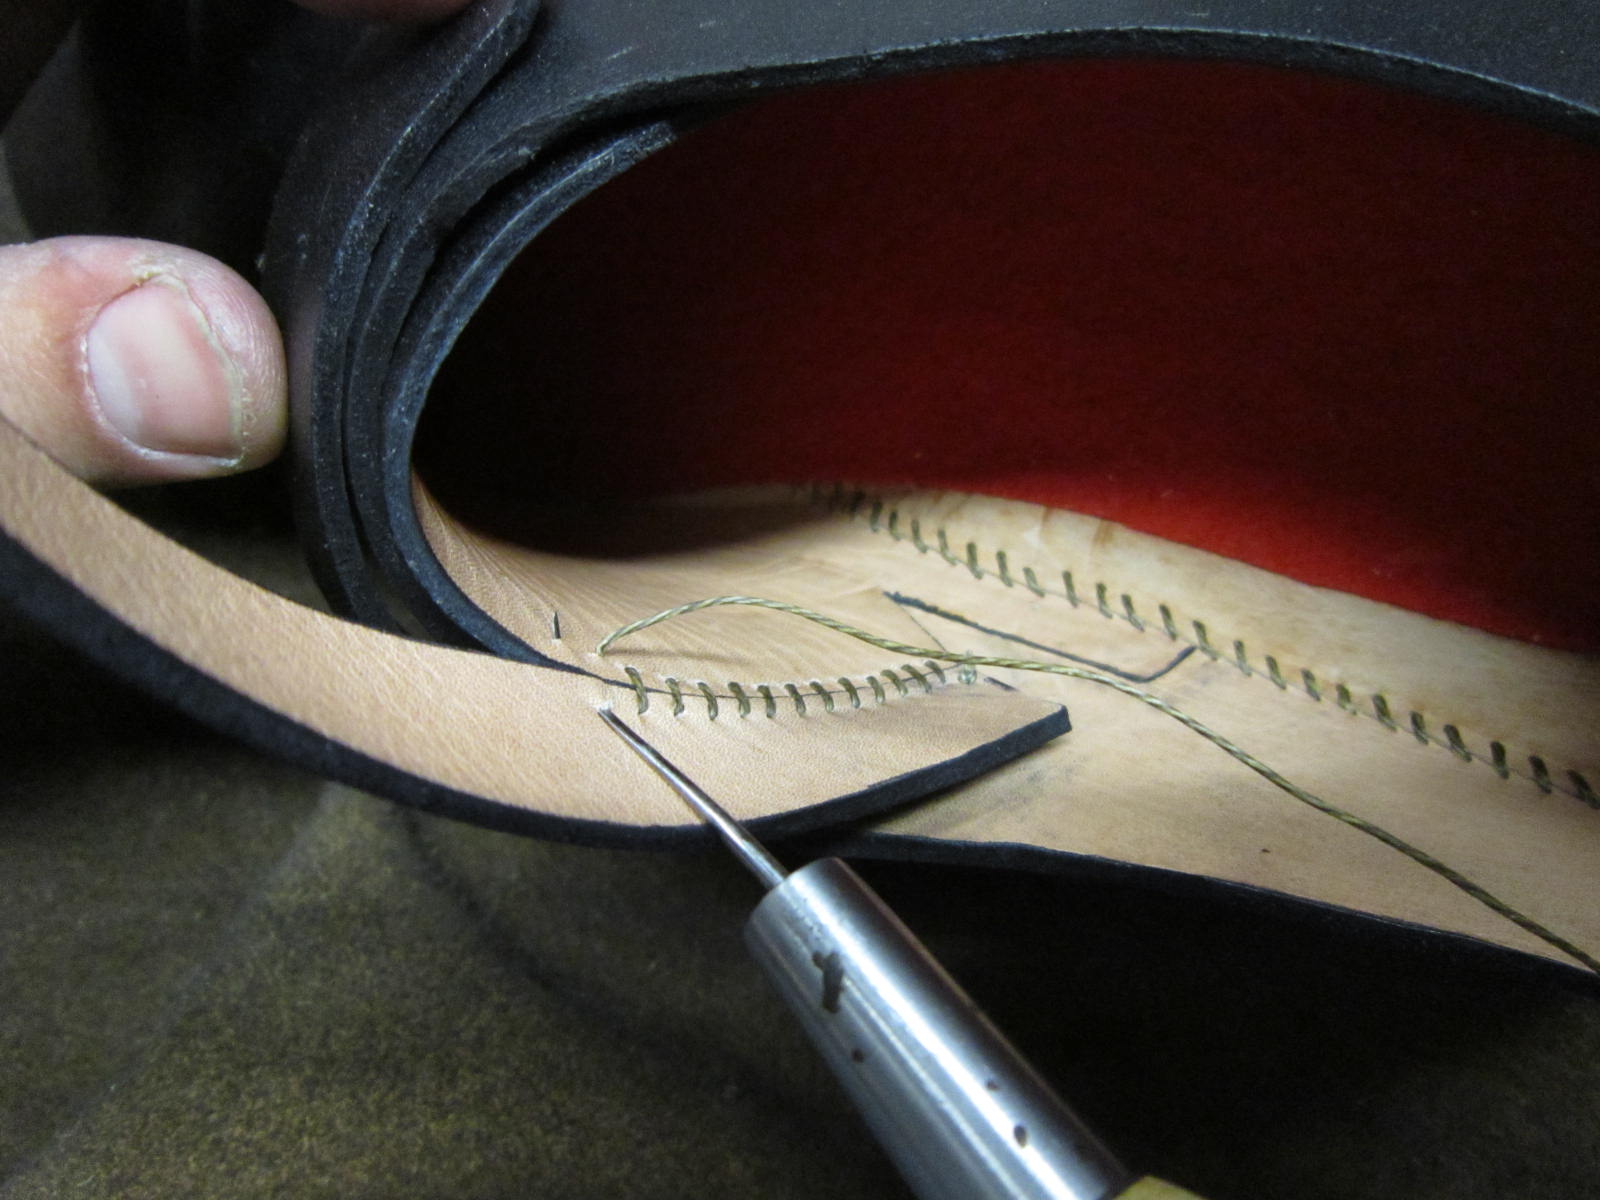
The second is how the strap, when it overlaps, is secured with what is called “split and lift” stitching. The pictures show it more clearly, but a tunnel stitch is started in one end which then meets with the edge of the overlapped strap, securing it down as the awl path in the two pictures below shows.
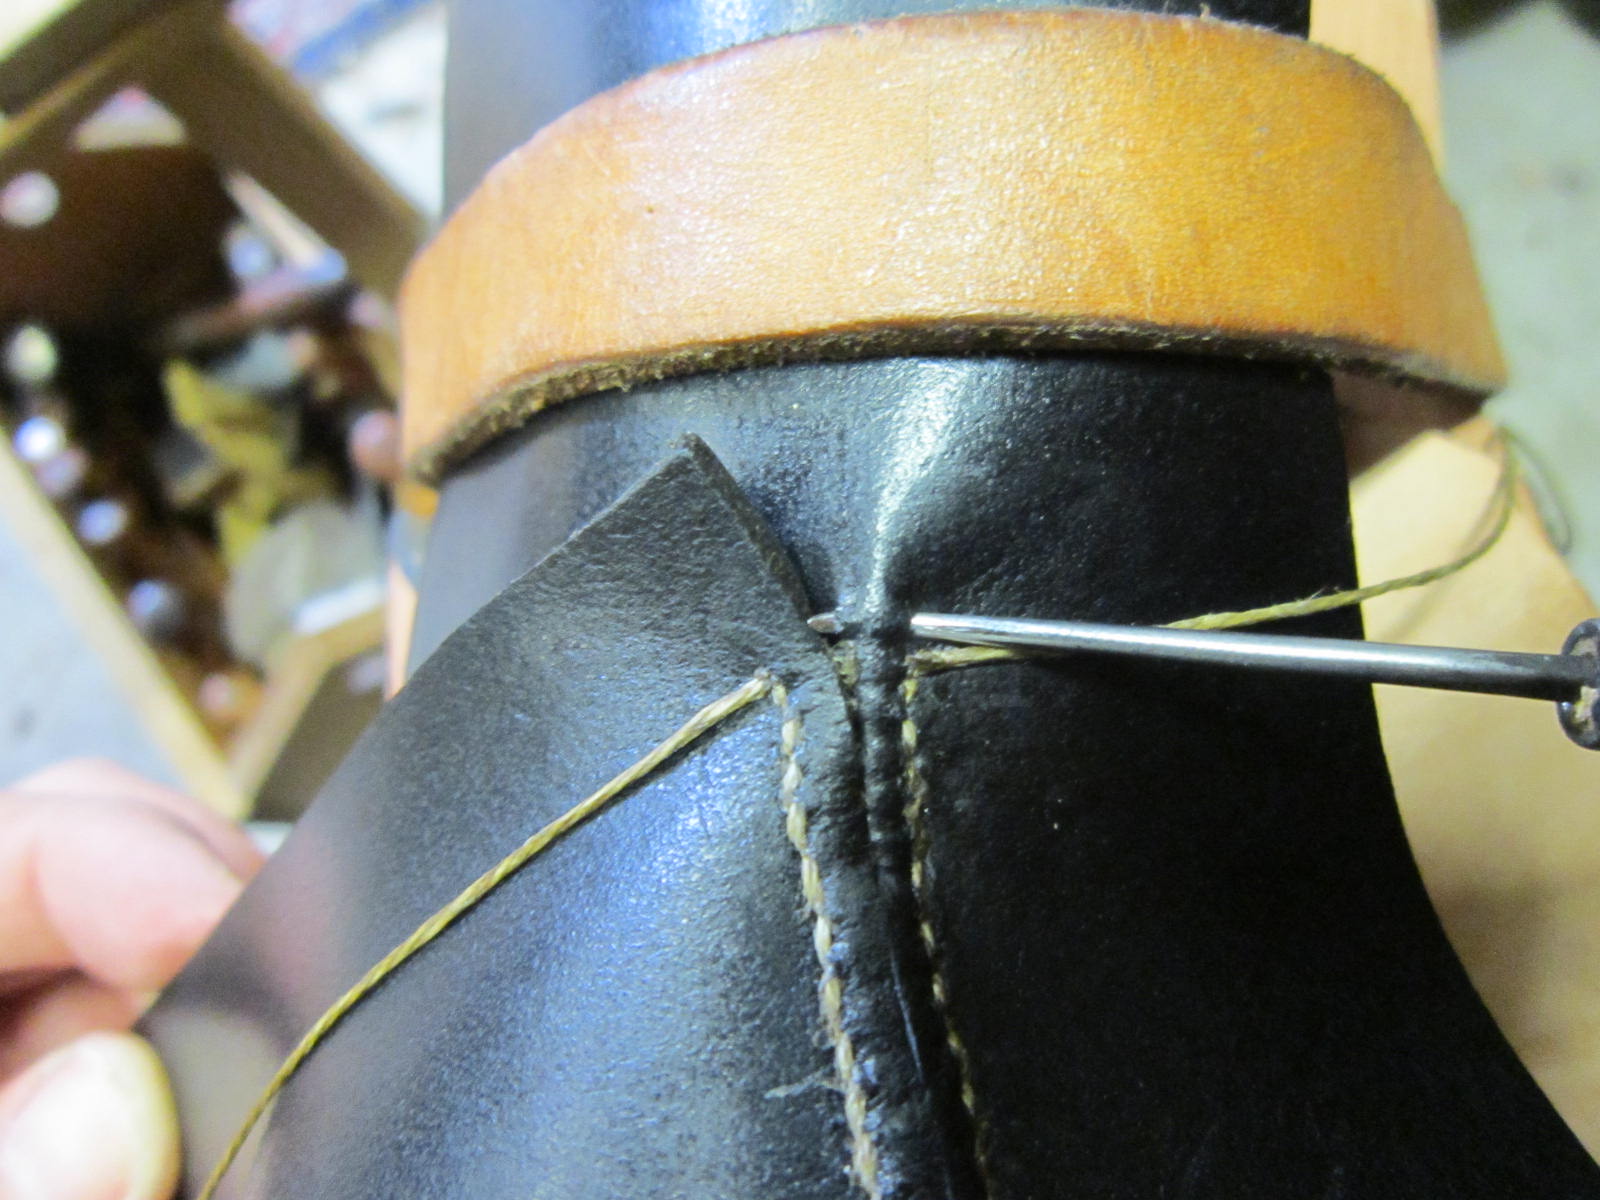

Once the end of the strap is reached, one line goes through the thickness of the material to emerge on the other side where the blue Xs are. Then, one stitch is made to form the bottom of a “U,” and then the stitching continues, but this time, all the way through the thickness of both layers of leather. This has the benefit of reinforcing the strap to the vamp, as when the straps are tugged for buckling, this part gets the most wear (as well as while walking).

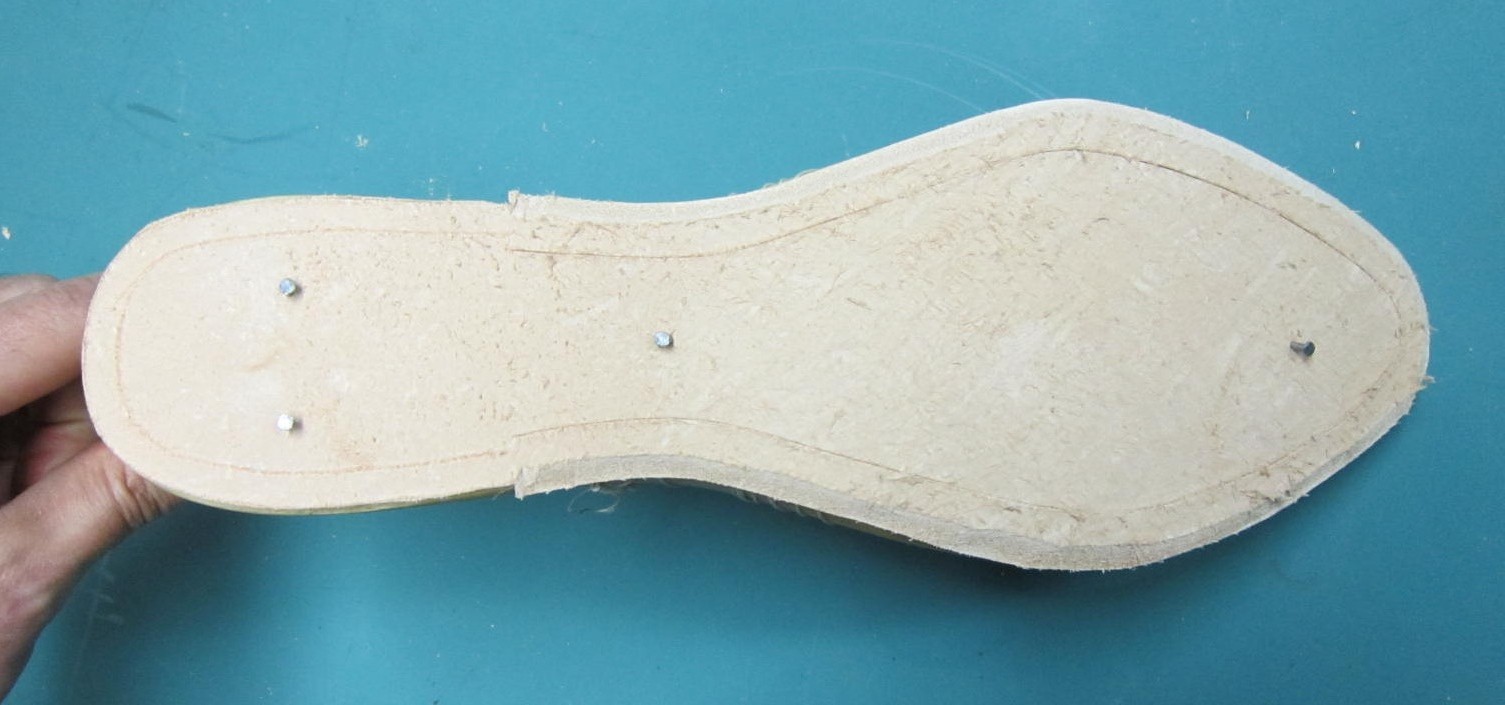
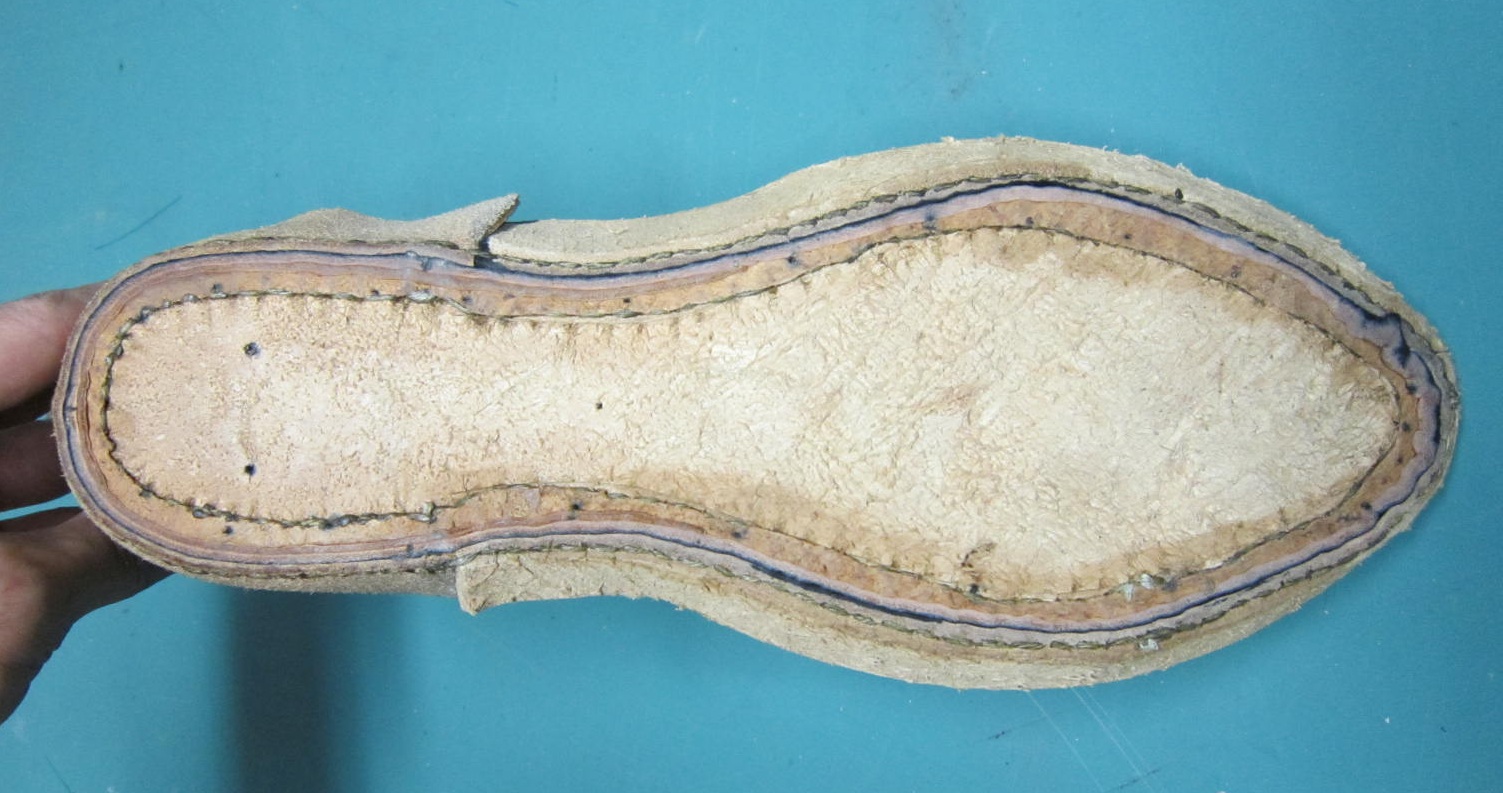
A quick word on the insole – Garsault mentions for shoes with a stacked leather heel, you carve your insole with a little notch on each side of the heel seat, as you can see in the image. The edges of the insole are pared down to match with the upper more cleanly, and a groove is cut into the insole for stitching. This notch is important, because when you make your blind rand at the heel, the rand will take up this extra space (this will become clear as you read onwards). Note that tack holes are just where Garsault describes them.
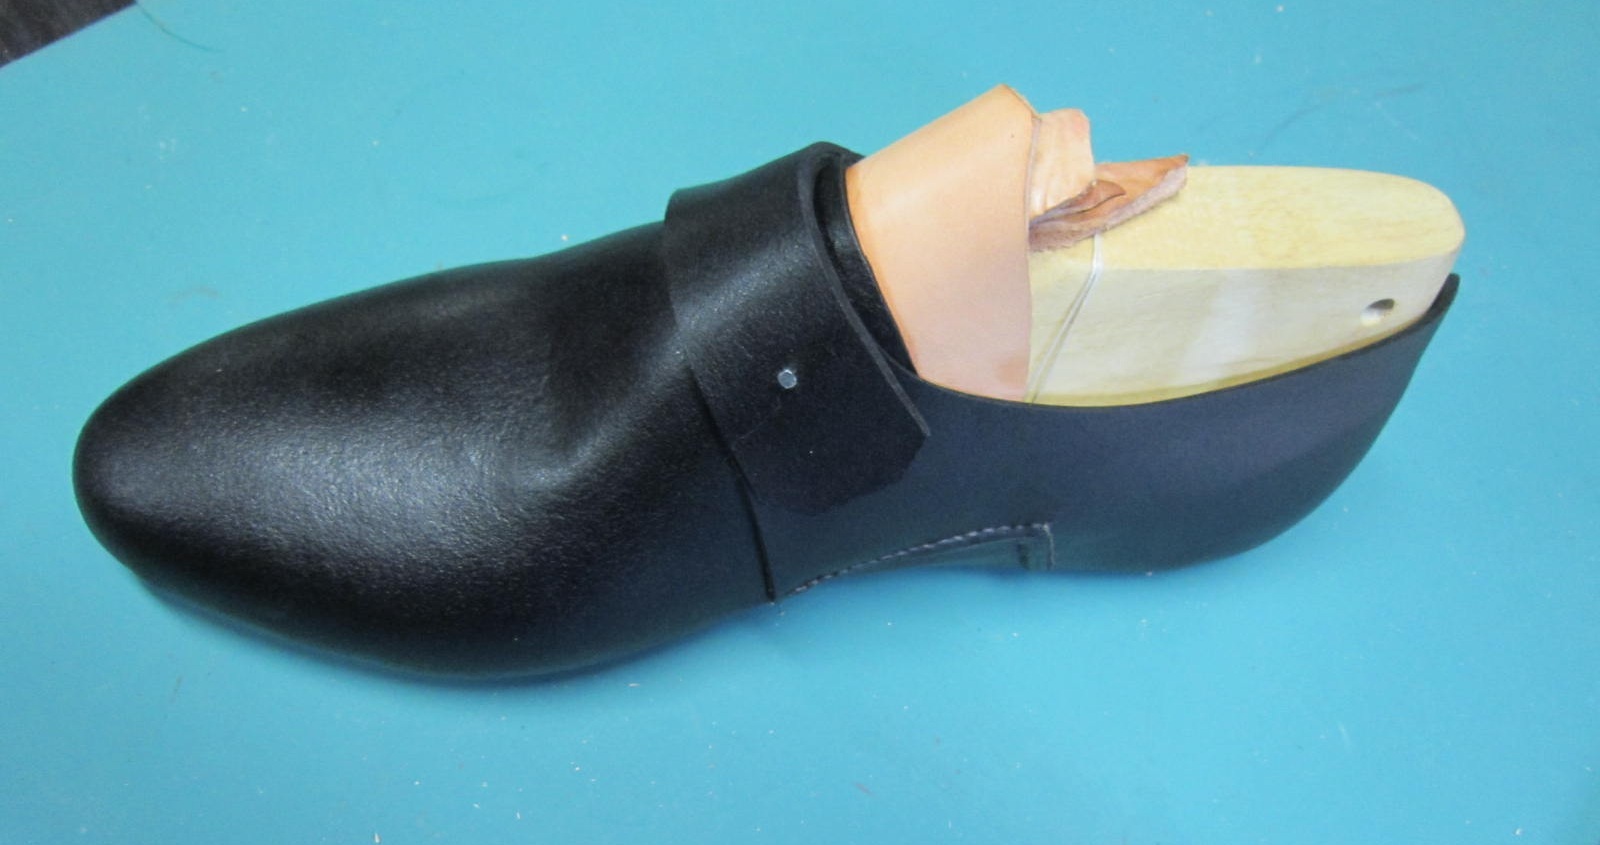
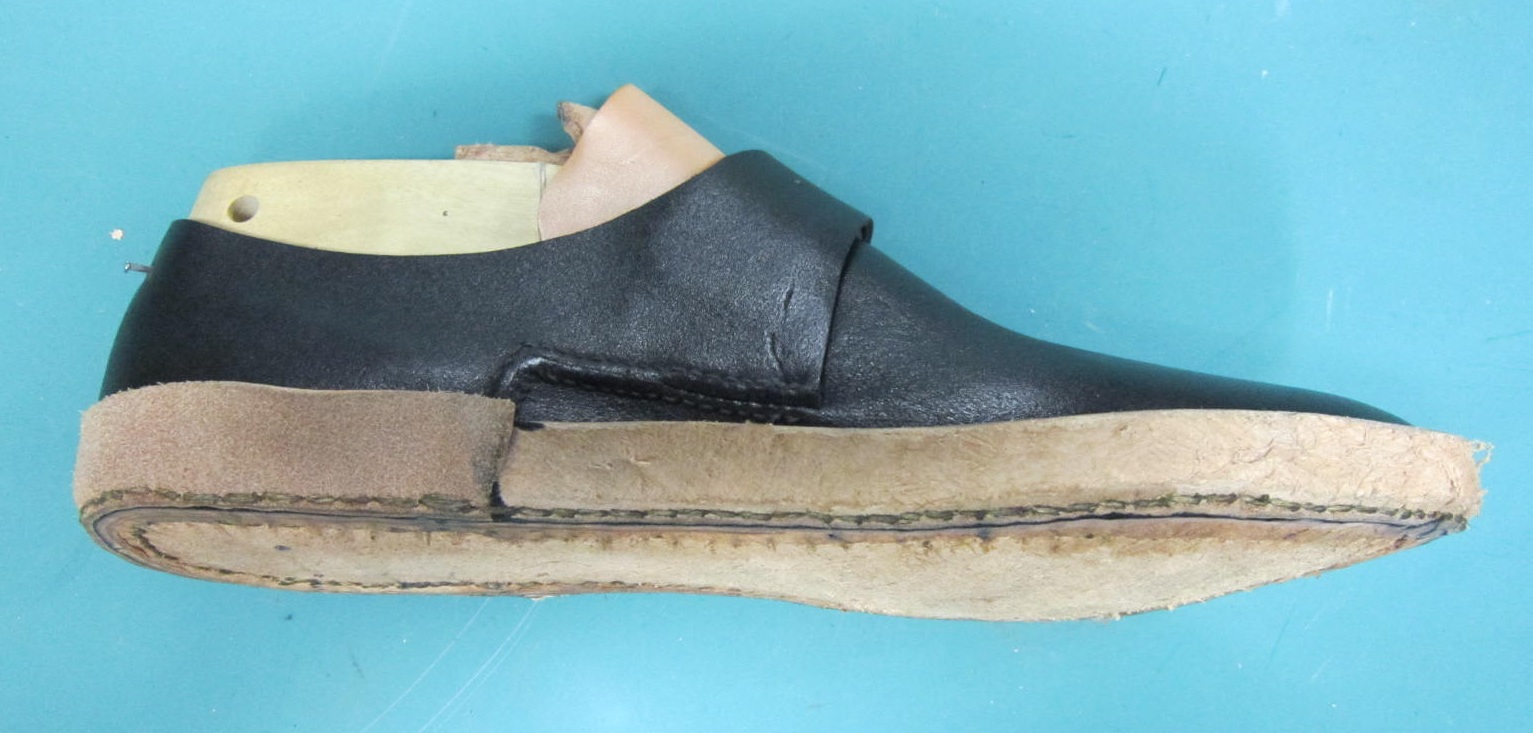
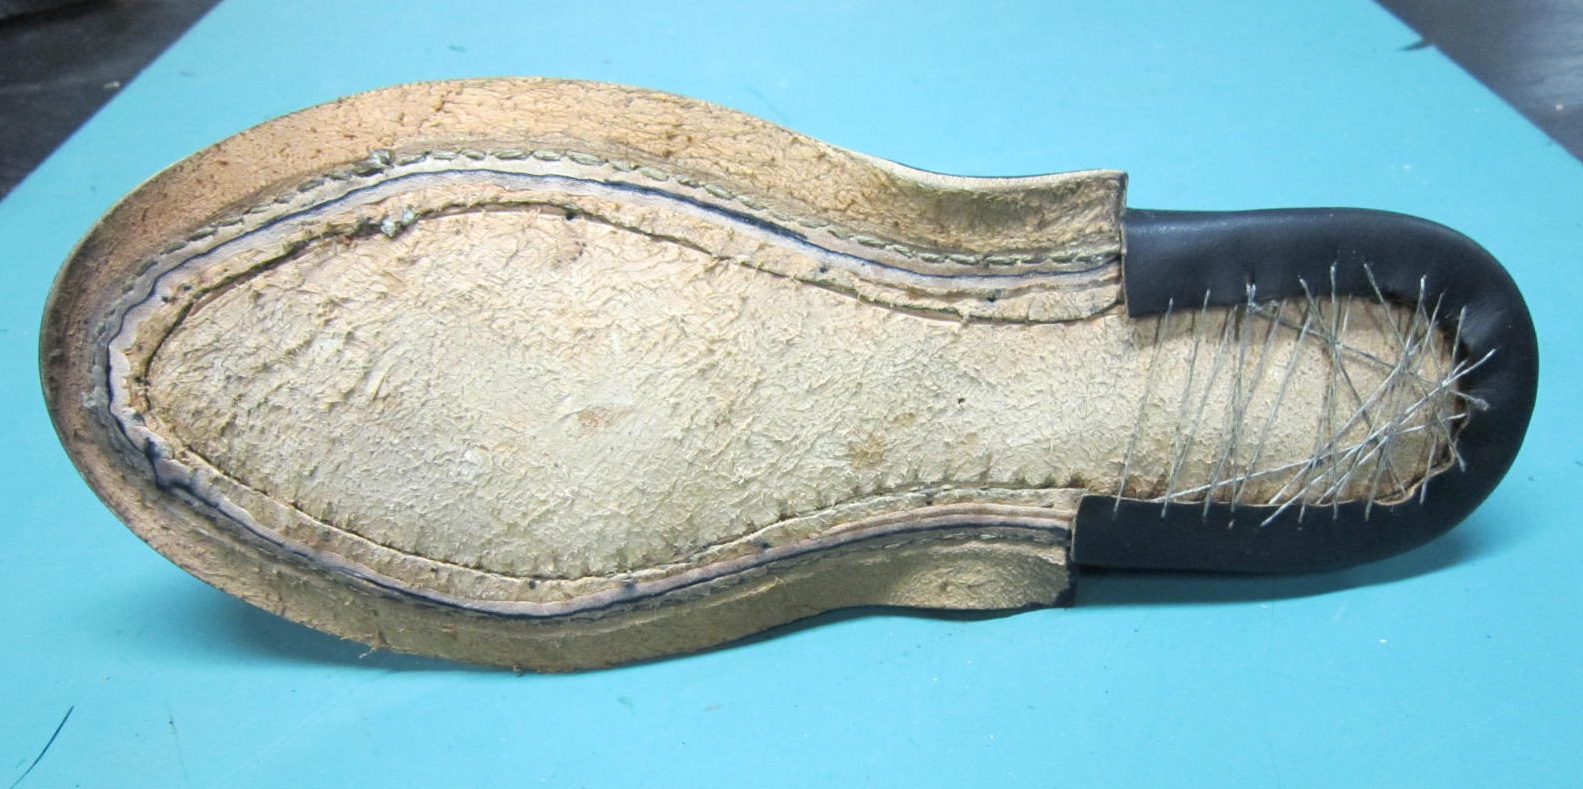
I won’t give too much detail on the lasting process, but I will note that a heel lining was tacked into the back, though pictures are only visible once the last has been removed (though you can see it on the lasting margin). Also, Garsault says to tack the straps down with a single nail, likely to keep them in place while you perform the inseaming.

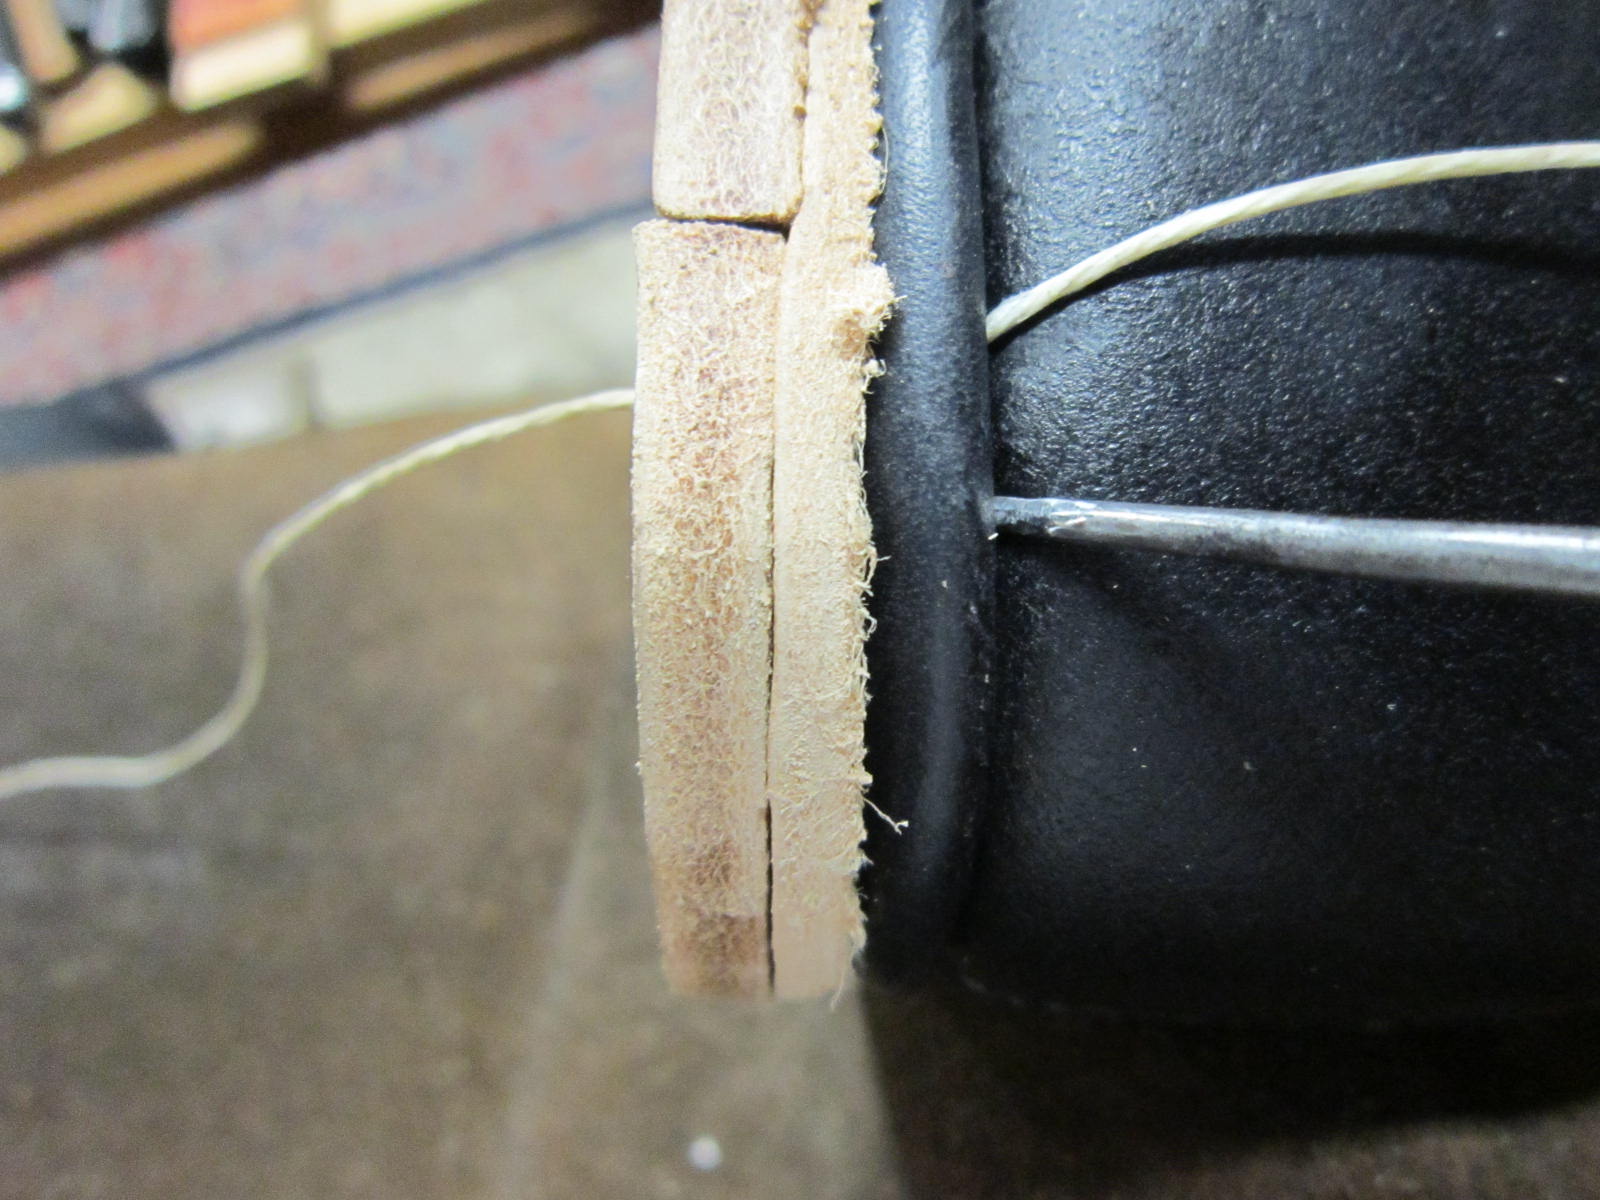
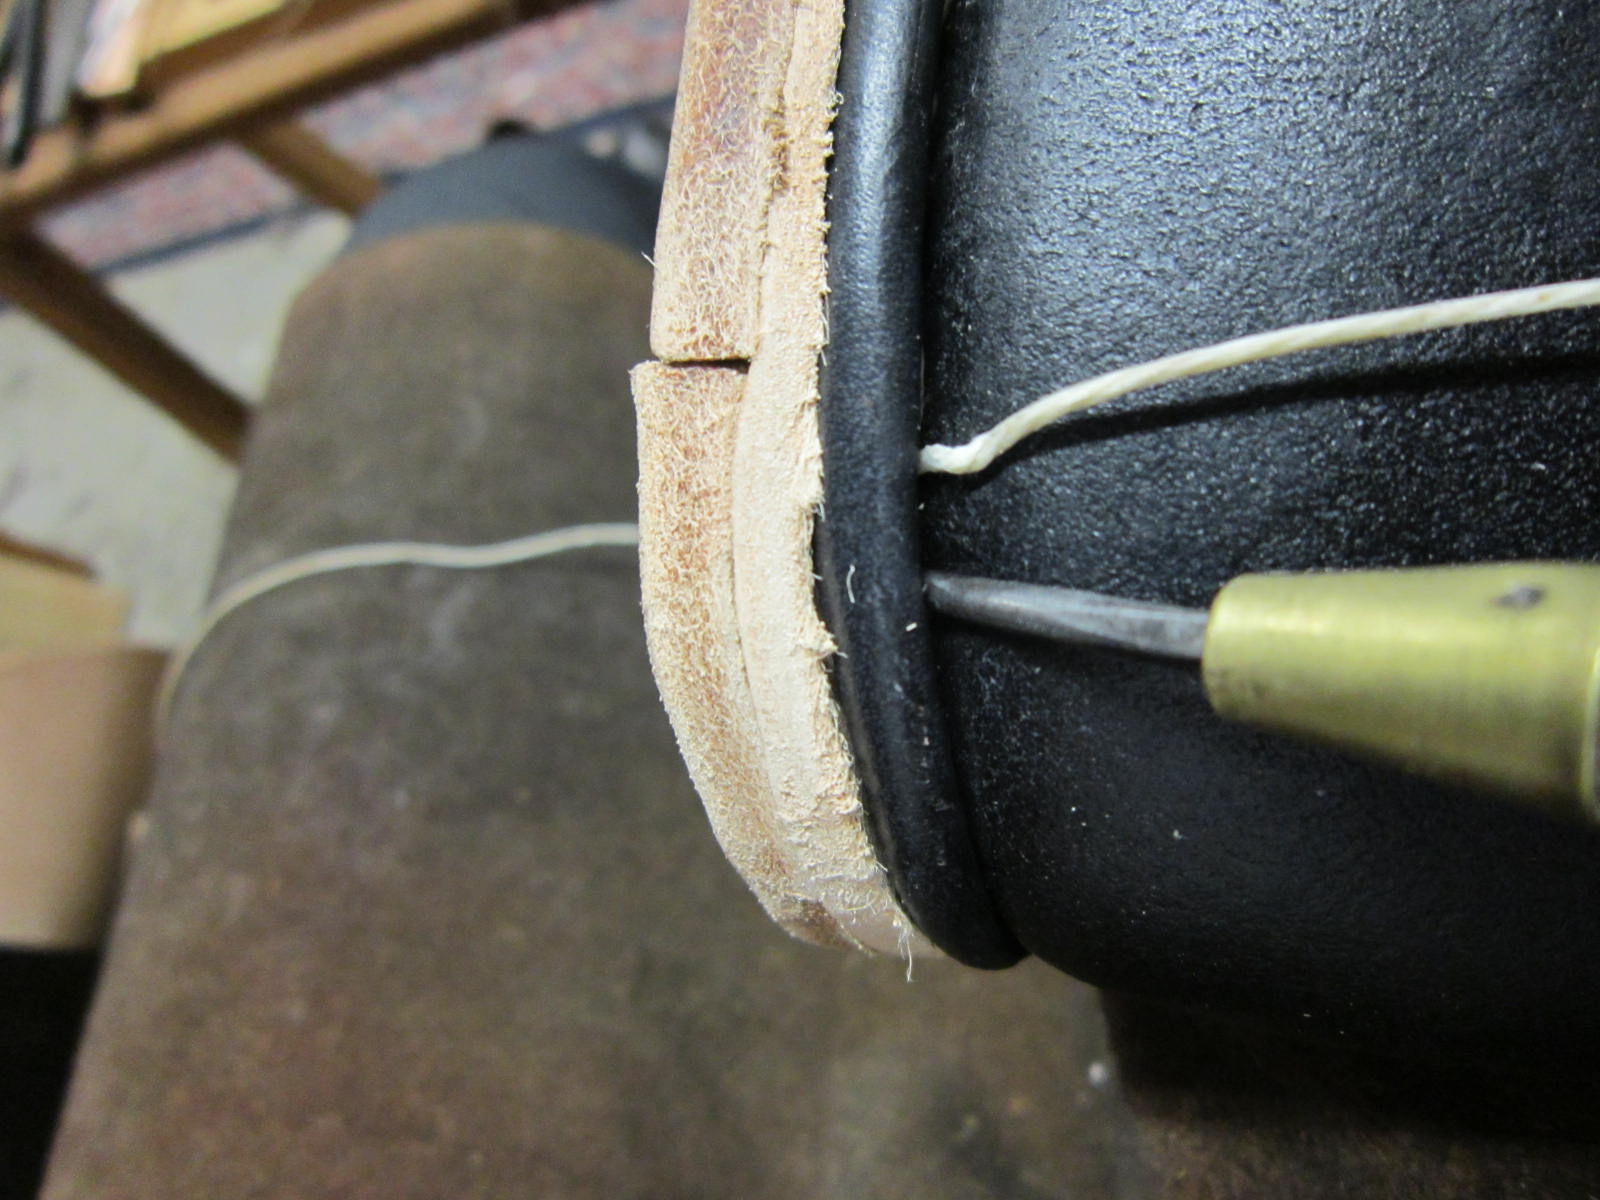
Inseaming is performed with a welt of sturdy cattle hide, which has also been skived down on the side that is sewn into the lasting margin. As you know, leather is quite strong, so even if the leather is thin at this point, it still stays on admirably well. You will also see the heel rand, which is a wide strip of calfhide. It must so be thinner, because it needs to be folded down and tucked under the heel. Note that very coarse stitches are to sew the heel rand on so that when you get around to attaching the heel pieces, there is plenty of space to get your heel awl behind the rand (more on that later).
Now, we need to work the heel rand – it needs to be wet thoroughly to make it flexible, and then tucked down underneath the heel of the shoe to make a smooth surface to be stitched upon. Depending on how thick your calf is, you may need add more or less bracing to keep the heel rand tucked. A couple of taps with the hammer will do you good.
Now that the welt is sewn on and the heel rand is finished, it’s time to attach the outsole. Garsault says that the outsoles are always cut shorter than the shoe, and that one must use an extra piece to make up the entire length of the shoe. First, one pastes the insole to make the attachment to the outsole more firm.
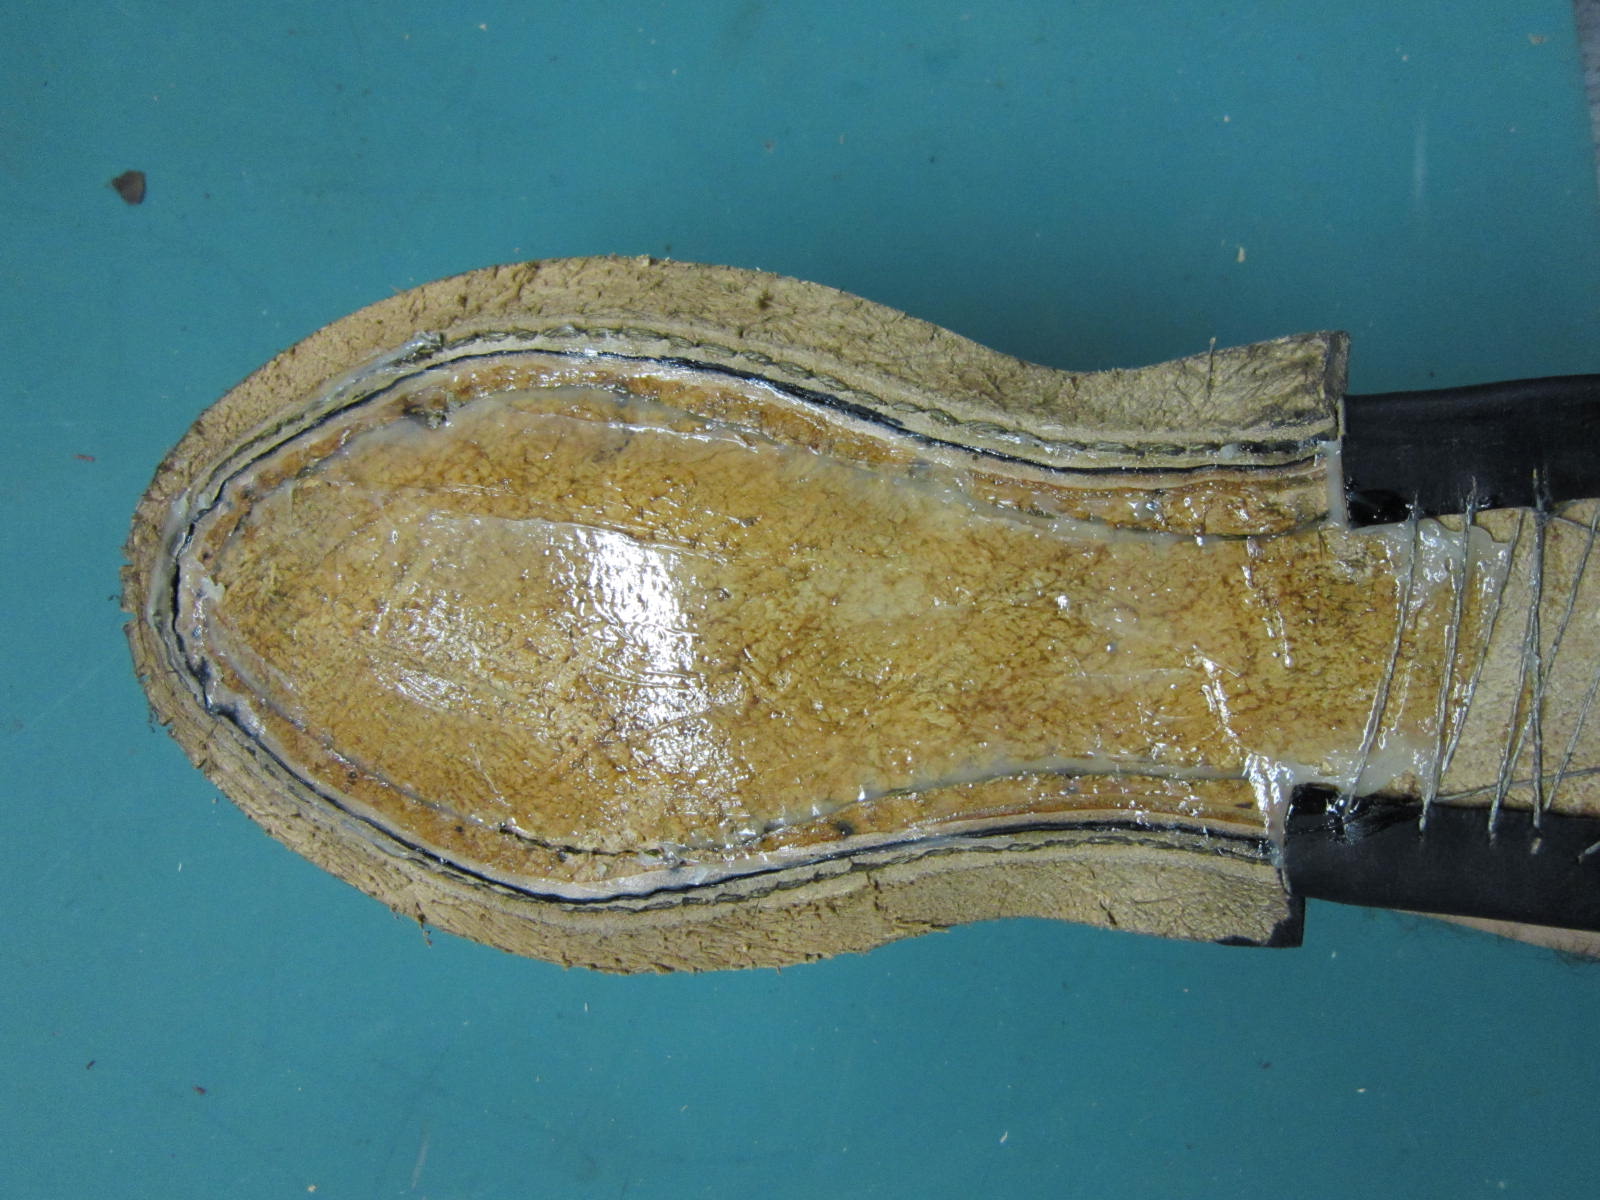
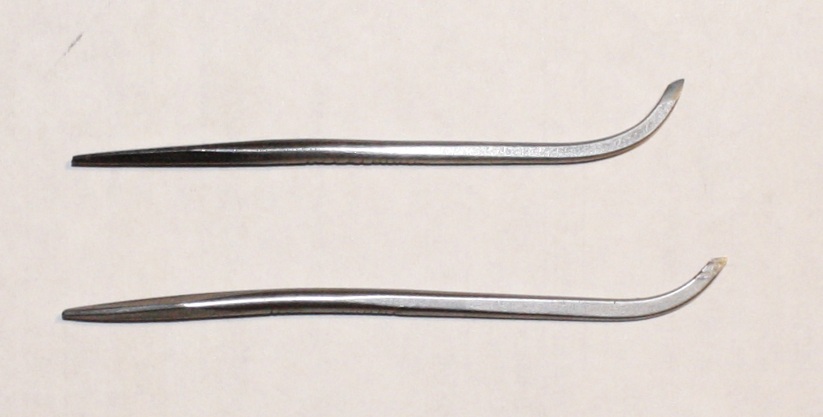
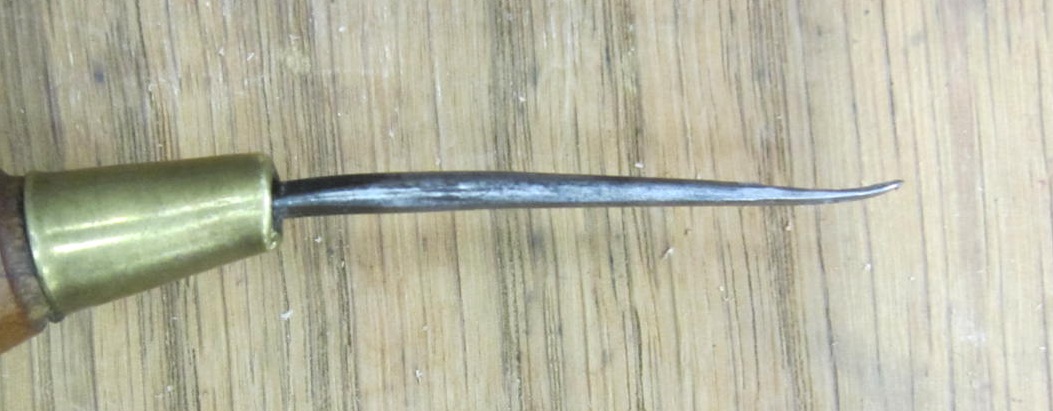
Once pasted and tacked, the outsole can be sewn on. For this, a square awl is used. It is used to pierce a “rectangular” holes in the shoe perpendicular to the direction of stitching, and is not an easy skill to master. It differs from a regular sewing awl in that the instead of an oval cross section, it has a rectangular cross section, and the orientation of the blade is 90 degrees shifted from a sewing awl. Further, the awl must be very, very sharp in order not to require the shoemaker to push too hard or to snap the blade. Having only made a few of these pairs of shoes, I can say that although I can certainly make the awl do the work, it will take a bit more practice to get truly adept. Here are some square awl blades and a sewing awl blades for comparison (although the sewing awl blade has enough curve to be used as an inseaming awl).
Taking very small stitches, about the same pitch as your closing stitches (3/32 or thereabouts), you can make your way all the way around the shoe. Note that you stitch from the welt side through to the sole side. The margin I used for the outsole was a little tight here, but it should be fine. Don’t forget that you’re doing this while the sole is very damp!
Once sewn all the way around, the outsole can be trimmed.
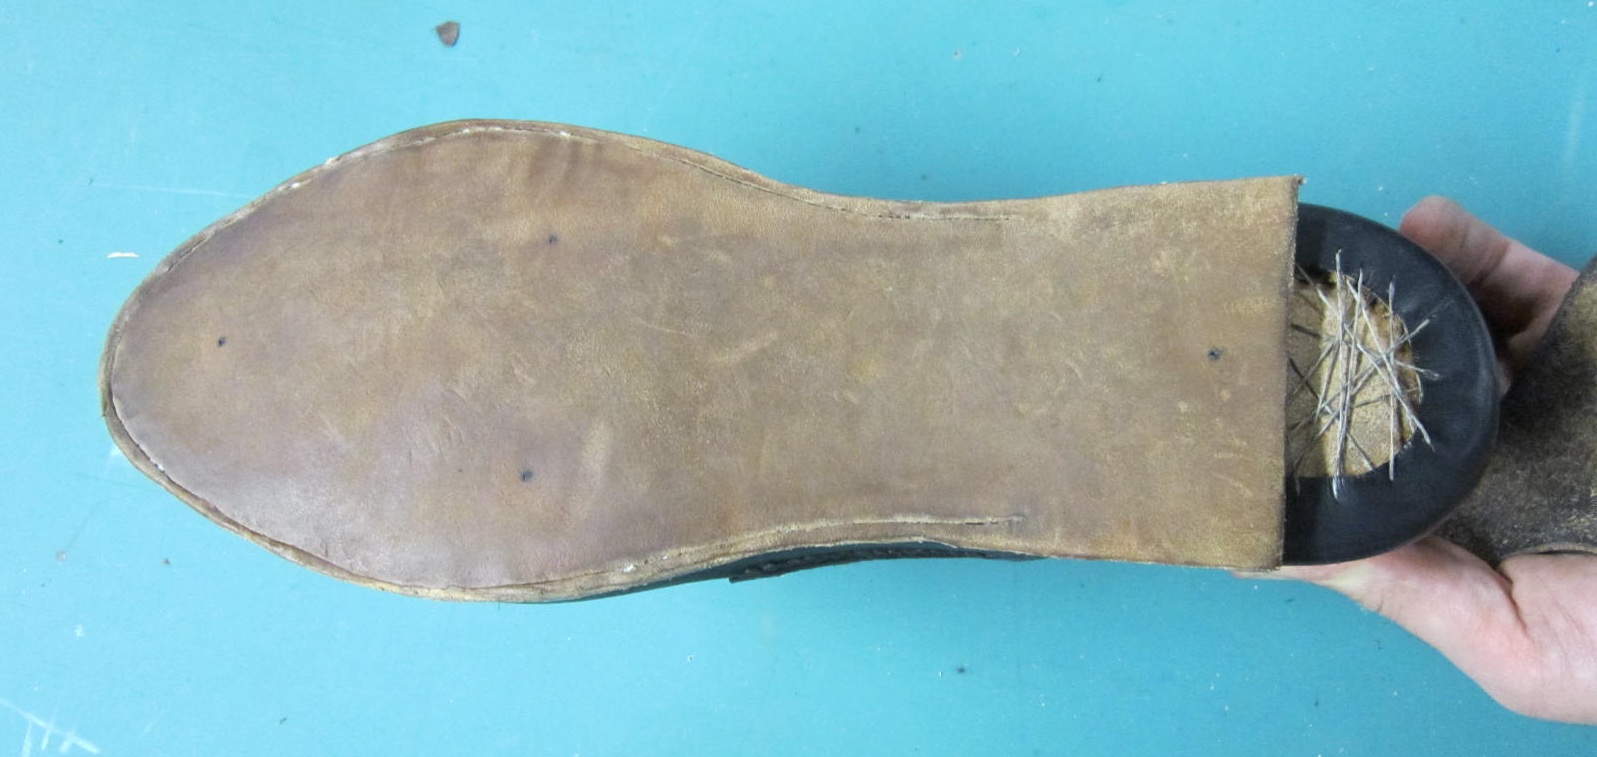
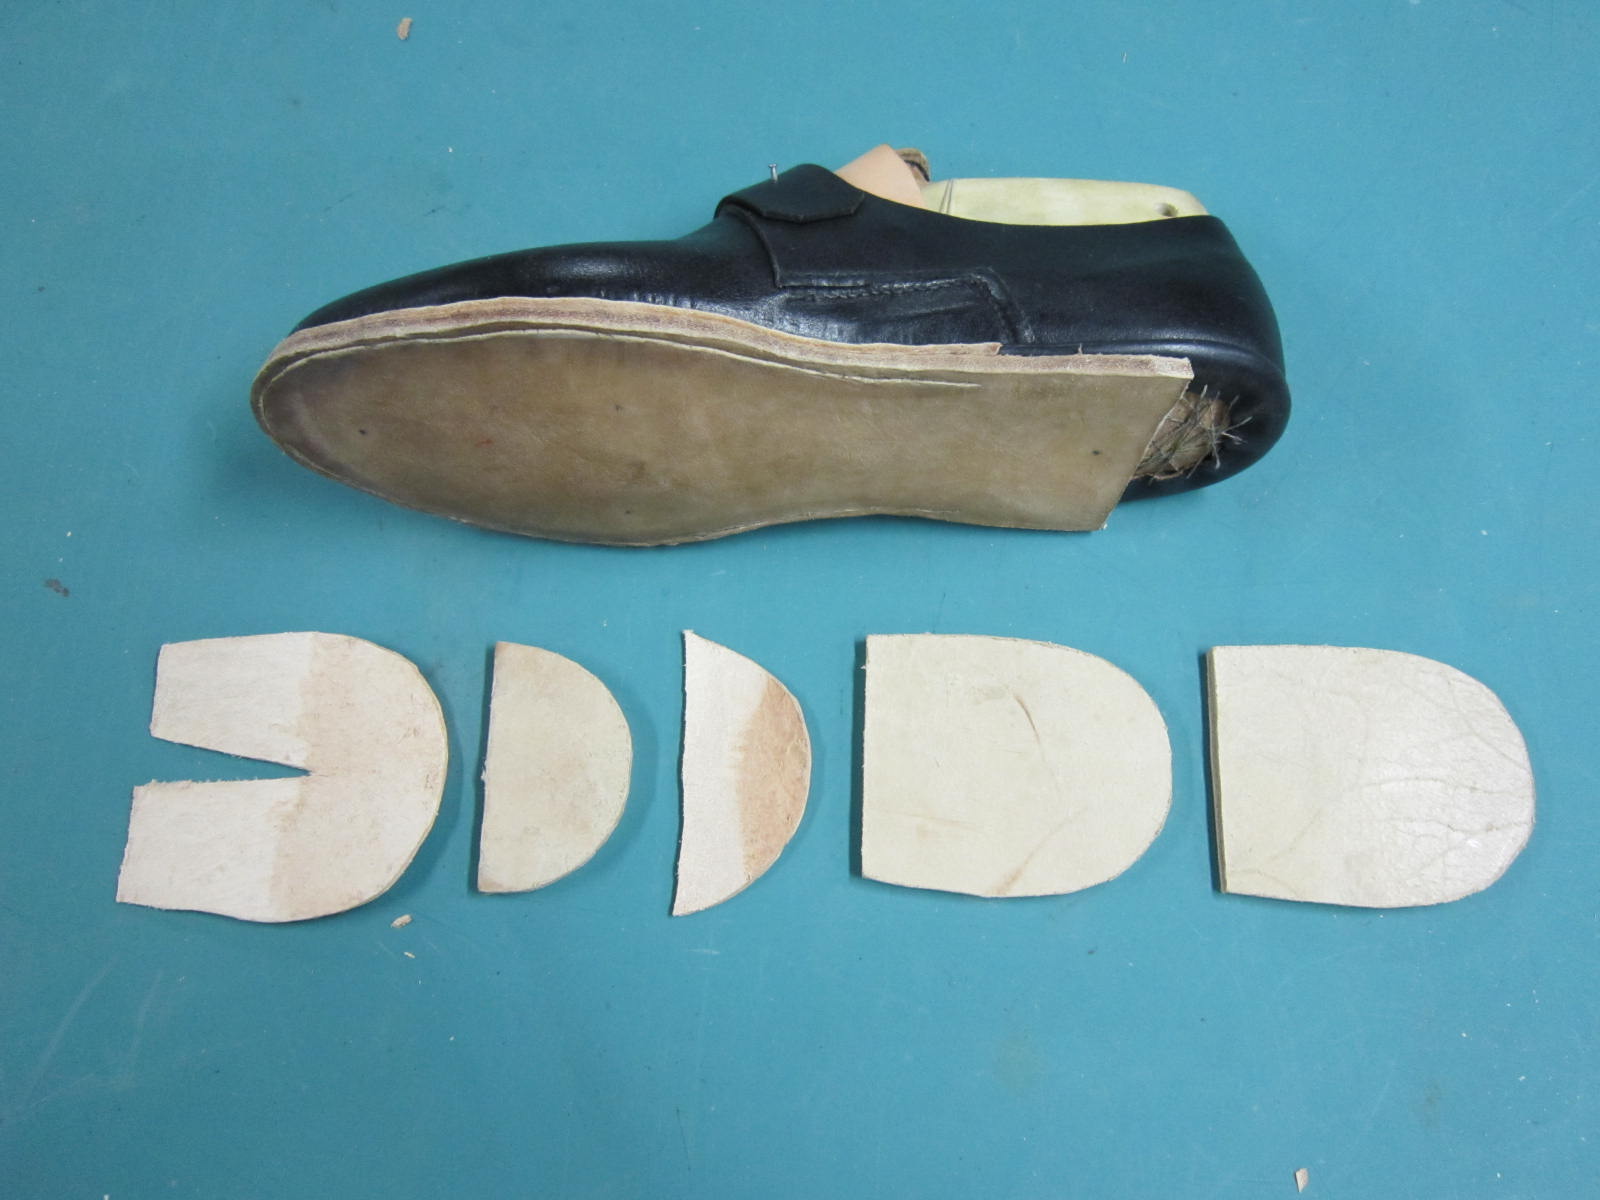
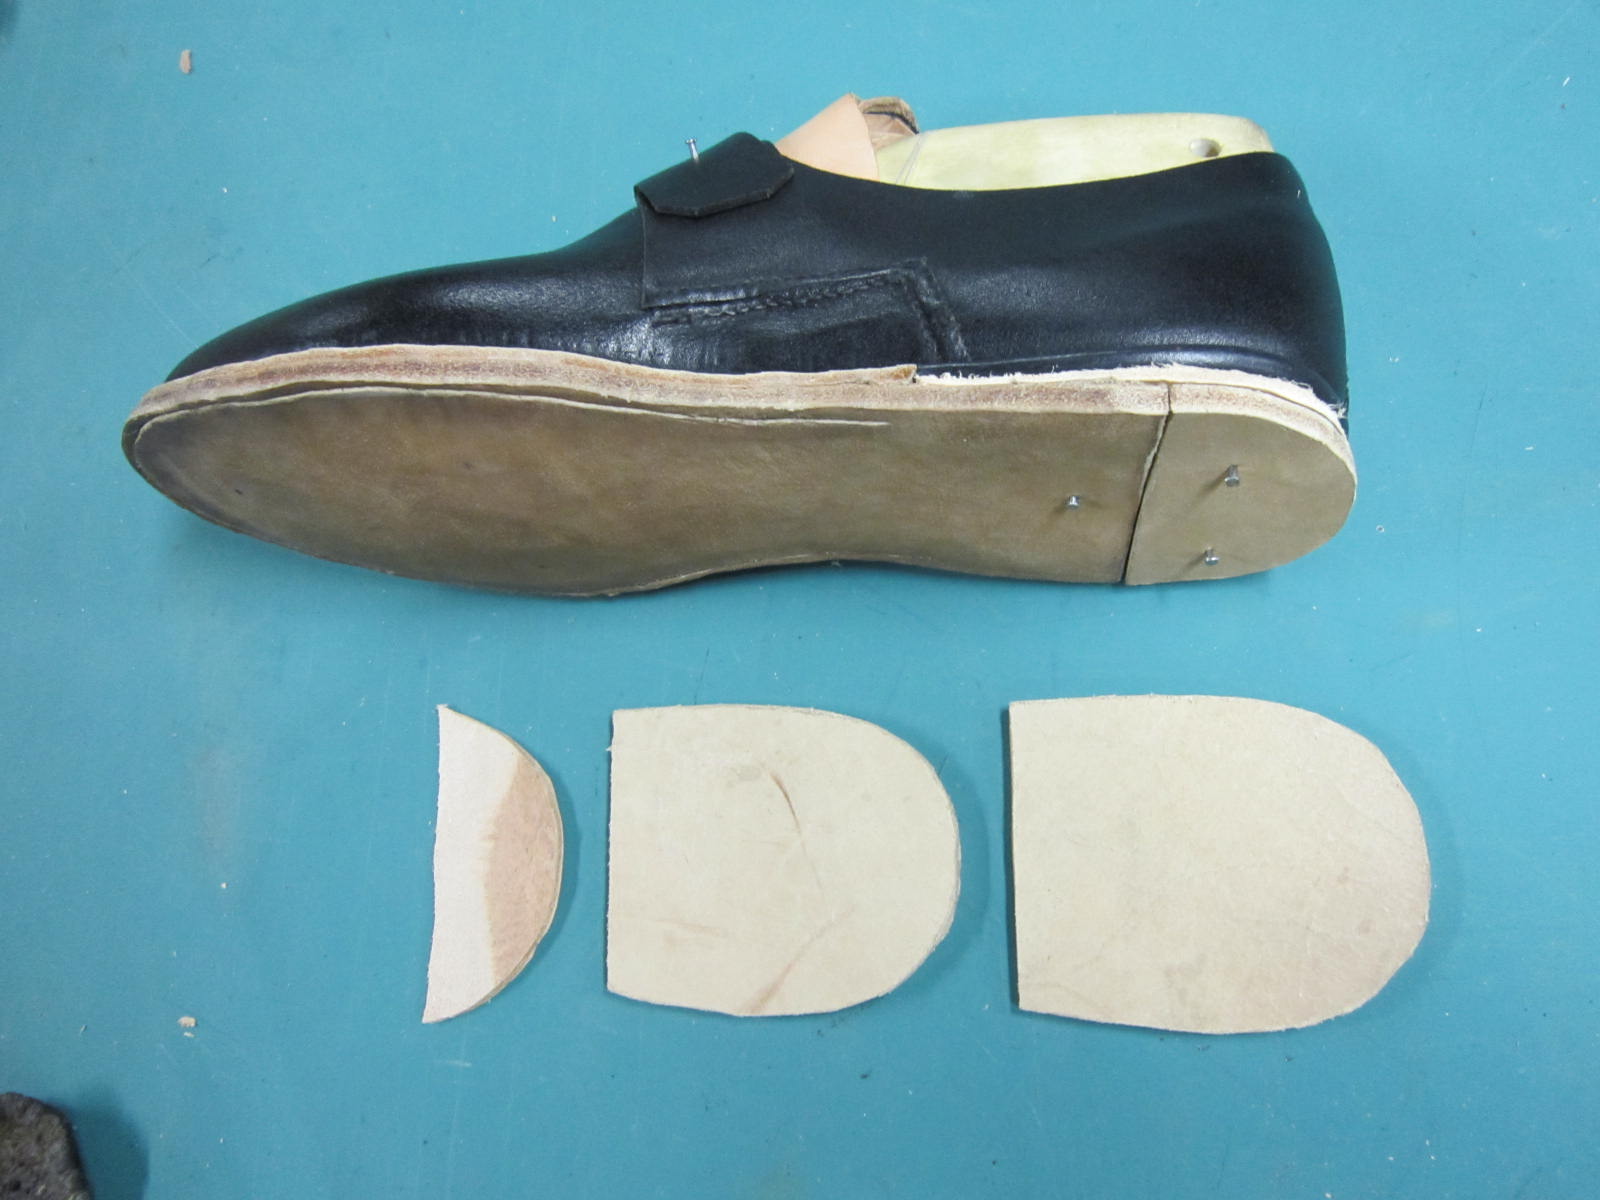
Now, we can focus on the heel. Garsault describes first adding in a split-lift which is the heel-shaped piece with a “V” cut into it first. Then, the extension piece can be attached inwards. Again, paste is used in between each layer. You will also note the extra sole pieces along with a small “half moon” piece. This small half-moon piece is also described in Garsault, though it does not seem to be absolutely necessary.
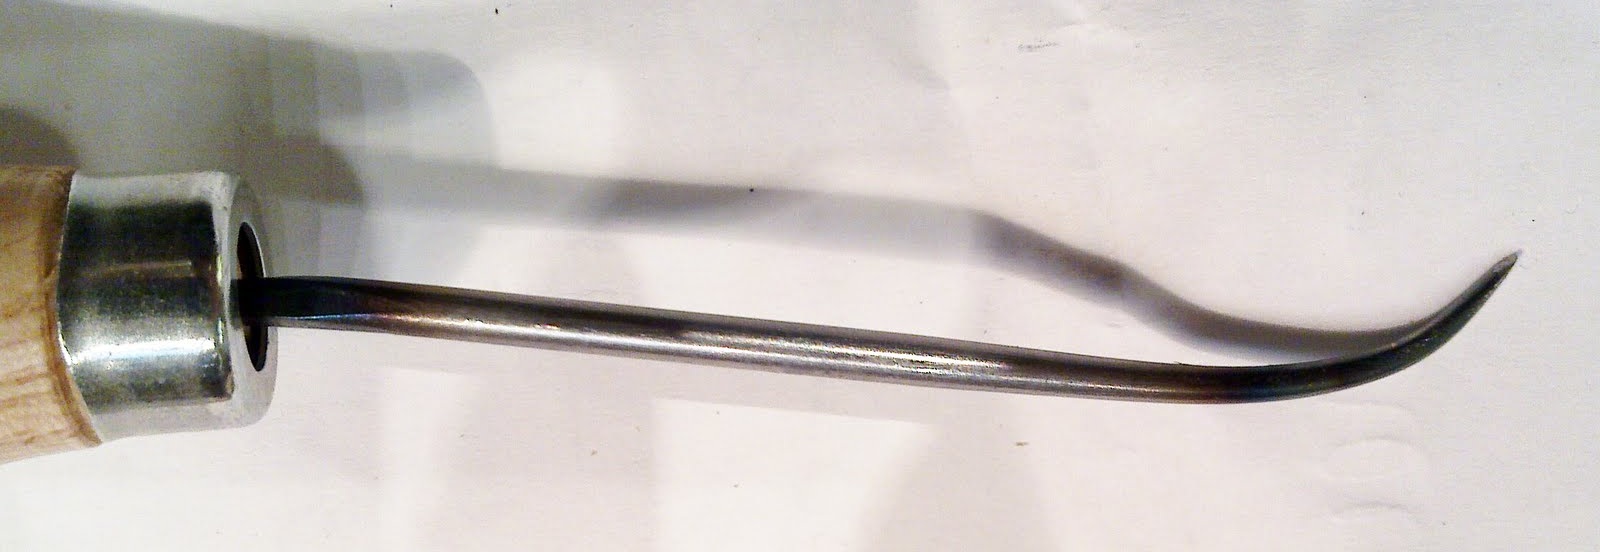
Sewing on the heel requires another special awl, a heel awl. This awl has a much more shallow bend in it to allow it to slip behind the heel rand, as described previously.
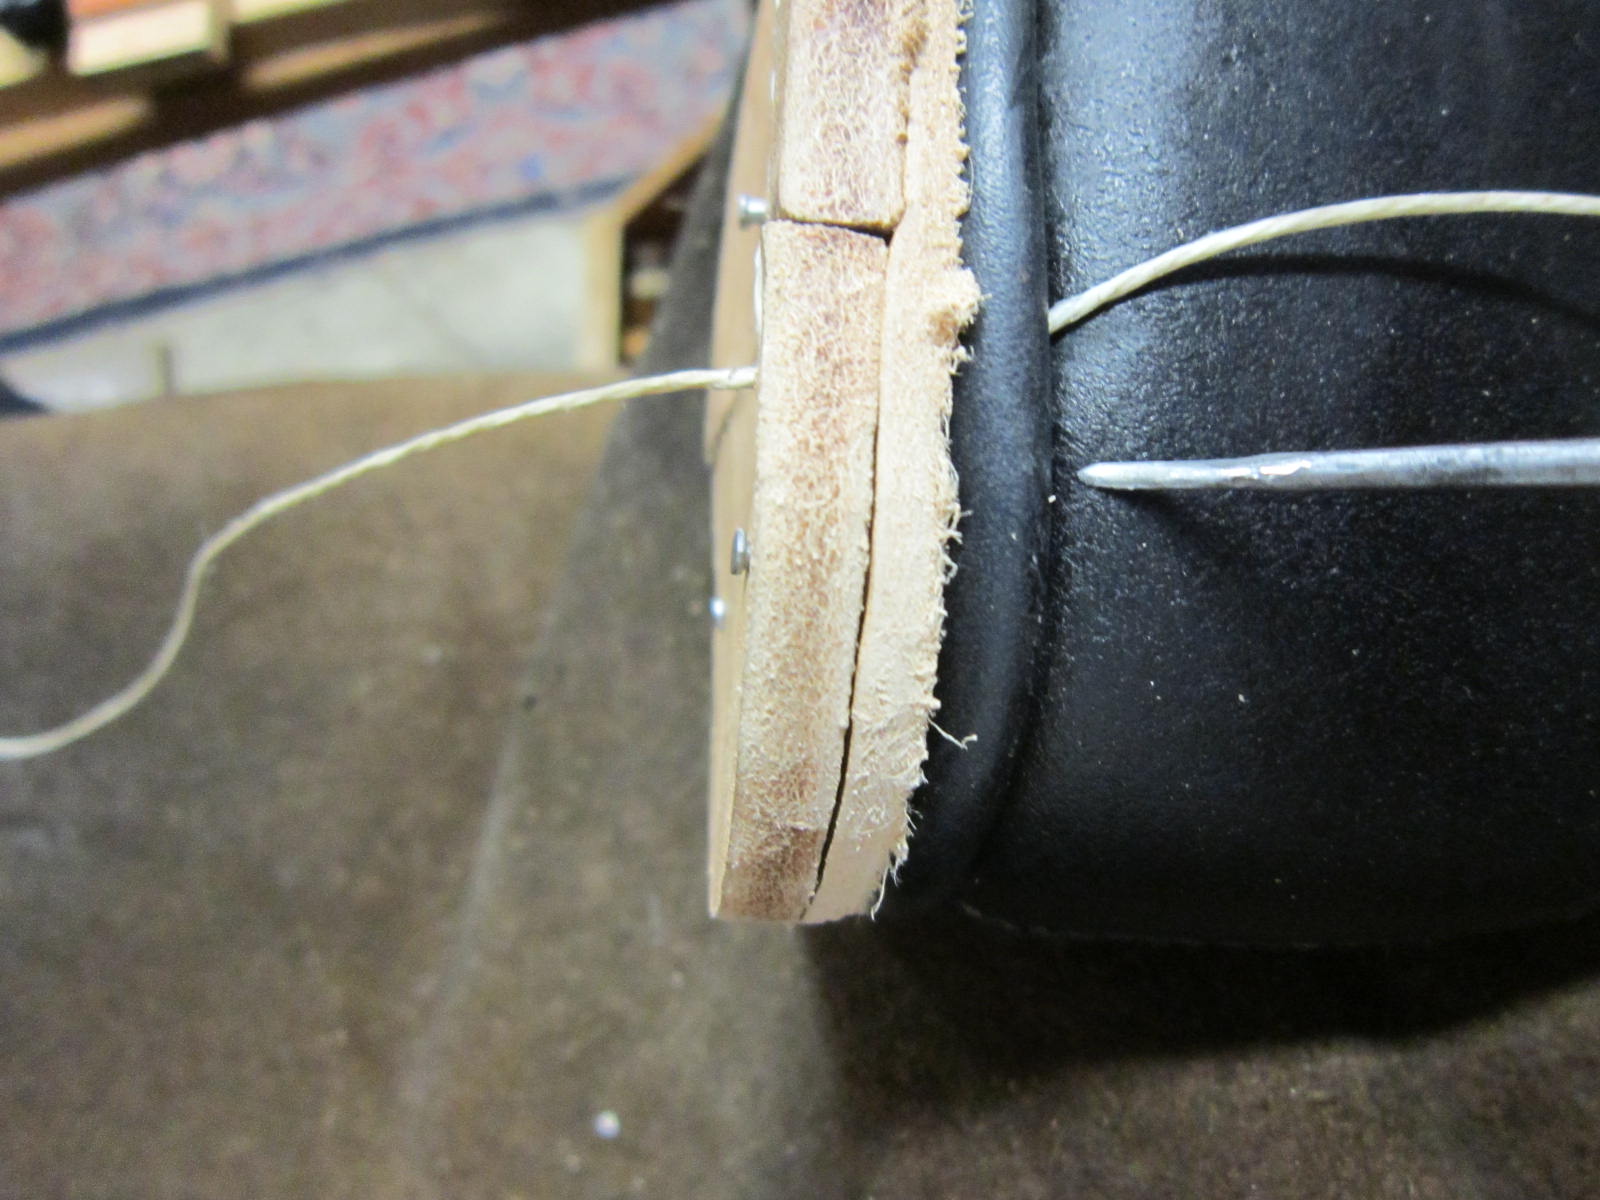
Placing the awl behind the heel, making sure that you have lubricated it with your beeswax, pierce the hole through the heel rand, through the split lift, and through the outsole, stitching all the way around. Here are four shots of the piercing process.

I’ve only sewn on the extension piece, although Garsault claims that you can do two or three heel lifts at a time. Having broken one heel awl during the process, I’m content with pasting and pegging on the remaining two heel lifts.
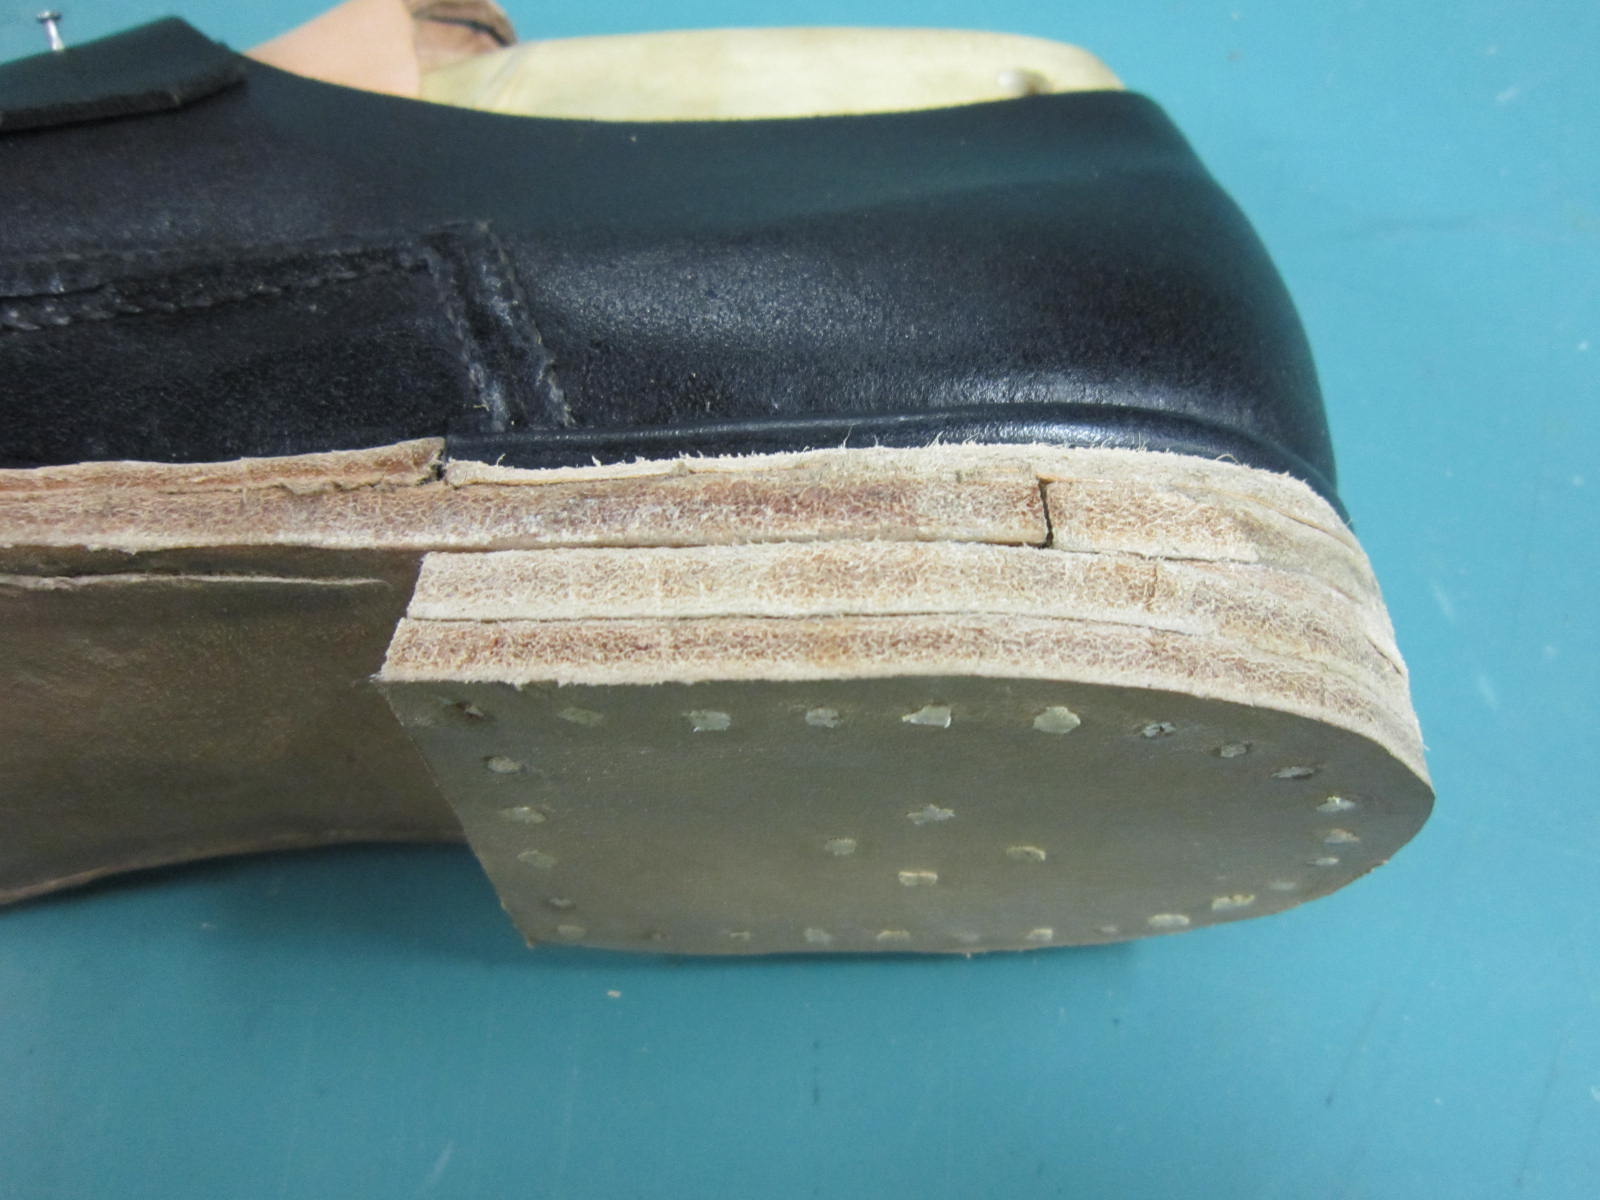
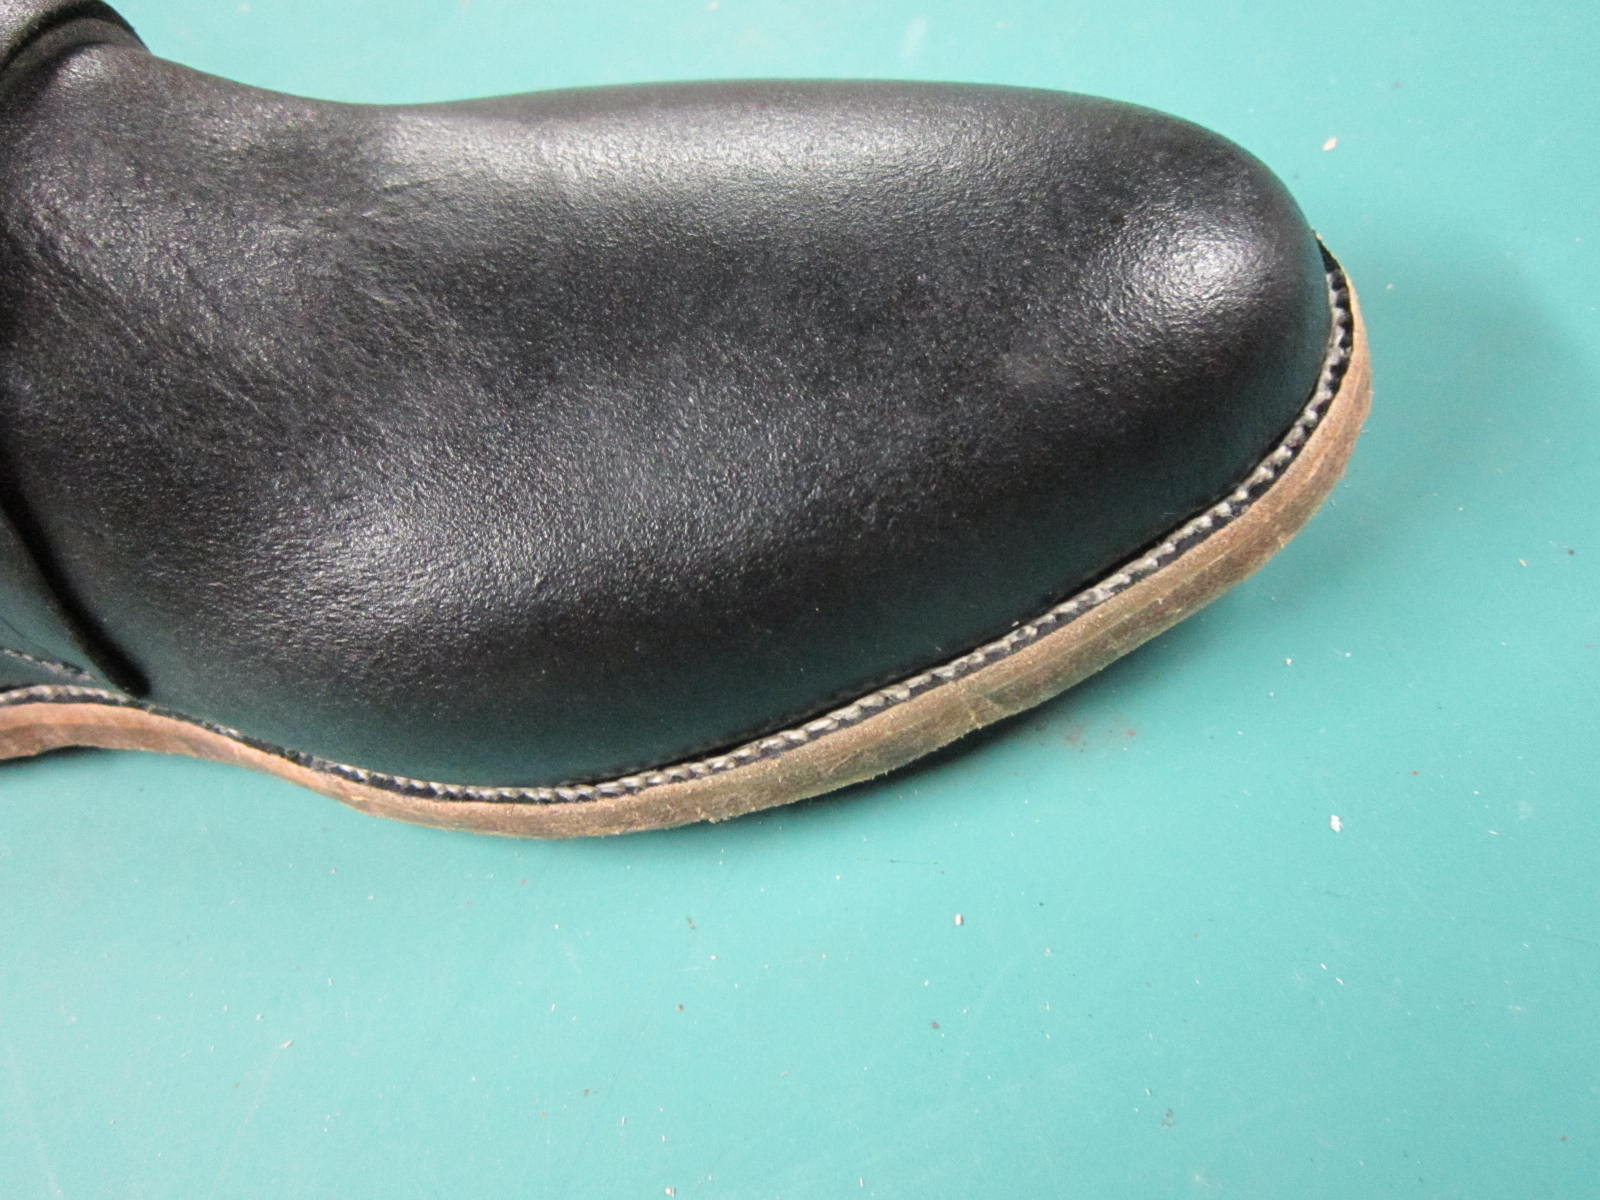
And, if all of the above wasn’t enough of a pain, now we have to spend a ton of time finishing. First, the edge is rasped all the way around to make it even with itself.
Then, the edge is glassed. The glass takes off fine layers of the outsole, until you’ve gotten a nice, smooth finish. Modernly, sandpaper is also used, but Garsault doesn’t describe that =)
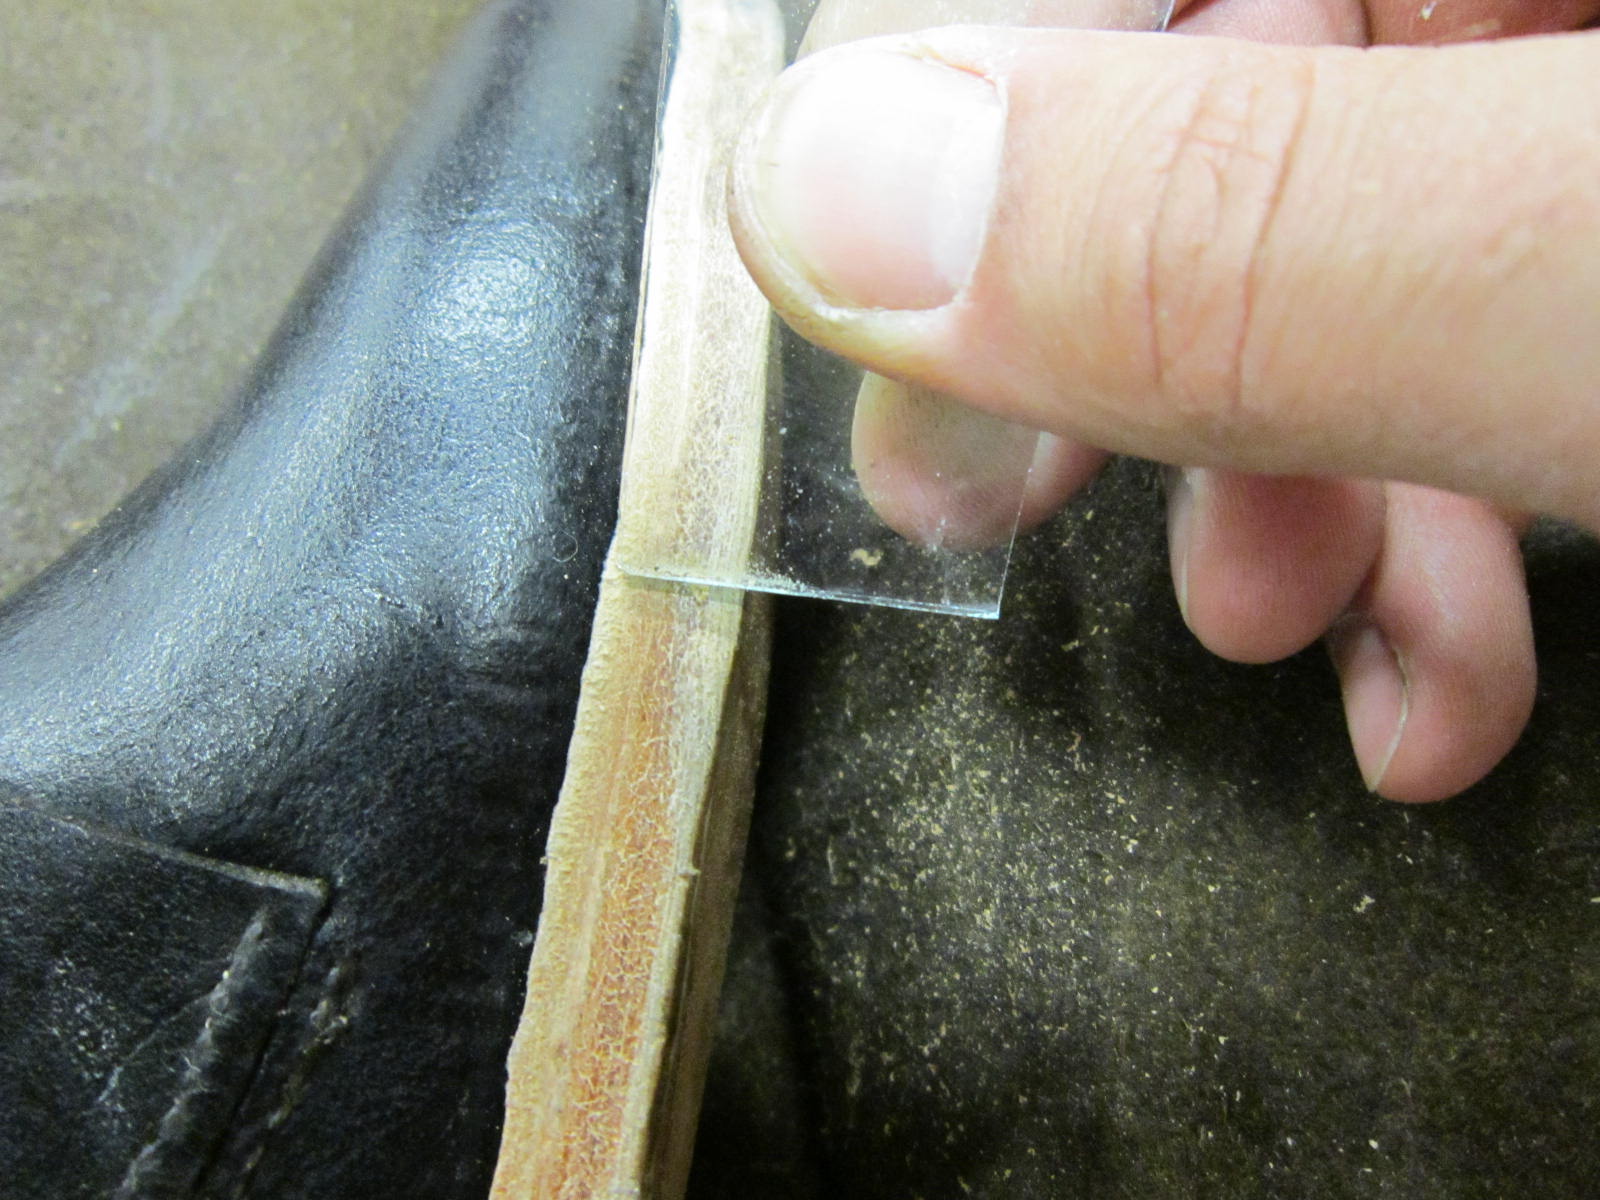
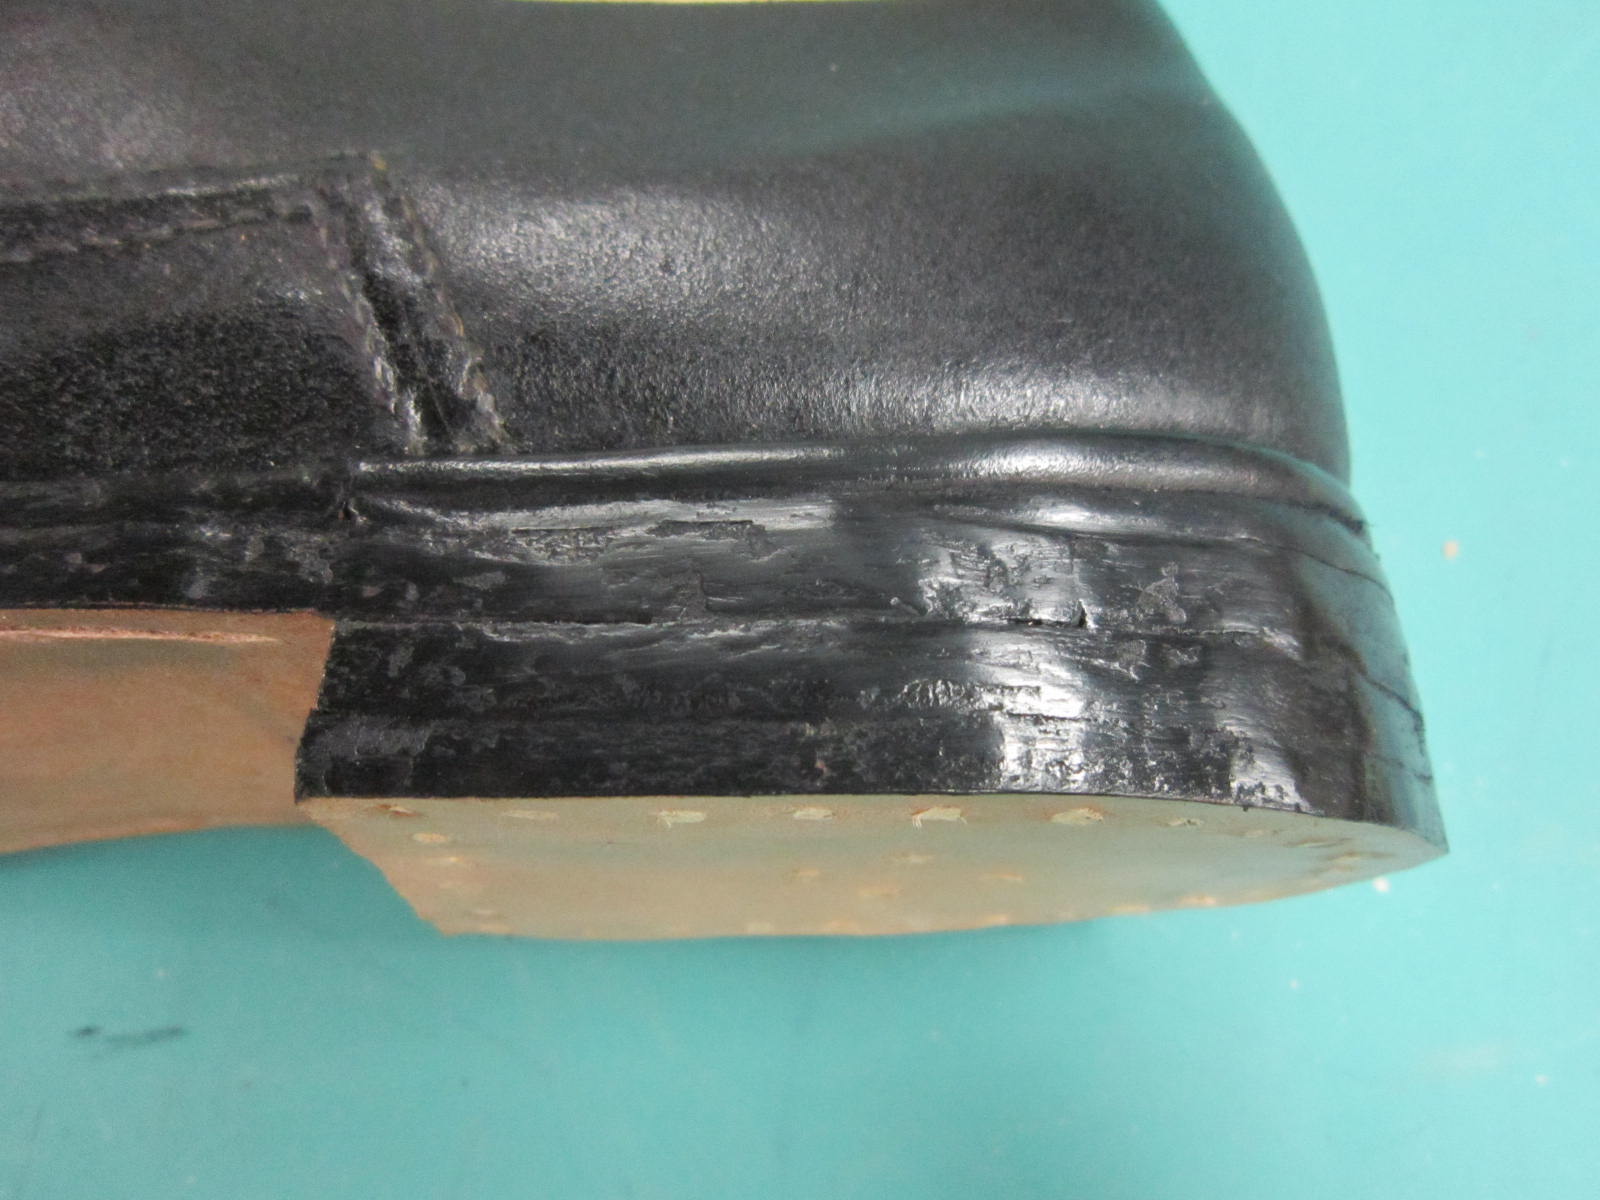
Once this is all done, the outsole edge is dyed black, and then it is waxed with a wax which has boot black impregnated into it. This gives it a nice, glossy finish when applied, and helps fill in any gaps. Unfortunately, you can see how impatient I was with my glassing, as those small pockmarks and dimples can plainly show.
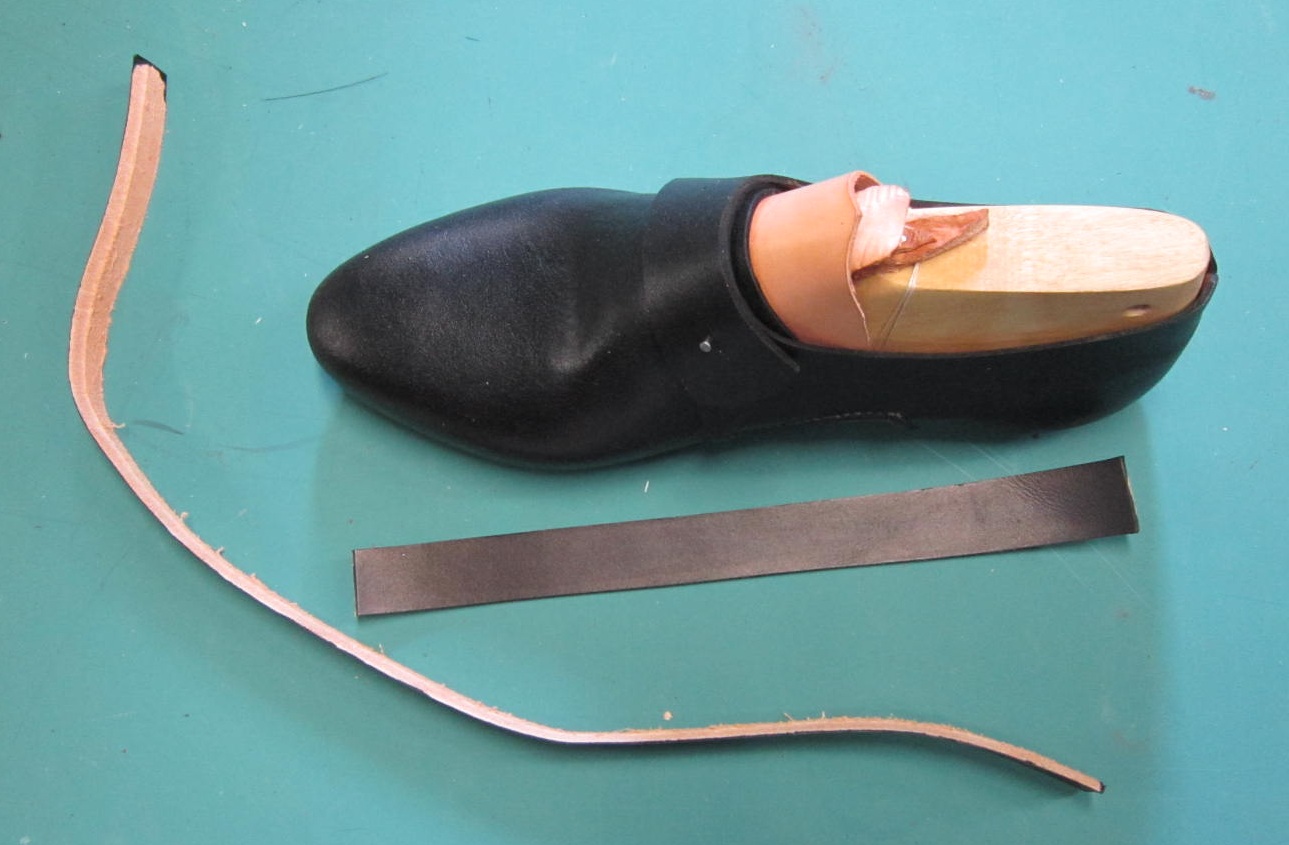
Lest you think that we’re completely done, there is one more step to do. After untying the shover and slipping the last out (be gentle with this process!), Garsault describes the sewing on of a shiny piece of black calf onto the tongue to extend it a little. Why the vamp pattern was not simply extended is not clear to me, although the indication is that this is a special piece of calf, perhaps a smoother one to help slide the foot in. No matter, Garsault says, so we follow:
After this extension, and crossing your fingers, the shoes are tried on. Miracle of miracles, they do fit, and now we can paste in a wool sock (not strictly necessary, but I like doing it). You can see the tacked in heel stiffener here. Then, we punch some holes and attach these amazing 18th century paste buckles (yes, they are actually 18th century antiques) to finish the pair off.
I admonish you, my friends, always to double-check your original material before you start. Refresh your memory on stitch pitches, construction, and the like before you start, so that you produce the best results possible.
Great work and an excellent description! I wish I would have thought to check your blog before going about my first try on a shoe like this, also following Garsault. Fortunately I had Al giving quite a few comments and tips 🙂
Looking forward to read more from you!
Best,
Martin
Thank you! I would definitely recommend using the blackened waxed calf that I used, since it is very nice to work with, and has a nice smooth finish on the outside. I’d even split a skin with you, if you don’t care for a whole one. =)
Cheers,
Francis
Hello,
I like your last. Where did you get it? Are they commercially available?
I was able to source these from the shoemakers at Colonial Williamsburg. They’re limited, though they may have some kicking around that they would be willing to part with.
Francis
Hi there,
Could I ask where you get your sole stitching awl blades from please?!
many thanks – great blog!
Thanks very much! Are you referring to the square awl blade contained here: http://www.raisedheels.com/images/18thc_garsault/square_awls.jpg? I was fortunate to find a seller selling several packets of them. However, there is currently an auction ongoing if you’re keen, though it seems a bit pricey: https://www.ebay.com/itm/new-55mm-square-awl-blade-set-x-20-cobbler-shoemaker-shoemaking-leather-tools/163489195627.
Francis