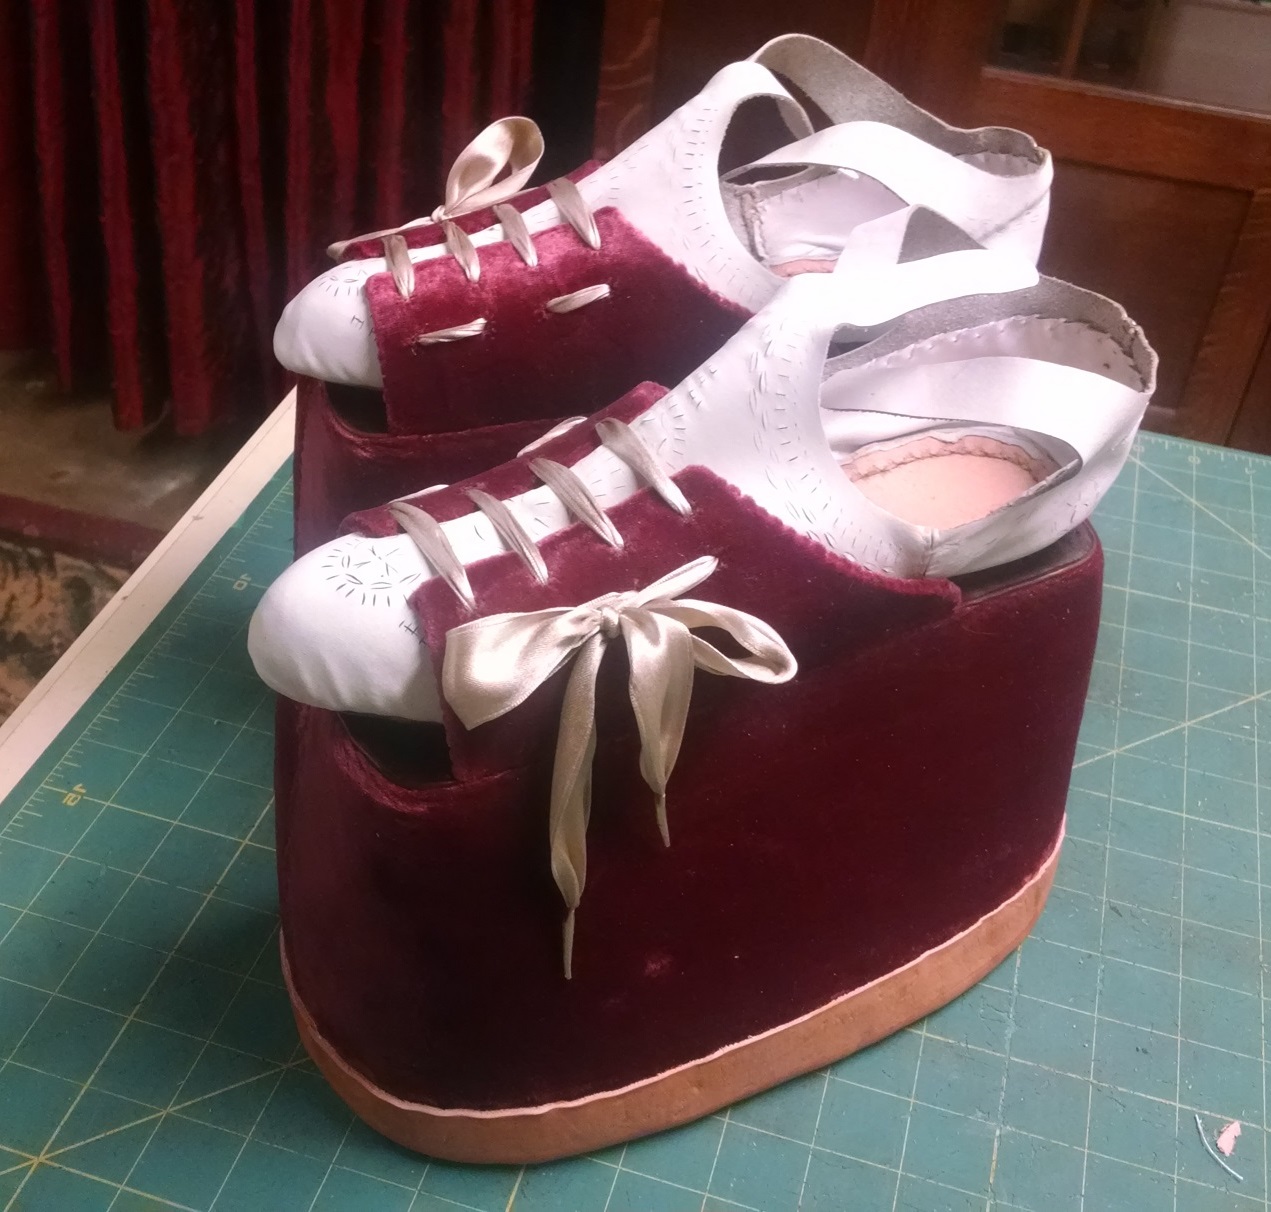
Let me start this off by saying that I’ve wanted to make a pair of these chopines for a long time. However, the construction (and the outsole in particular) has daunted me so, not to mention that I’ve never had a request, so they remained on the list to tackle at some point. Leave it to Amanda L.P. to give me one heck of a challenge. The shoes are just a simple pair of turn-shoes, although sewing such lightweight leather proved more of a challenge than expected. The chopines are bulk cork, surrounded with velvet and with silk ribbons for laces.
This pair took longer than expected, through trials and tribulations, through sewing and re-sewing (none of which you will see here, of course!), and with some helpful hand-holding by Dr. Volken. In the end, I can say that I’m reasonably pleased with these, though if you squint your eyes, they do look a bit like a pair of shoes that a bad movie rendition of Frankenstein’s monster might have worn, all dolled up with velvet and silk, of course…perhaps his bride. 😉


You simply have to see how these things were created. Grab some coffee, tea, or a cocktail, and follow along with me, as I give you the whole story.
Let’s start off with the shoes themselves. They were constructed using turn-shoe methodology, and the technique has been described elsewhere in this blog. You can see here for yourself two inspiration examples, the first from the Germanisches National Museum Nurnberg, Inventory number T44 and the second from the Staatliche Kunstsammlungen Dresden, inventory number 0305.
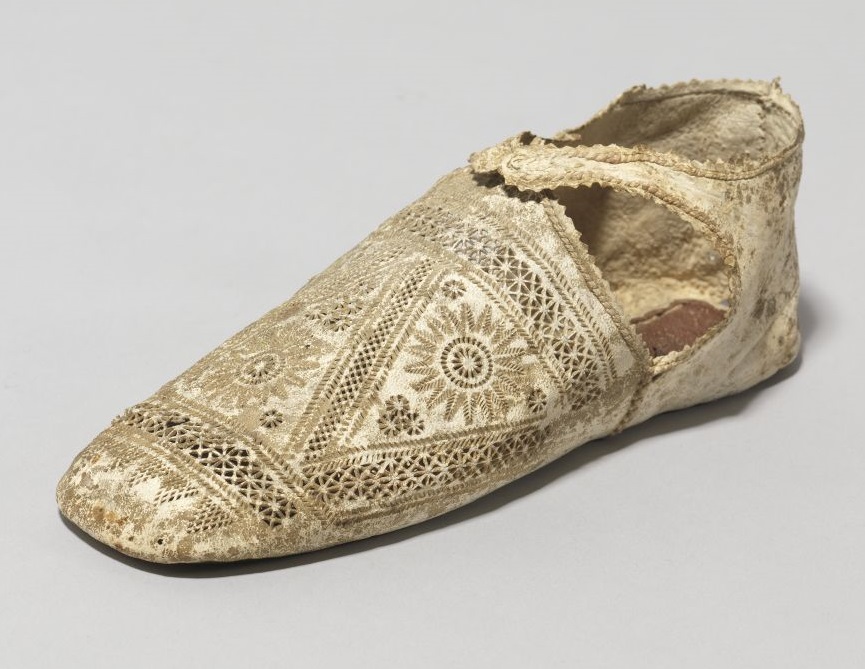
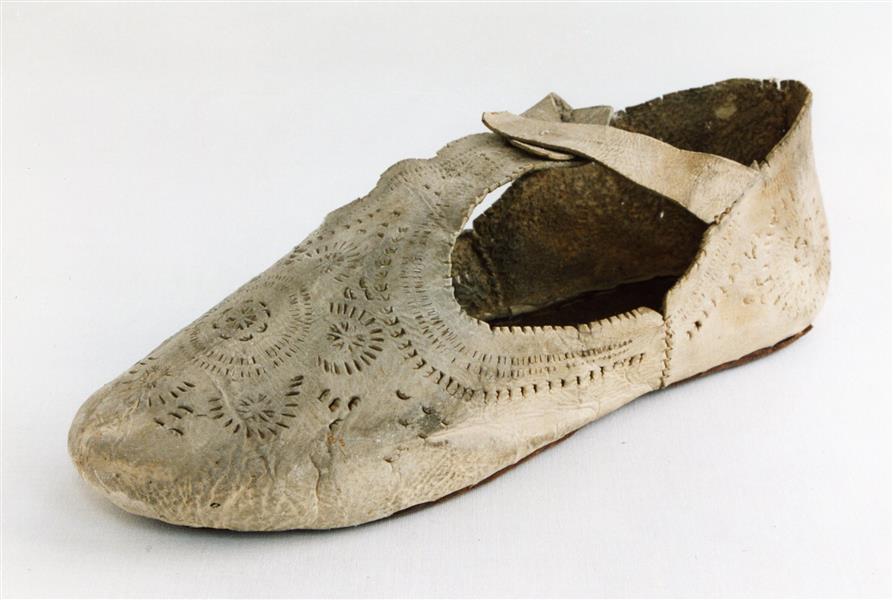
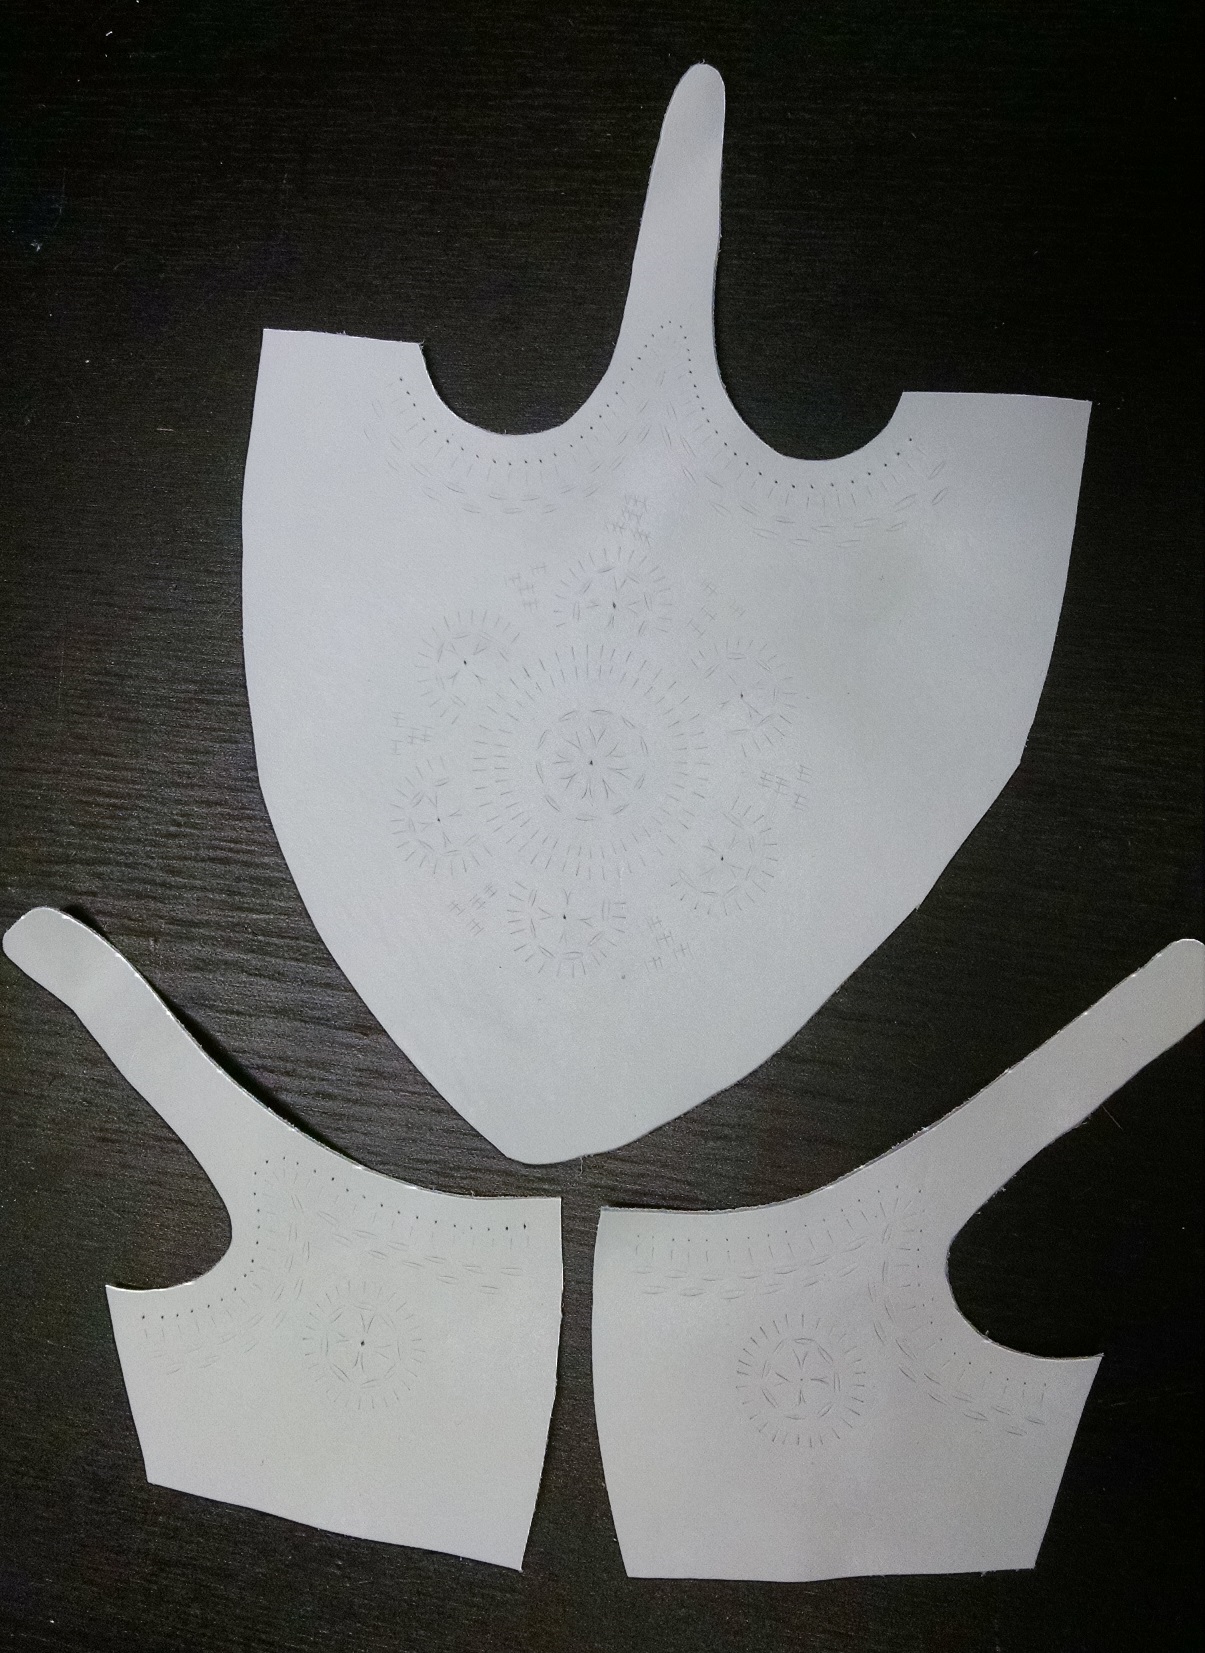
The pinking and punchwork pattern was a combined effort design, and involved little scores, punches, and zigzags, in a typical pattern for this later period 16th century shoe.
The shoes were closed, but considering the weight of the leather, I whipped in a heel stiffener and a toe stiffener, to ensure a greater longevity. The extant pieces were likely made with alum-tawed calf, which was more robust than the leather used here. I was uncertain of the origin of the tanning, but though it seemed to be chrome-tanned, it seemed to have several qualities of alum-tawed leather in that it did not have the typical “white-blue” sheen that most white alum-tawed leathers can take on.
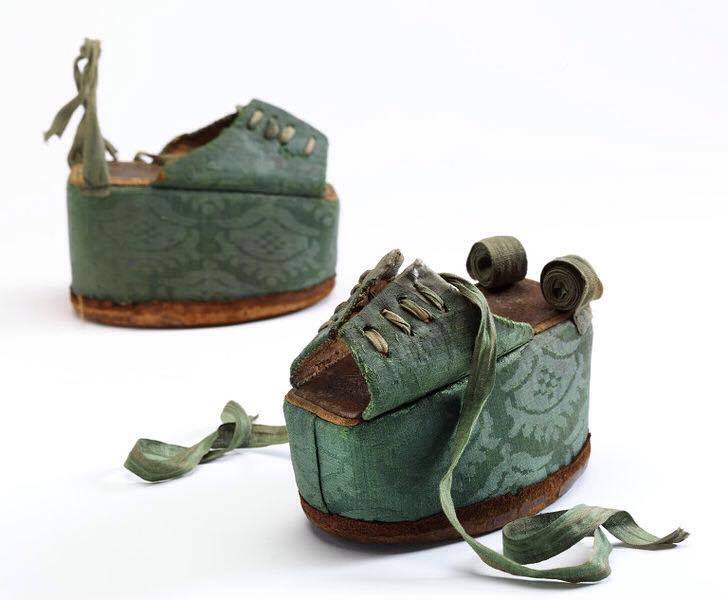
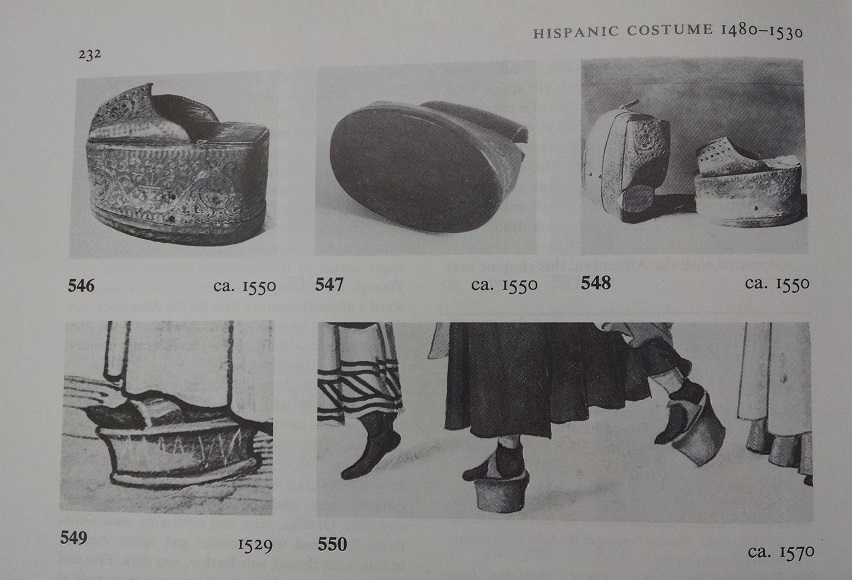
For the chopines themselves, these are based on an extant pair from the V&A Museum. They look like typical mid-late 16th century Spanish chopines, except for the laces at the back of each chopine. I’m unaware of any lacing strips or cords in any pictorial or extant pieces save these, so I suspect they might be a later addition. Moreover, the lacing technique does not seem consistent with the pictorial or extant evidence, or that described in “Hispanic Costume 1480-1530” by Anderson, which is an excellent source.
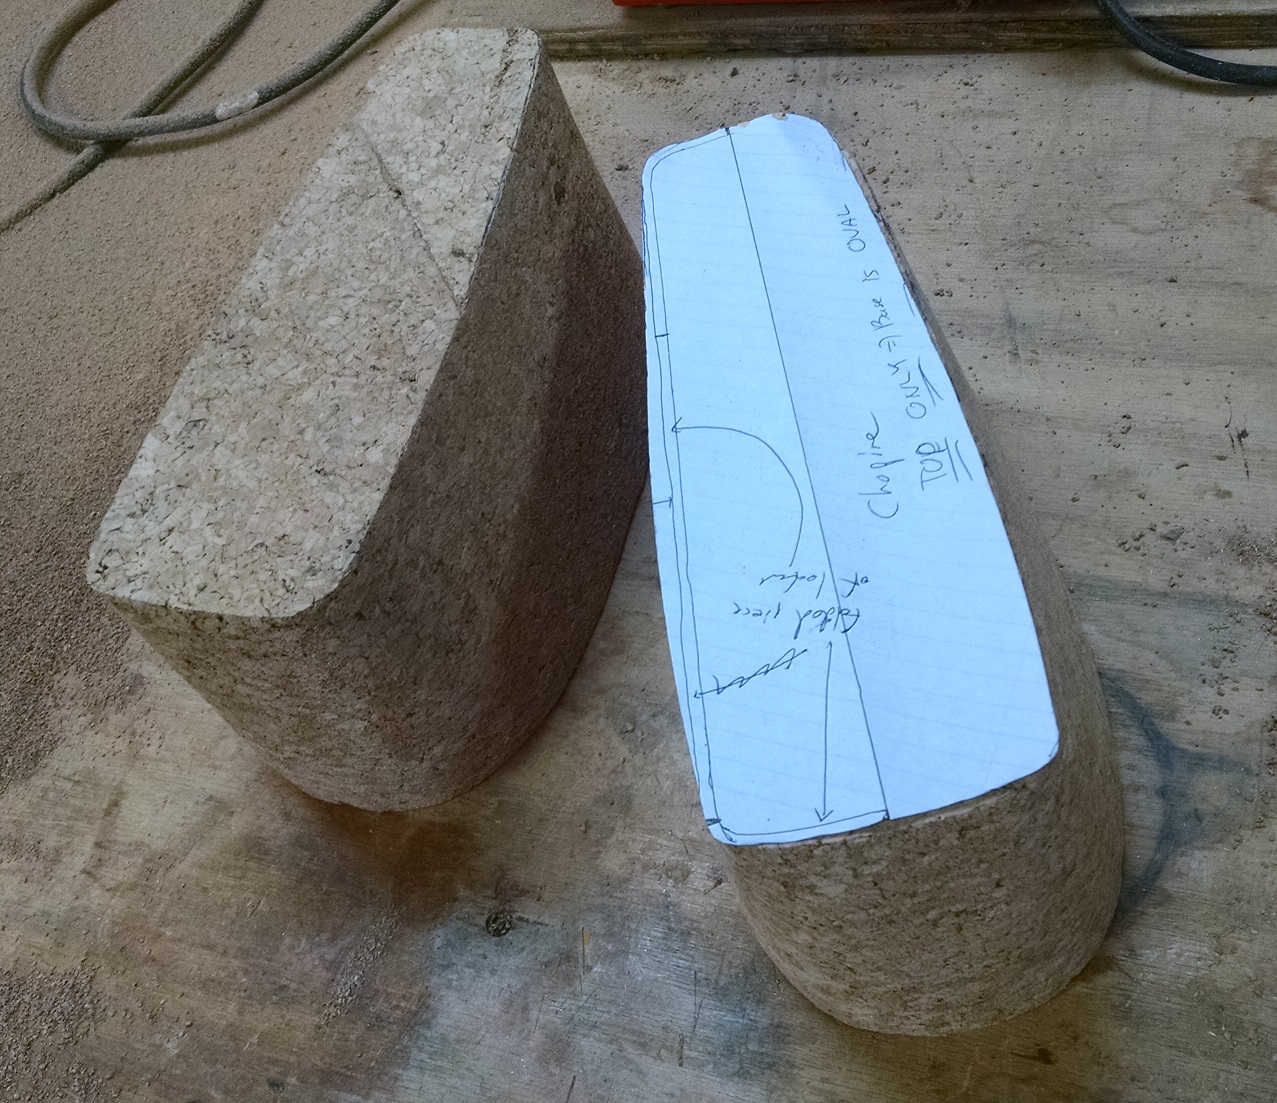
There was a great deal of work involved in attempting to get the scaling correct, as well as make the base of the cork core as round as possible without making them too wide. In period, cork layers would have been pinned together with wood or reed slivers, as shown at the bottom of this page. With the accessibility of bulk cork, the last pieces from my original Lesson 1, it is a matter of sanding and grinding to achieve the proper shape. Looks like it took me just over ten years to go through that huge chunk of cork I purchased over ten years ago!
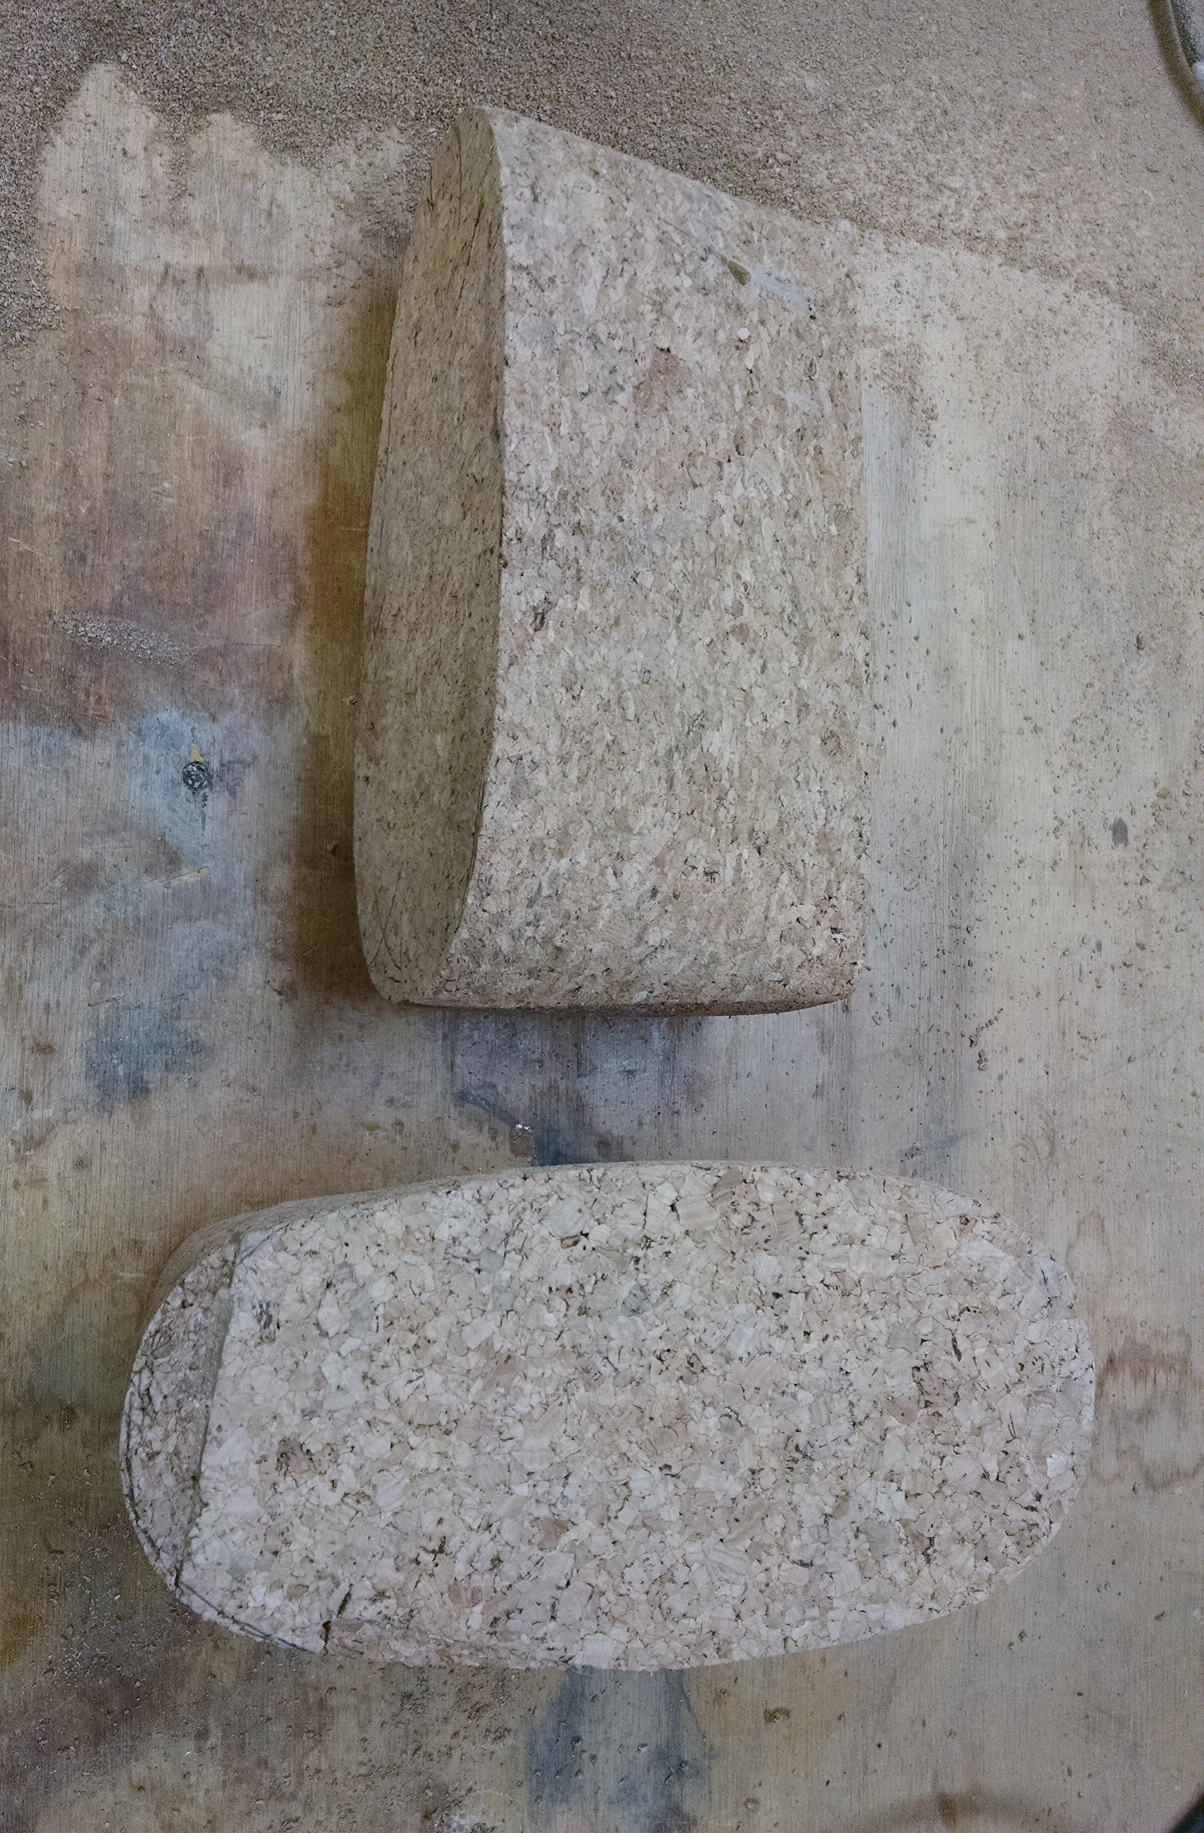
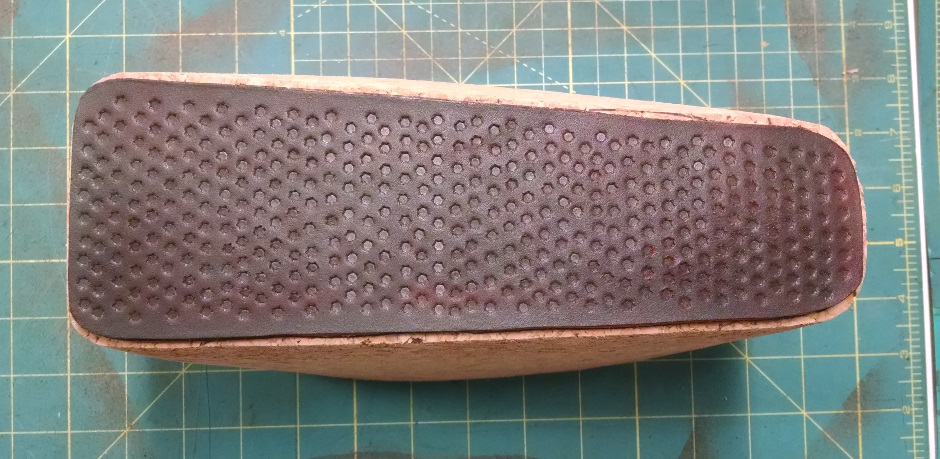
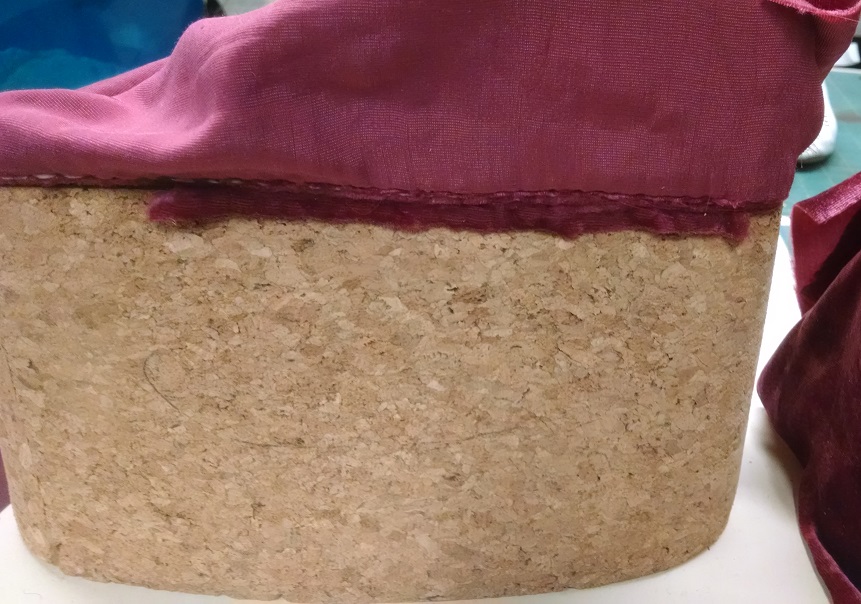
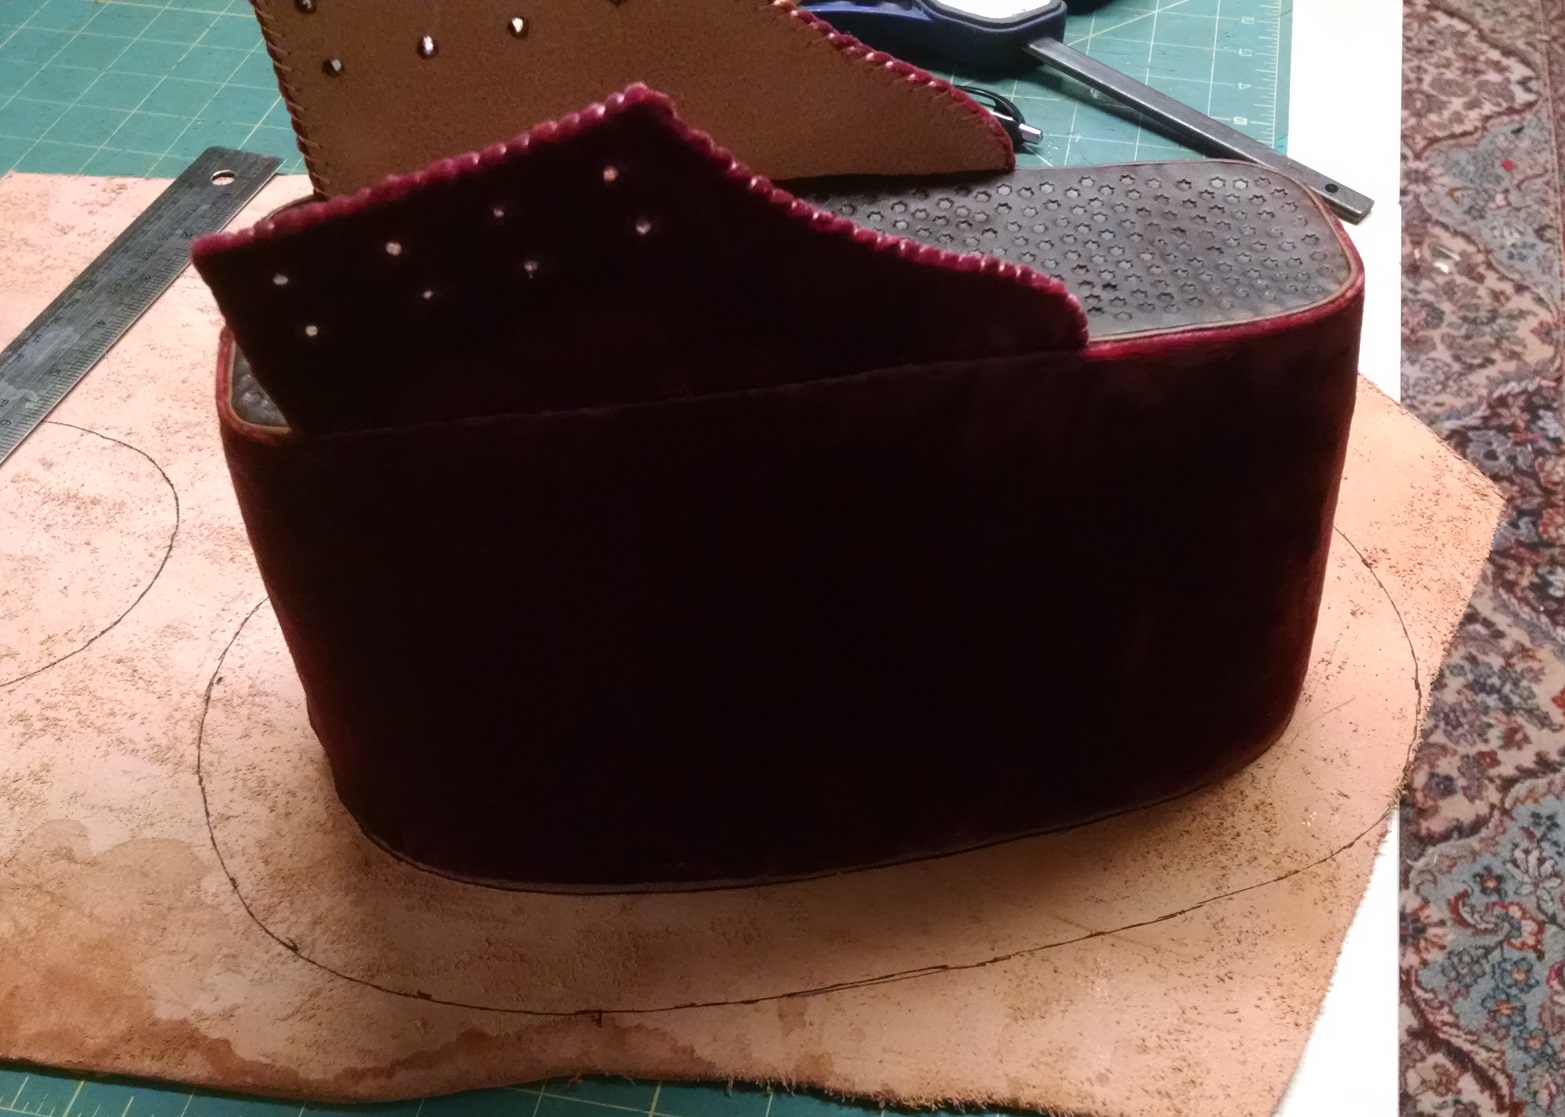
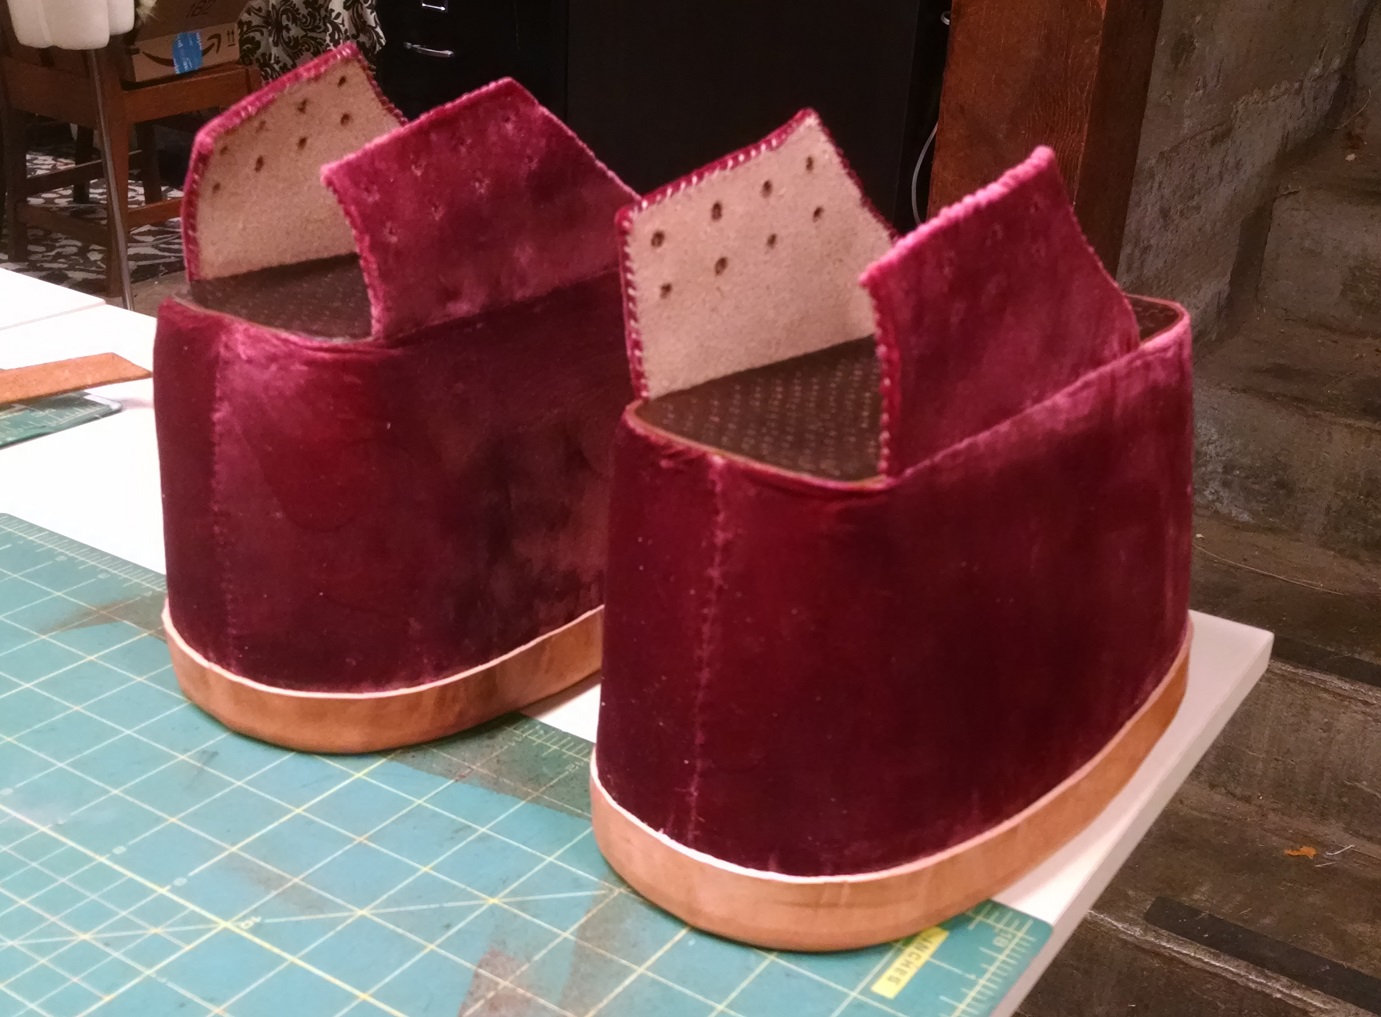
This shot does a better job of showing the base of the core of the chopines. Although extant pieces to tend to have a much rounder sides, practicality took over in this instance, and I made them narrower than in period (period pieces shown from Anderson as well).
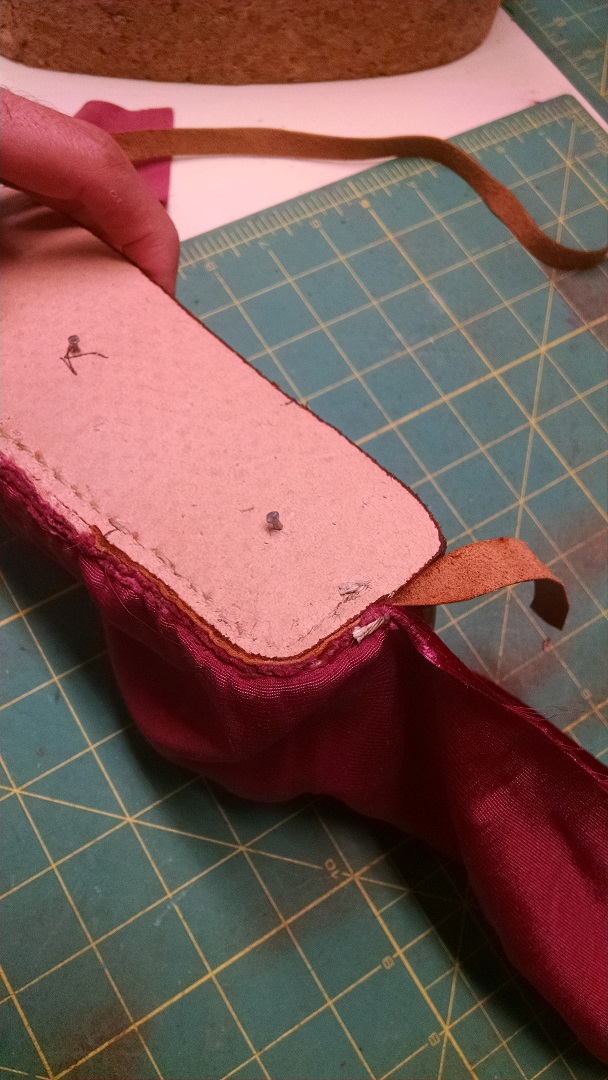
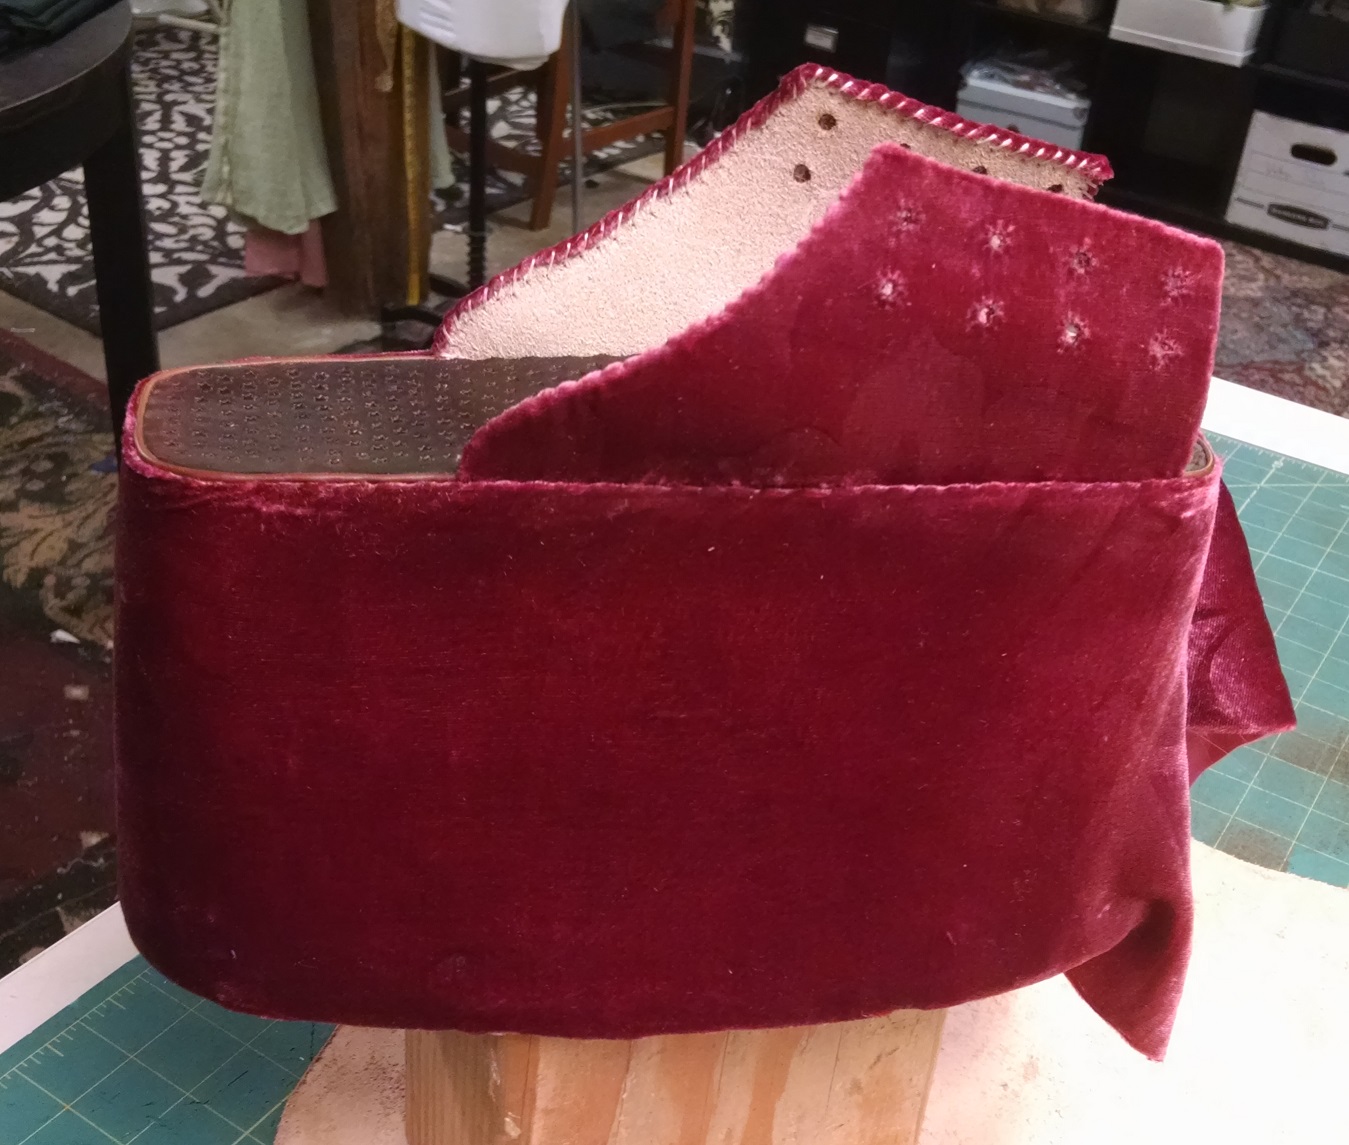
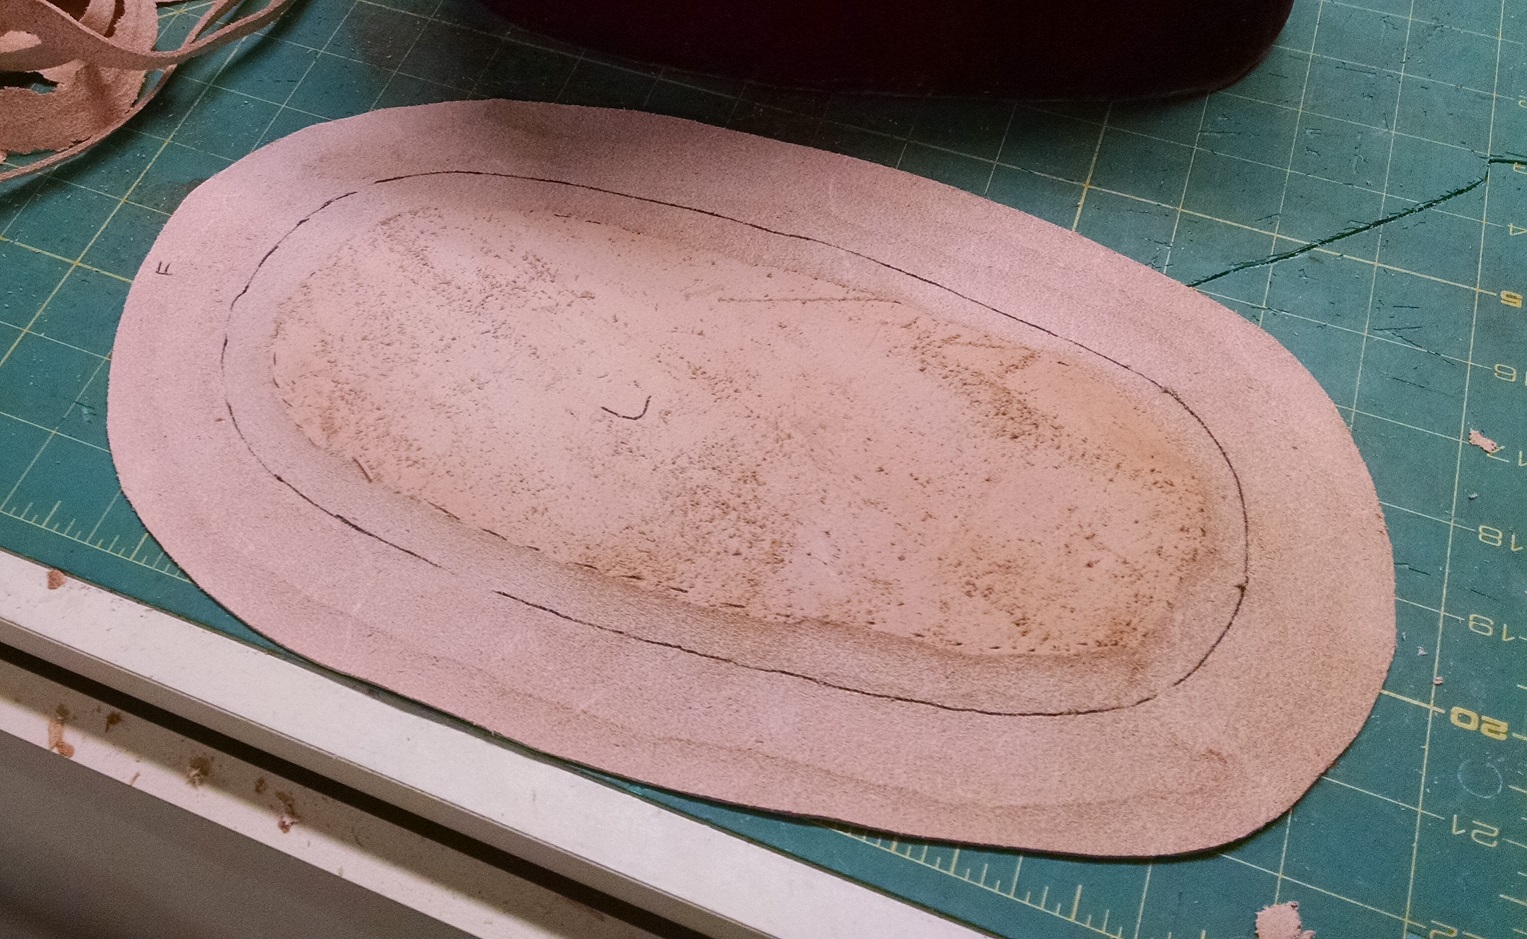
Once sanded to perfection, the insole can be cut, dyed, and tooled. In this case, a simple star punch was used to pattern the insole and give some texture. Note that there is a border of space all around the insole.
This is important for two reasons. First, we want the vamp to line up perfectly with the outside of the cork.

Secondly, you will notice that there is a folded strip of leather on the extant piece in between the outside surround of velvet and the insole. This takes up the extra “space” that the vamp adds in.
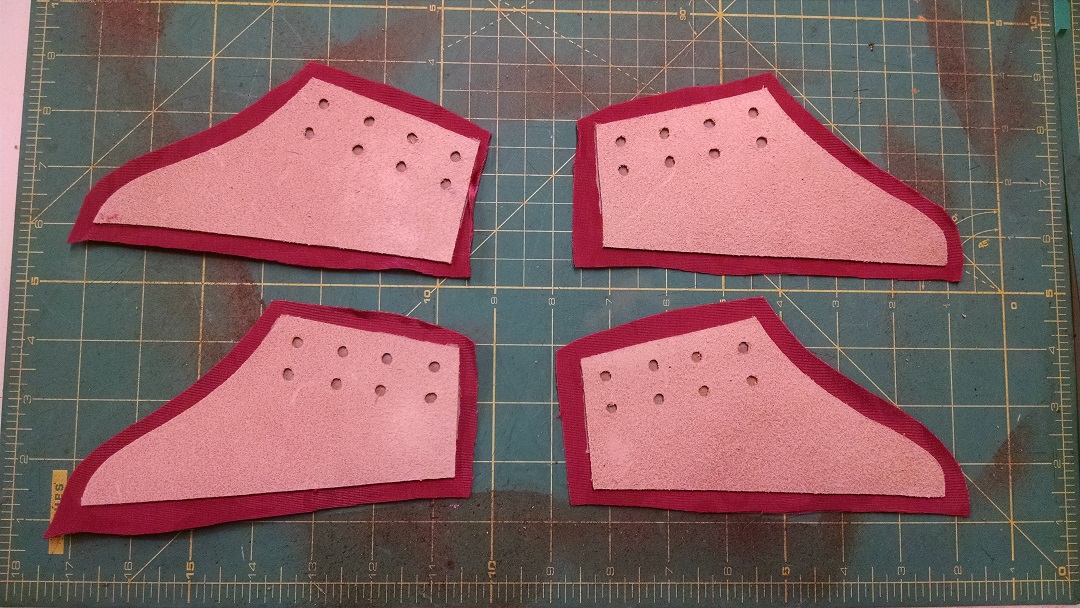
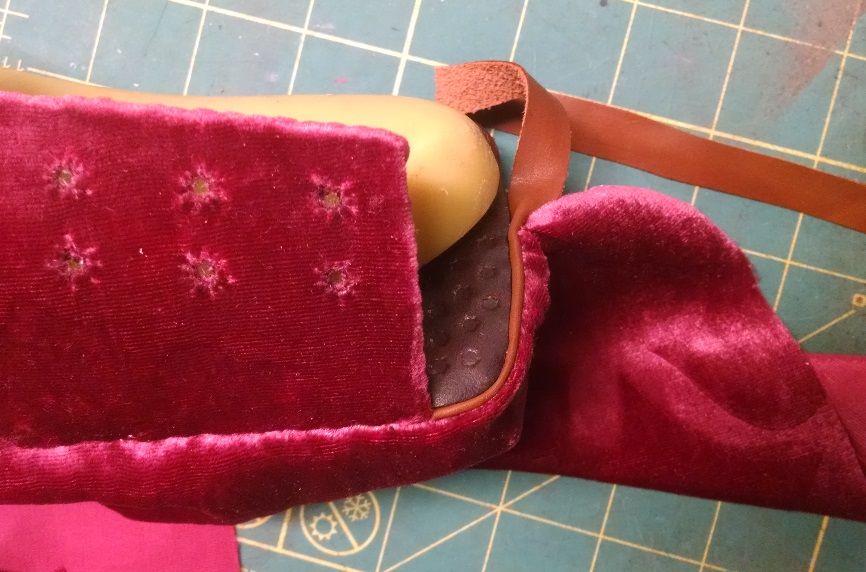
Now we cut out the velvet for the vamp itself. The holes are already punched, in a typical manner with two sets of holes, as was commonly done for many Spanish chopines. Note that the velvet is bigger all around, in order to be able to tack it down to the leather. A point of warning!! Be sure to use the same orientation of the velvet for all pieces, as well as for the dress that is being matched. Because velvet often has a pile, if a different orientation is used, then different pieces will look different from each other, and you will have to pull it apart and re-do it (again).
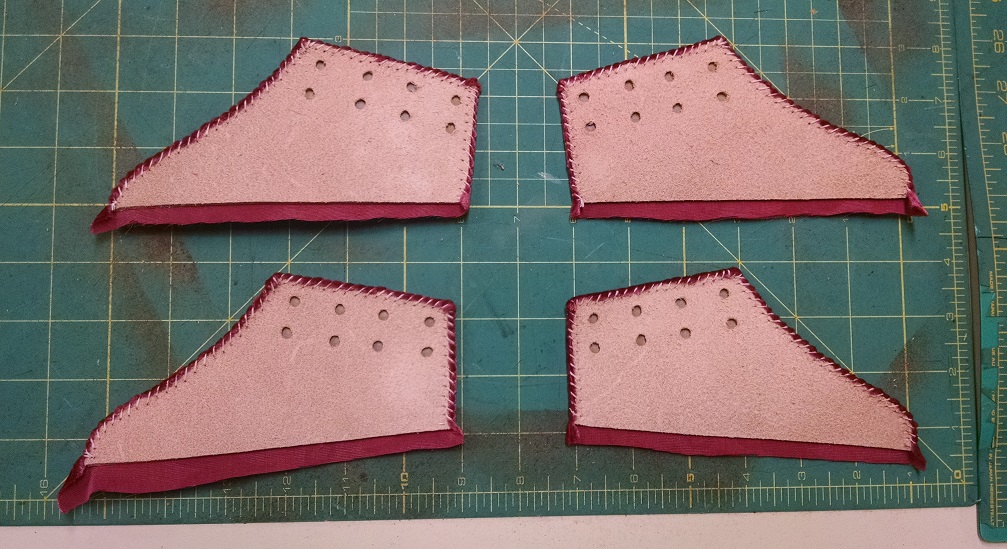
A simple whip tacks down the velvet to the leather, and then the eyelets can be made in the space of the holes. Note that there is still some velvet hanging down from the outside – this is very important, as it provides reinforcement for the chopines on the outside (which will become apparent shortly).
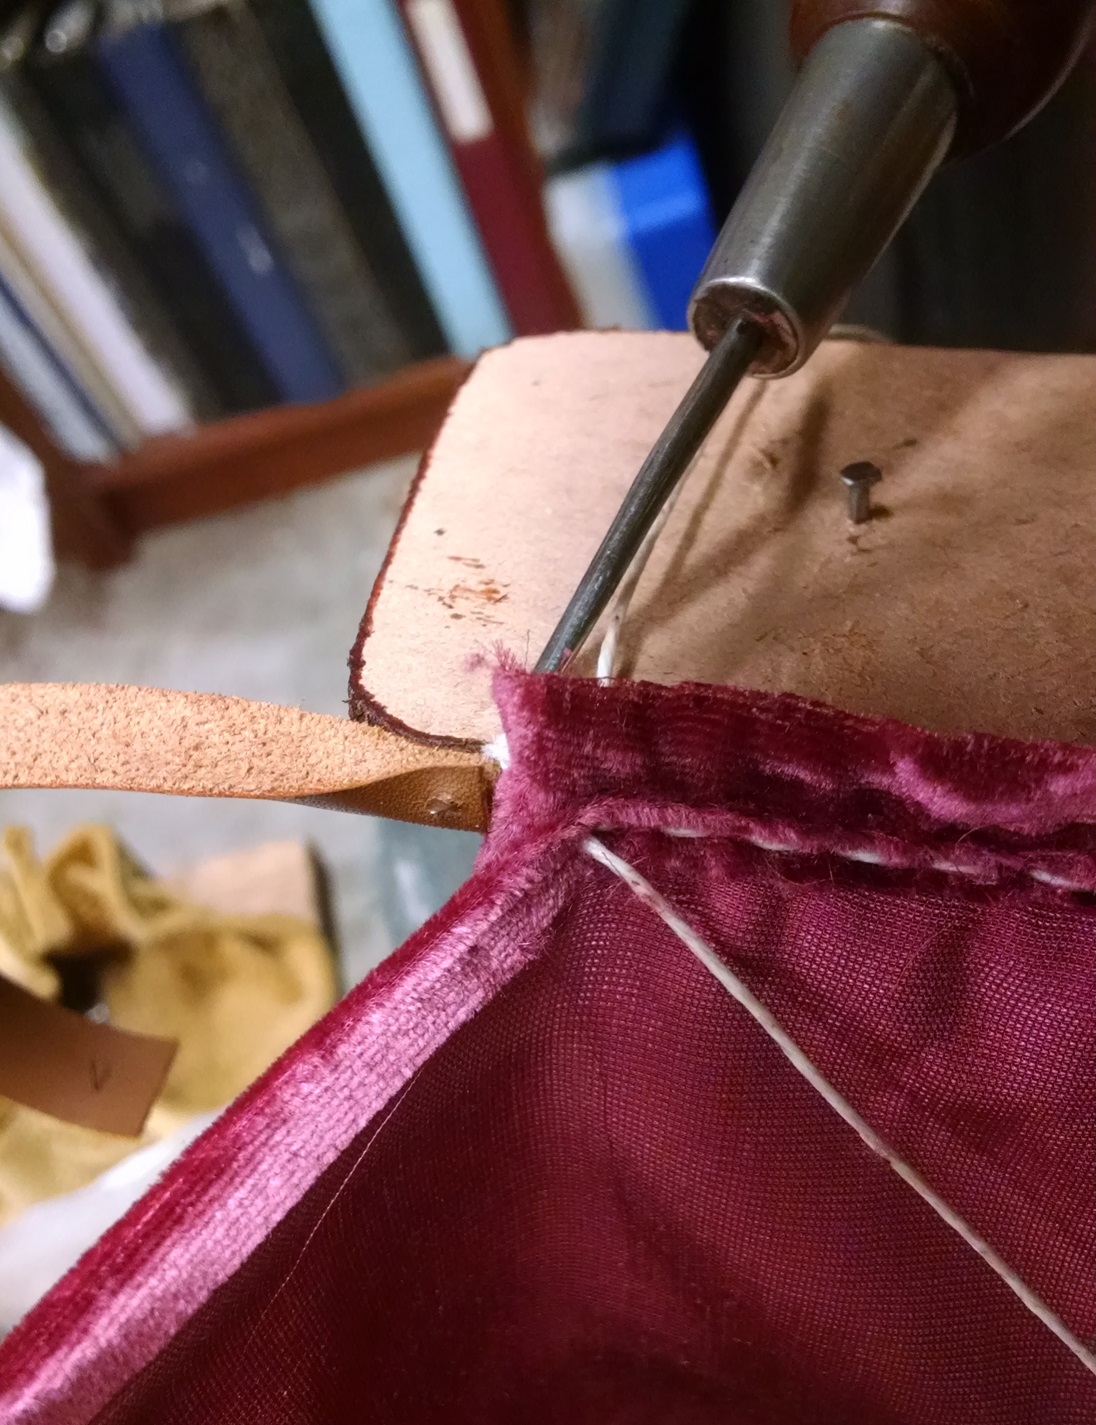
With the eyelets done and the velvet tacked down, we can now begin stitching the surround velvet to the insole. When you cut this velvet, please note the orientation issue above, as well as to make it two inches longer on every direction than you actually need. You’ll need extra to fold under and sew down at the front, not to mention fold under the base of the chopine. Note the folded leather strip in between the velvet surround and the insole.
A close-up of sewing the folded welt to the insole and surround.
The surround is half-way done. You must stop at the front center, since that is where the seam is, and that is where the velvet will meet to be sewn together.
With the velvet surround all sewn down, we can now paste the insole to the cork. I use Hirschkleber paste, an excellent strong paste which also happens to be water soluble.
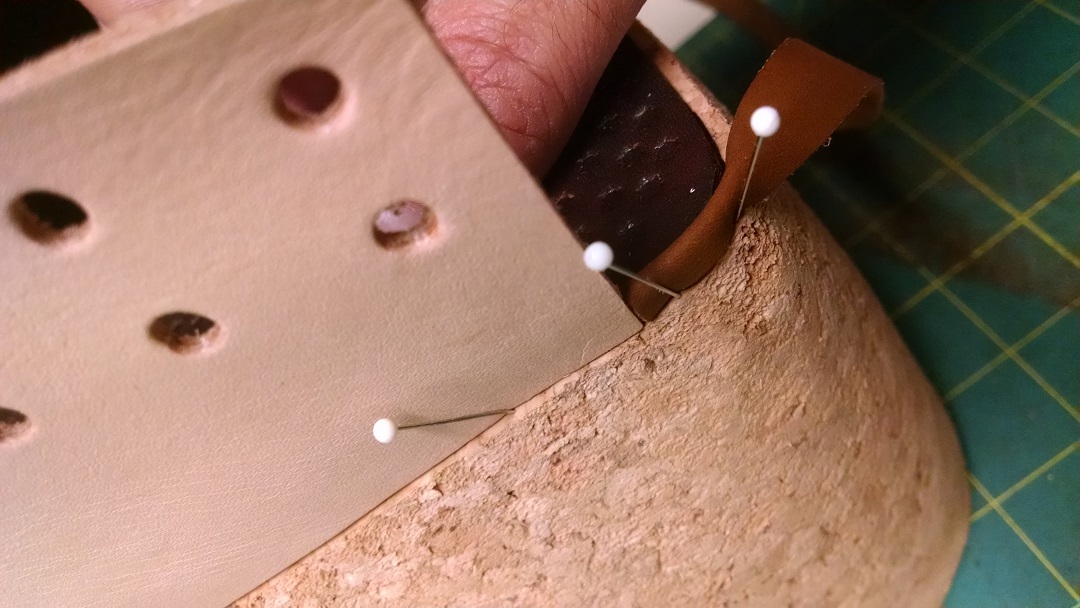
Remember that extra velvet length that I talked about which hung down from the bottom of the vamp? You can see it in the image above also. Well, this is where you use it. First, you paste it to the cork block. In truth, I probably ought to have made it a bit longer, but this will suffice. Then, you will peg it to the cork. This has the benefit of reinforcing the vamp itself. Extant pieces often have the vamp pegged to the sides of the base to give additional reinforcement. I felt that the leather I used for the vamp was too thick to peg both, so I just pegged the velvet.
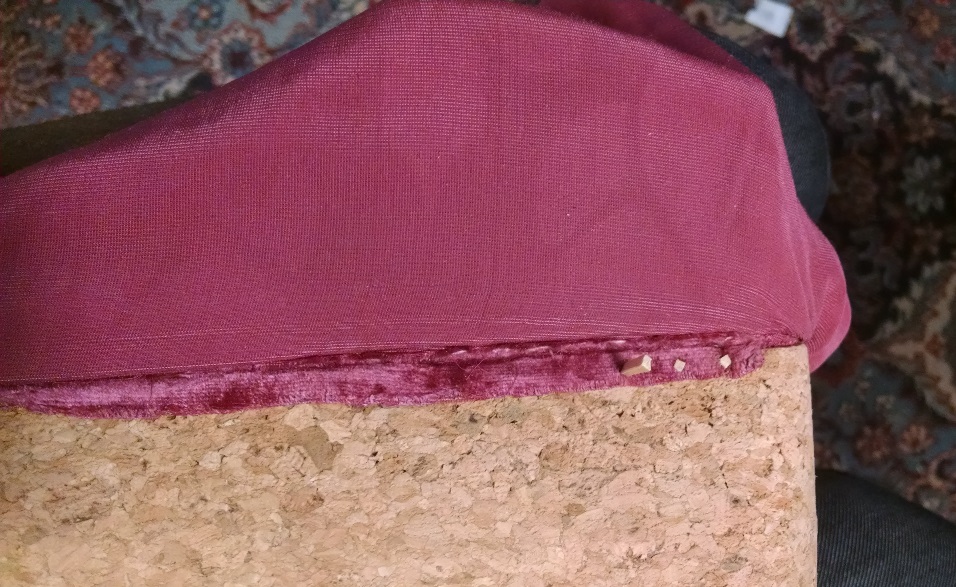
Once pegged, we are now ready to paste the surround velvet to the cork base. There are a lot of learning opportunities here. First, you will not want to paste the front of the chopine, since you’ll need to tuck under the excess velvet to sew it together. Second, don’t just glop on a bunch of paste onto the cork block. I’ll say it again – don’t simply glob on a bunch of paste to the cork block. When you press the velvet to the base, the paste will seep through the ground of the velvet and stick the pile together, ruining your work. You will curse, swear, tear your hair in despair, and then finally cut off the velvet surround and do it again. And then again, because you got the orientation wrong. Again.
Anyhow, apply paste to the base of the cork, and then with a rag, spread out the paste evenly on the cork base. This will give you a very thin layer of paste that will not seep through the velvet. Try not to get any paste on your fingers, or the same problem will happen – the paste will stick the pile together, and it will look imperfect. Additionally, do not press so strongly on the velvet that it forces paste through the ground of the velvet, again, ruining your work.
After effort, and pain, tugging, and suffering, you will finally get the surround firmly around the cork base. You can see the extra flaps at the front which we will tuck under to sew together, as was done in the extant piece.
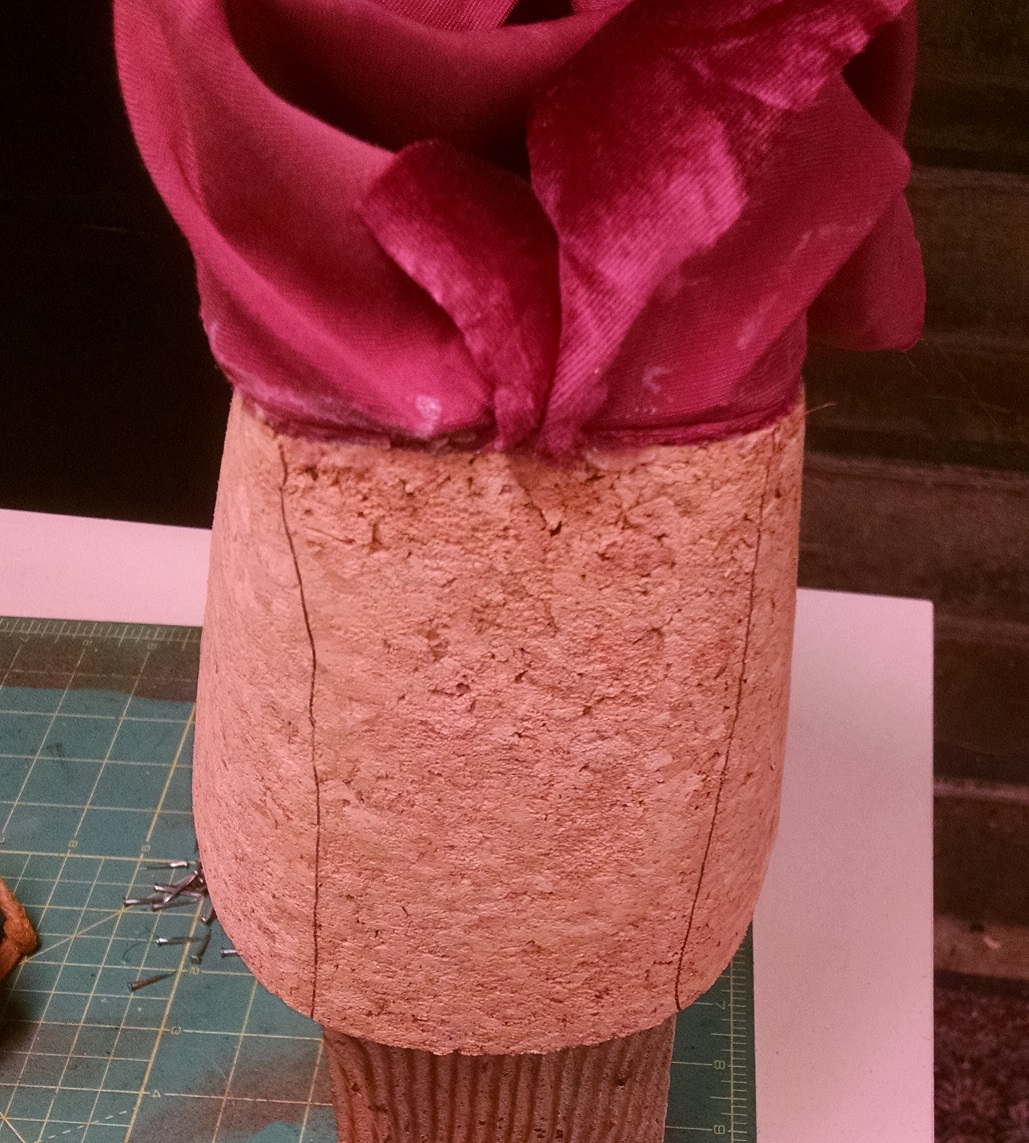
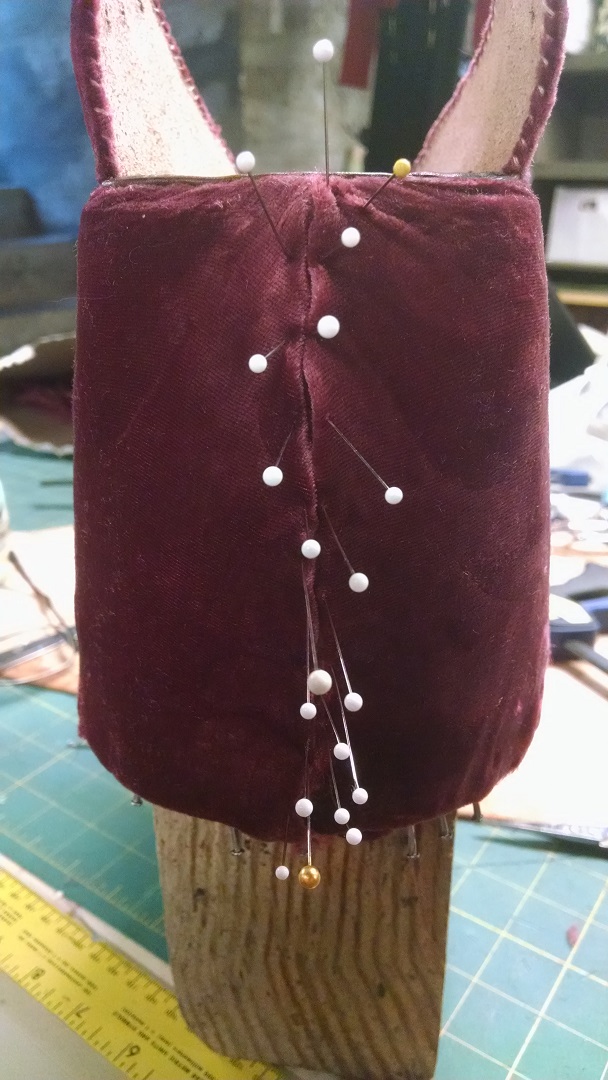
This part was far trickier than expected, but be patient, keep working at it, and you will get a reasonably straight seam down the front. Tack them together with some thread using a whip stitch, and the base is now covered and surrounded by velvet.
Now, the part we are all dreading. Or, at least, I was. If you examine the extant pieces, the leather outsole is folded up perfectly all around the round core of the chopine. No folds, no nicks are readily apparent in the work. Now, vegetable-tanned leather can be quite flexible when damp, and it lends itself very well to being manipulated while wet. Consider leather masks, as an example – a flat piece of leather is molded and formed to make long noses or huge eyebrows. In the same way, the use of wet vegetable-tanned leather can help us here.
First, we’ll cut the outsole larger than the chopine itself, by about an inch. Too much, and you will have a large amount of bunched up leather. Too little, and it won’t look right.
Next, we need to pare down the leather not just at the edge where it meets the corner of the cork base, but inwards a bit to allow for the flexibility to bend up. Don’t make it paper thin, but it needs to be maybe ten sheets of paper thin. Be careful – you don’t want to waste that much leather!
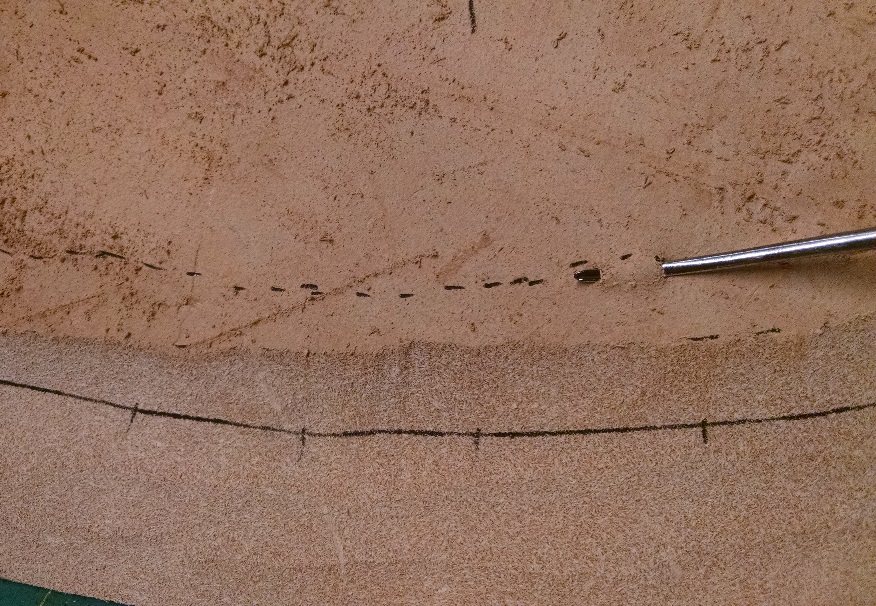
Now, we must sew the leather to the base. Since the stitching is actually covered up in the extant pieces, it’s actually not entirely clear how this ought to be done. I first attempted to stitch it in a manner consistent with 15th century corked shoes or mules – that is, a running stitch is made in the sole and the leather that overlaps the base. Then, the stitch is pulled tight, bit by bit, along with some paste, to adhere the sole to the core. First, we will piece holes part way, but not all the way, through the leather outsole.
Now, we would stitch this outsole to the surround, but in this case, that would not work, because the velvet is not really stable enough to allow for such working, and the cork will simply deteriorate when a stitch is pulled tightly through it (I know both of these from experience ;). As a result, I ended up stitching diagonally through the cork base and the velvet surround, tugging after I had gotten a large number of stitches in, as shown in the picture. However, looking at this picture again, I have no idea why I “looped” the thread around the velvet rather than simply going back through the base as is done in a typical 16th-17th century randed shoe. Hence, I have placed blue question marks over this to remind me (and help you) the next time that I make a pair of these.

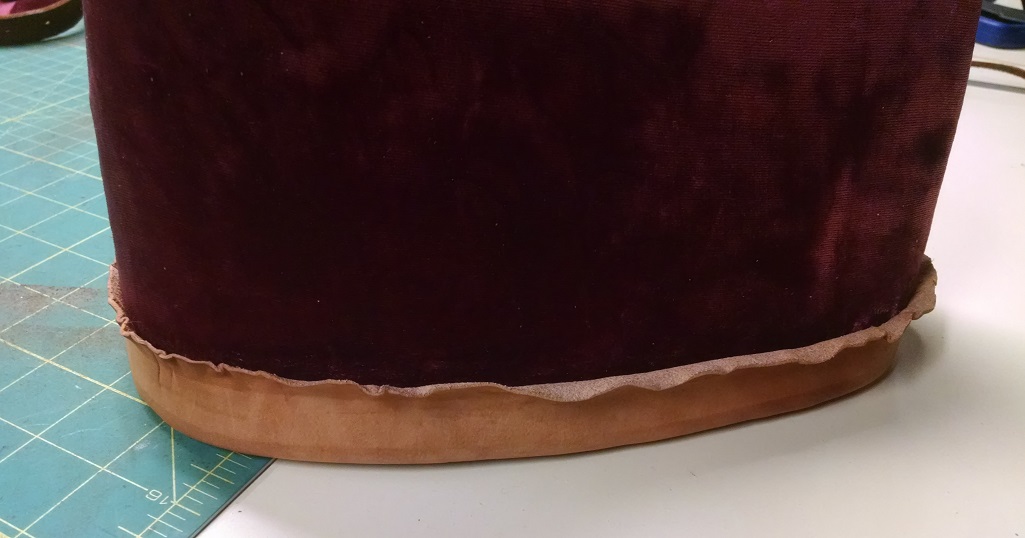
Now that the sole is both pasted and sewn on (and hopefully fully dry), we now go to the task of folding it up over the chopine. This, to me, was the most nerve-wracking part. Still, we soldier on. We must make sure that the sole (and especially the sole edges) are incredibly damp, almost sopping wet to give it the most flexibility possible. Then, we gently fold up the edges, smoothing them out as you go along. Naturally, they will want to fold back downwards, but to prevent that, apply your strap to the leather all the way around it, forcing the leather to retain its shape.
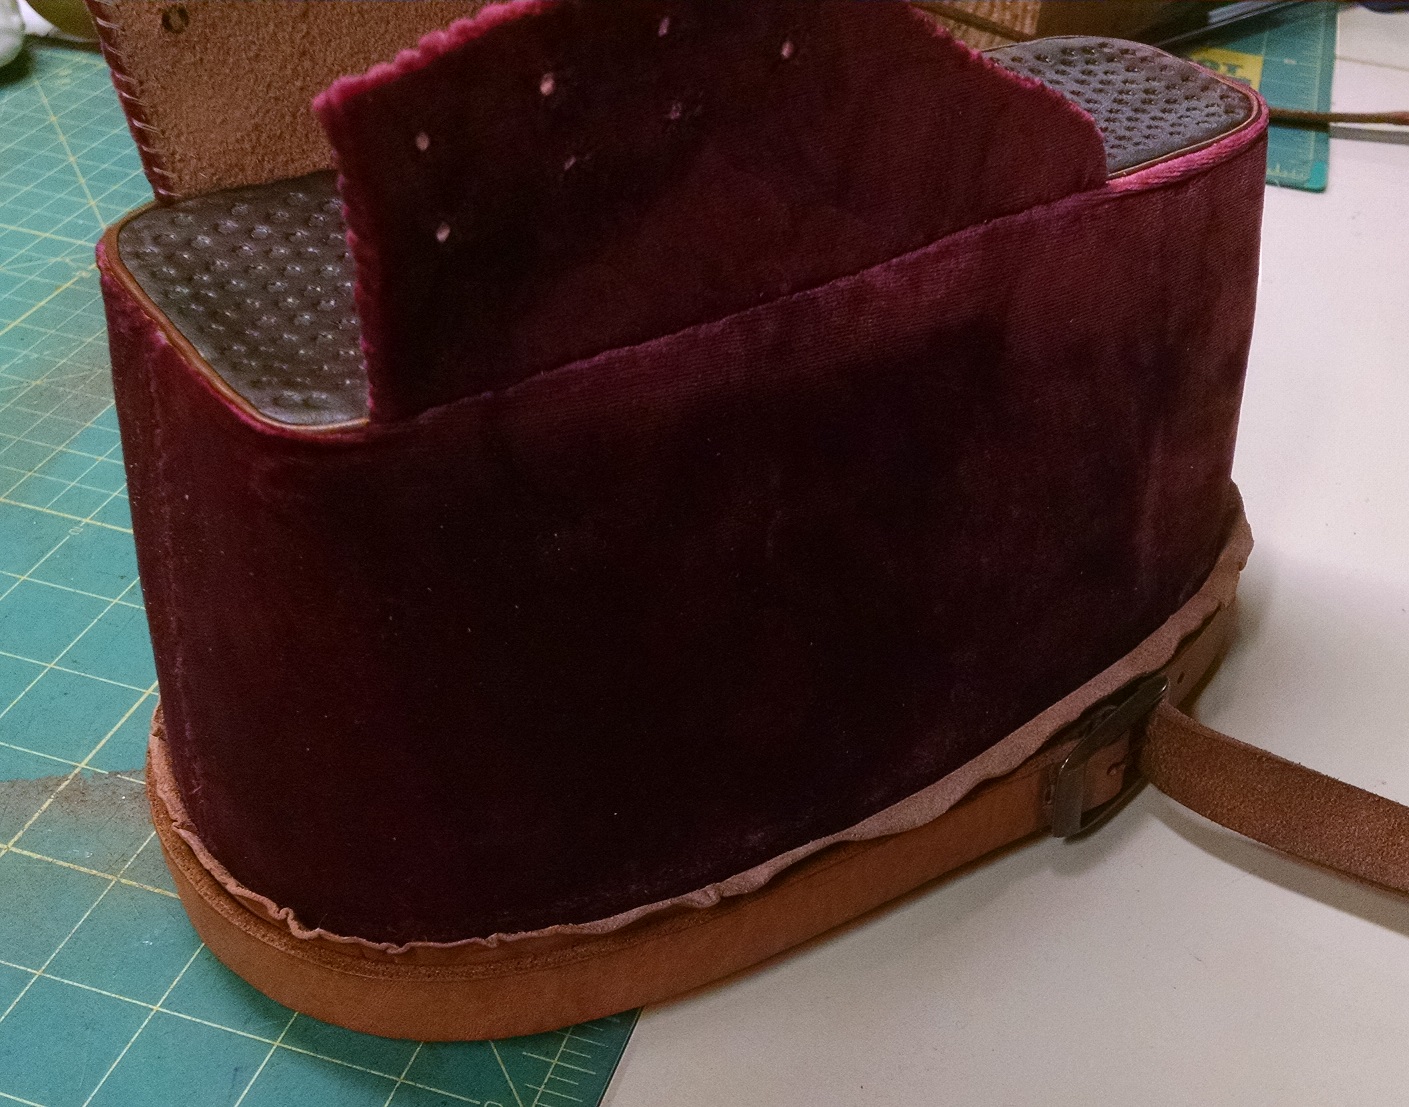
You’ll notice a bit of excess that has found its way over your strap – this is all right, as we will trim the rest of this off once they are both dry.
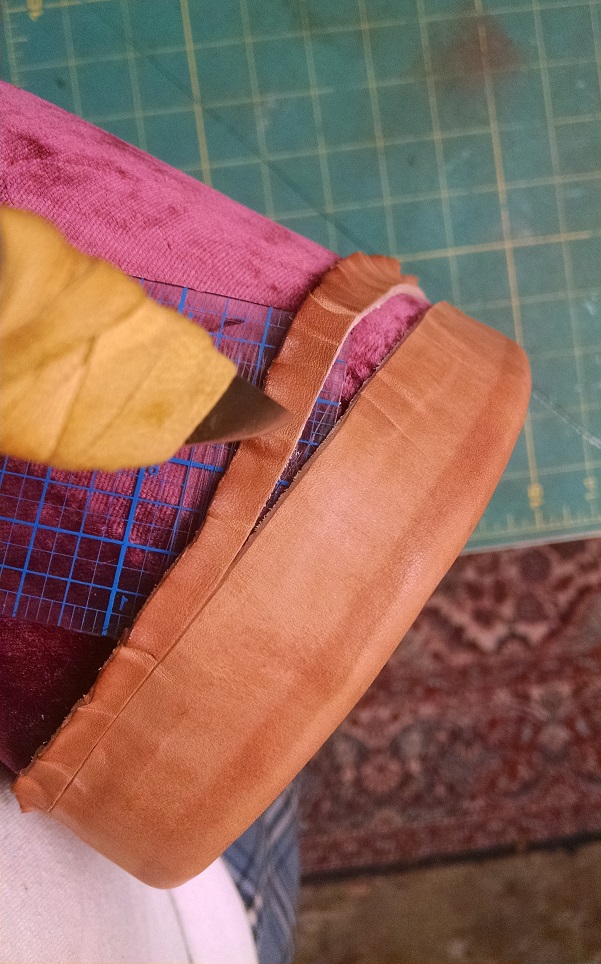
Using a thin, flexible ruler, you can actually use the guideline provided by the marking of the strap to help you trim off the excess leather. Go carefully and slowly.
Once complete, you can use finger and a thin piece of cardboard or something stiff to gently place a thin layer of paste between the turned-up leather and the velvet. This will keep the leather outsole from moving. You can re-apply the strap here to make sure the leather is firmly adhered to the surround, but don’t use so much that it spills over the leather’s turned up side.
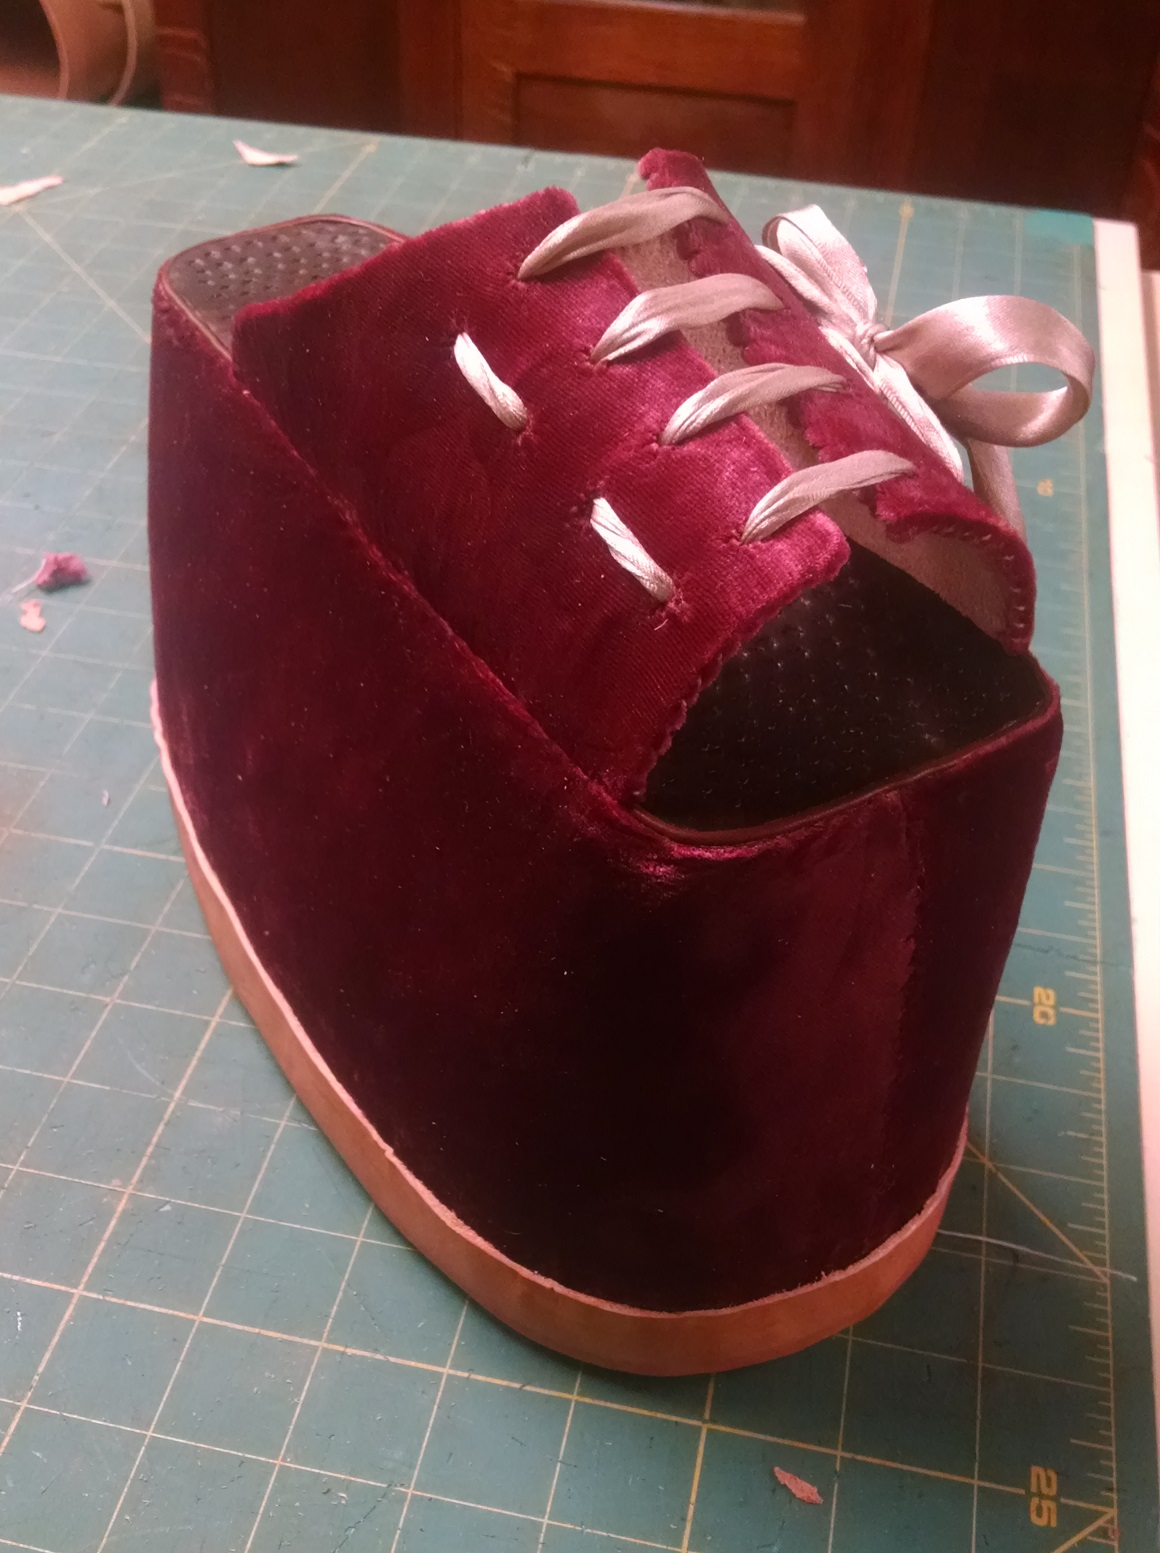
We are almost done! Using silk double-faced satin ribbon with aglets on the ends, we can then lace the chopine. Note how one starts by going in a lower corner hole, then out the hole towards the opening of the vamp, crossing over the split, back in and then out, moving down one set in the lower holes.
Another view of the lacing.
Once finished, we can put the shoes in and check the fit. You might say that the chopines actually look too small for the shoes, but if you look at the extant pictures above, you’ll note that in all instances, the wearer’s shoe actually extends a little beyond the length of the toe of the chopine, so we’re all good here.
This was probably one of the most challenging pieces that I’ve had to work on, but in the end, it all worked out reasonably well. I think that the outsole could probably have been a bit thinner on the edges, and I certainly could have used slightly thicker leather for the welt, but I would call them a lovely pair indeed.
I am wanting to create a set of slippers and chopines appropriate to 1540’s Florence to go with an Eleonora di Toledo style outfit. Any help would be greatly appreciated. Thank you.
What fun – this should be a grand project for you. One of the things that you have to think about is the style of outfit you are building. It sounds like you’re working on a Florentine outfit rather than something suitable for Spain, which puts things in historical context. We do not have a great deal of evidence for tall chopines in Florence – in fact, the pictorial evidence seems to indicate that smaller pantofles were more appropriate for Florentine women, like these: http://www.raisedheels.com/blog/?p=1278.