There are a variety of different references to corked shoes, that is, shoes in which a layer or multiple layers of cork have been inserted, to either keep an insulated layer from the cold, or perhaps to create an “arched” shoe, like that shown here. In this case, these shoes are based off of a pair that was found in Nova Zembla, a Russian archipelago in the Arctic circle. In 1596, a Dutch explorer Willem Barentsz led an expedition looking for the Northeast passage to the Indies and were stranded. Many excellently preserved items were found, including mules and shoes, including the finds upon which this pair is based.
This find was originally published in a Dutch journal which documented the catalog of the findings, “Behouden uit het Behouden Huys – Catalogus van da voorwerpen van de Barentsexpeditie (1596), gevonden op Nova Zembla. Di Rijksmuseumcollectie, aangevuld met Russische en Noorse vondsten.” In other words, the finds are primarily at the Rijjksmuseum. 🙂
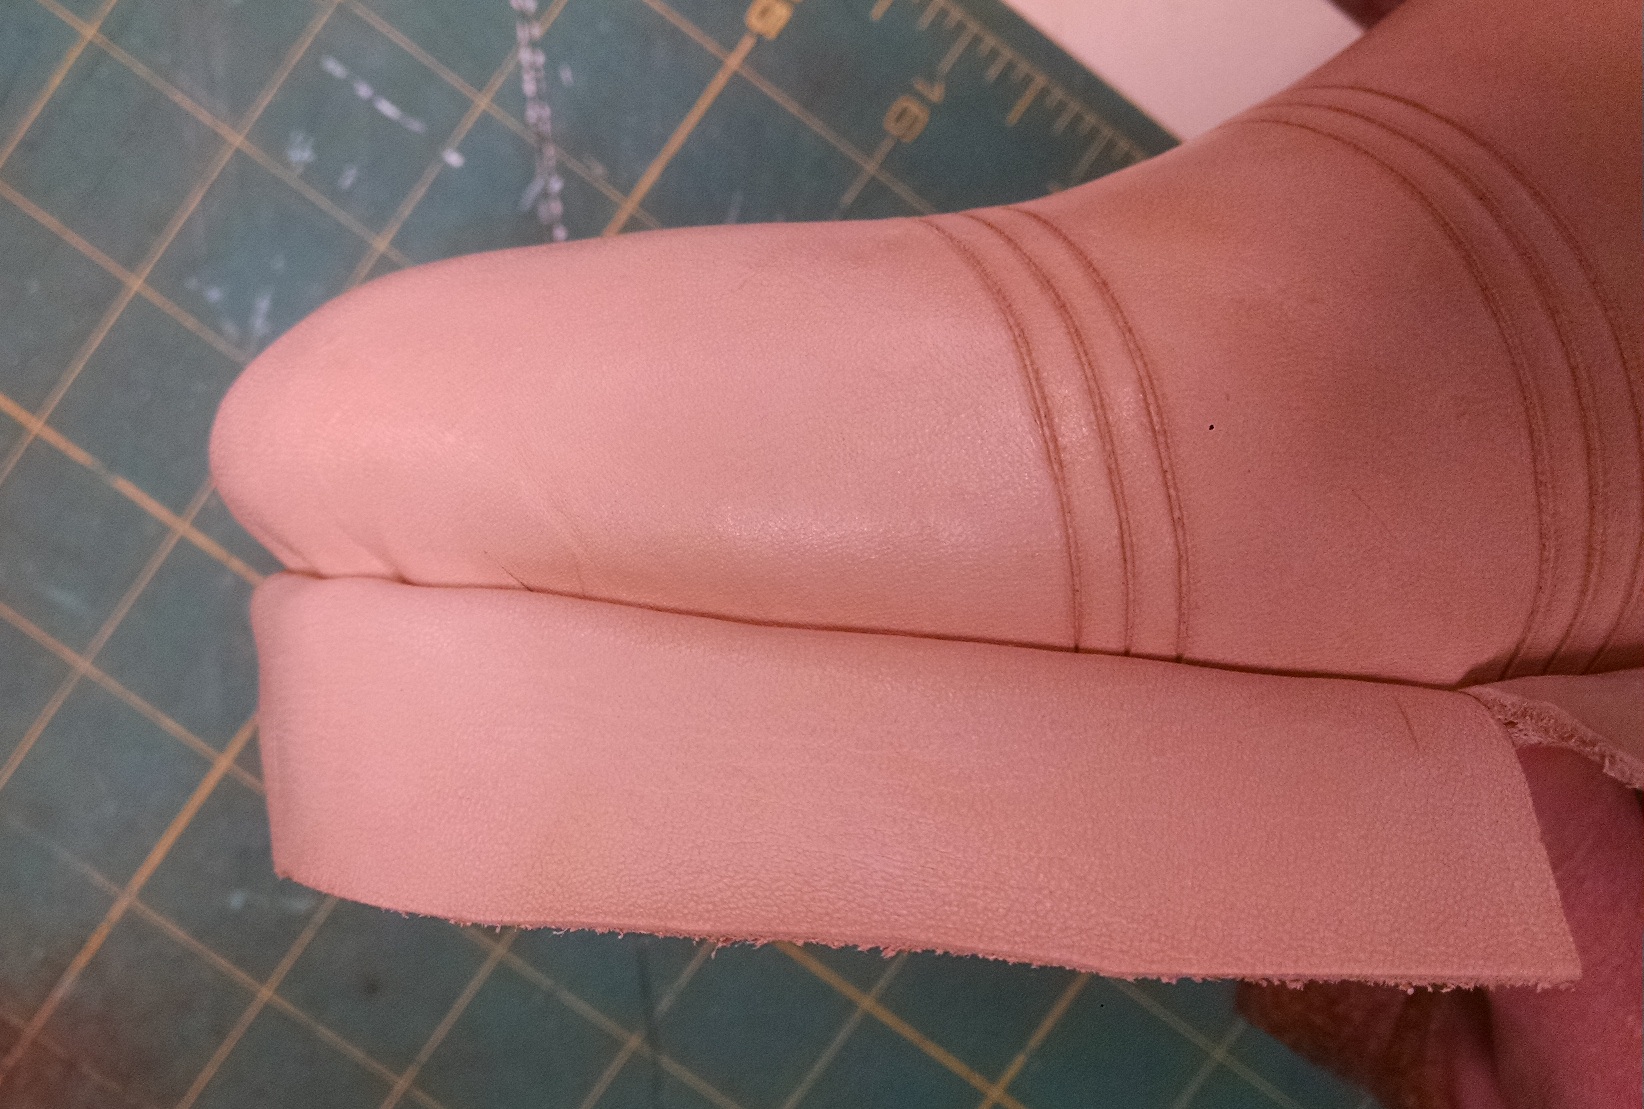
As for the design, you can see that for yourself easily enough with the close up image. Thanks to the envelope that is partially torn away, we are able to tell that there is both cork and timber in the shoe.
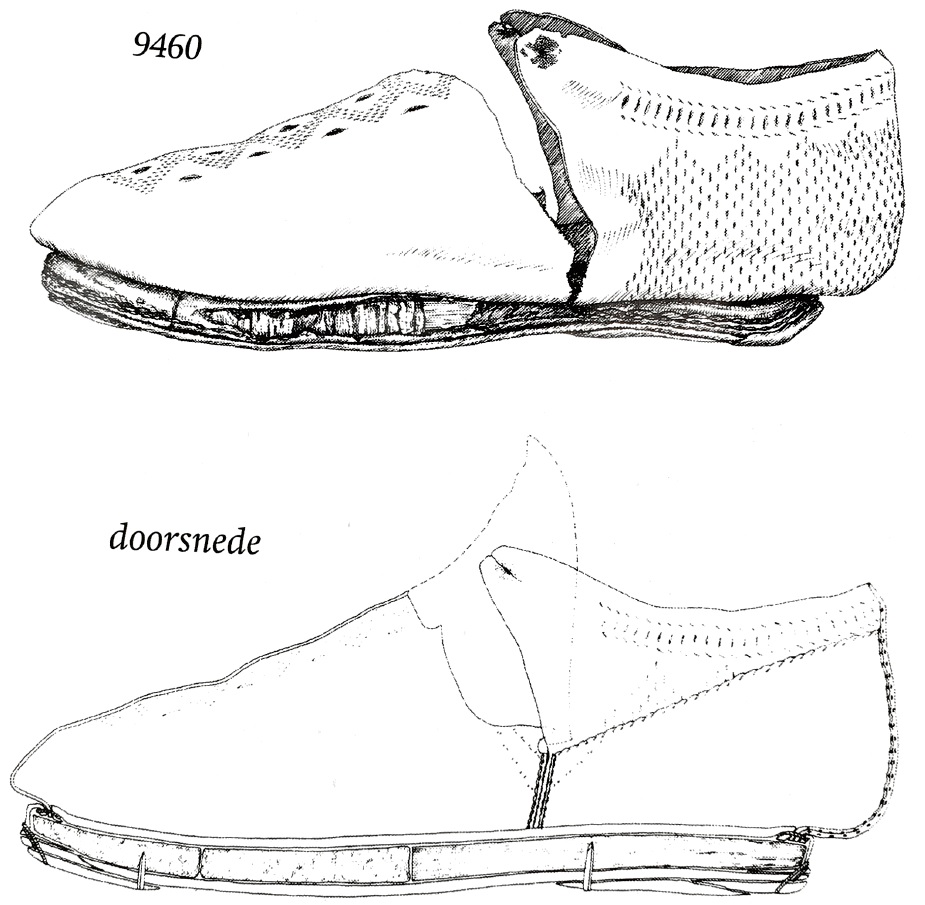
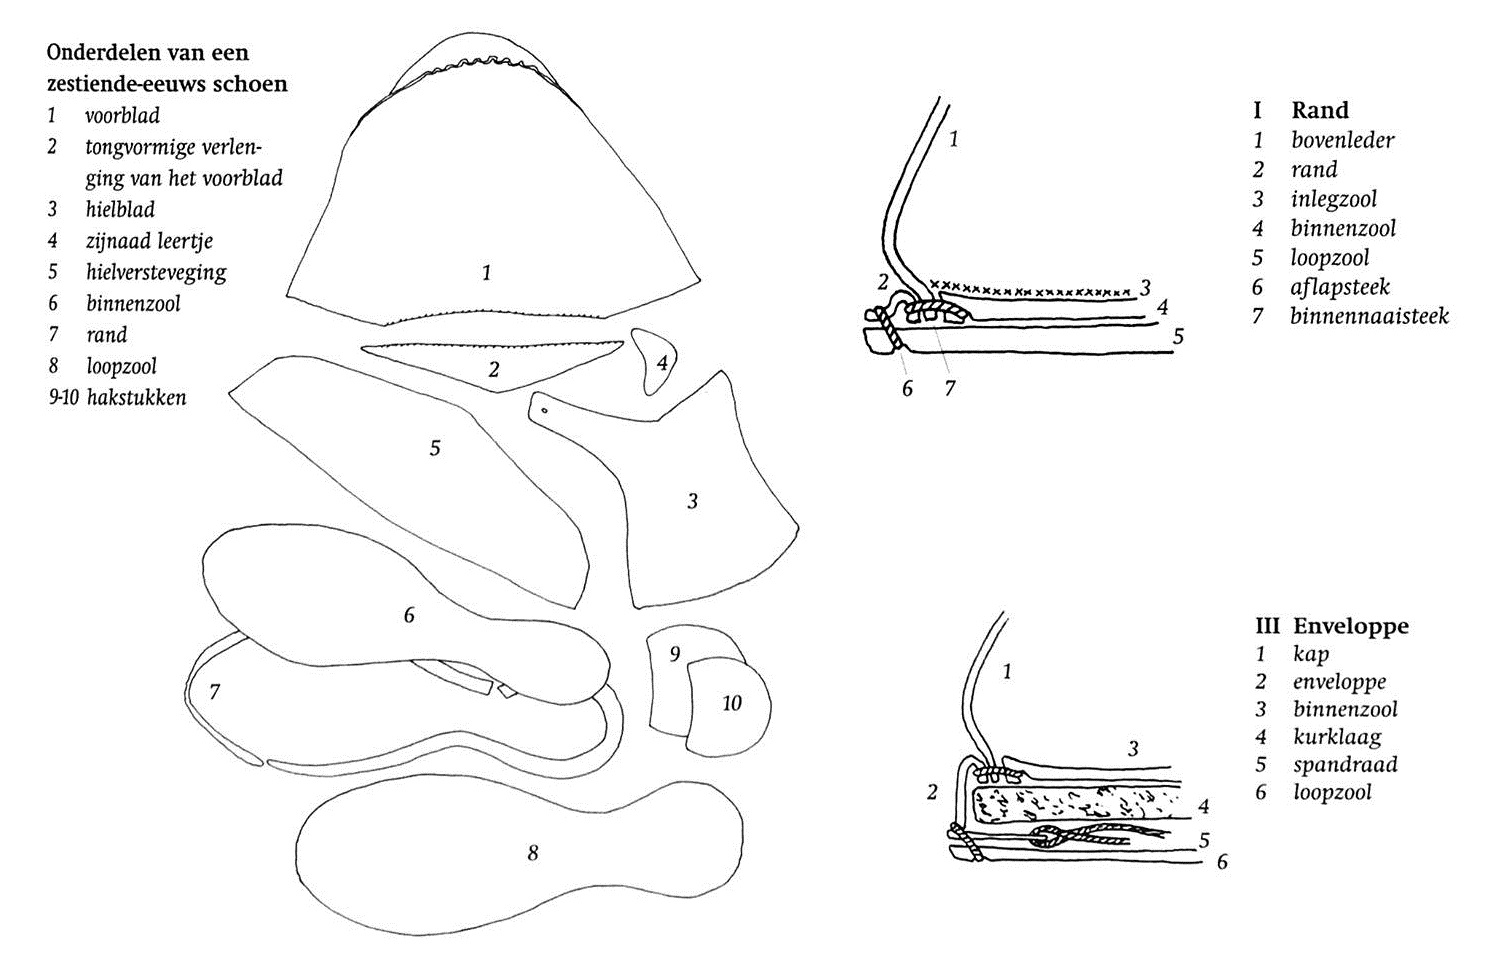
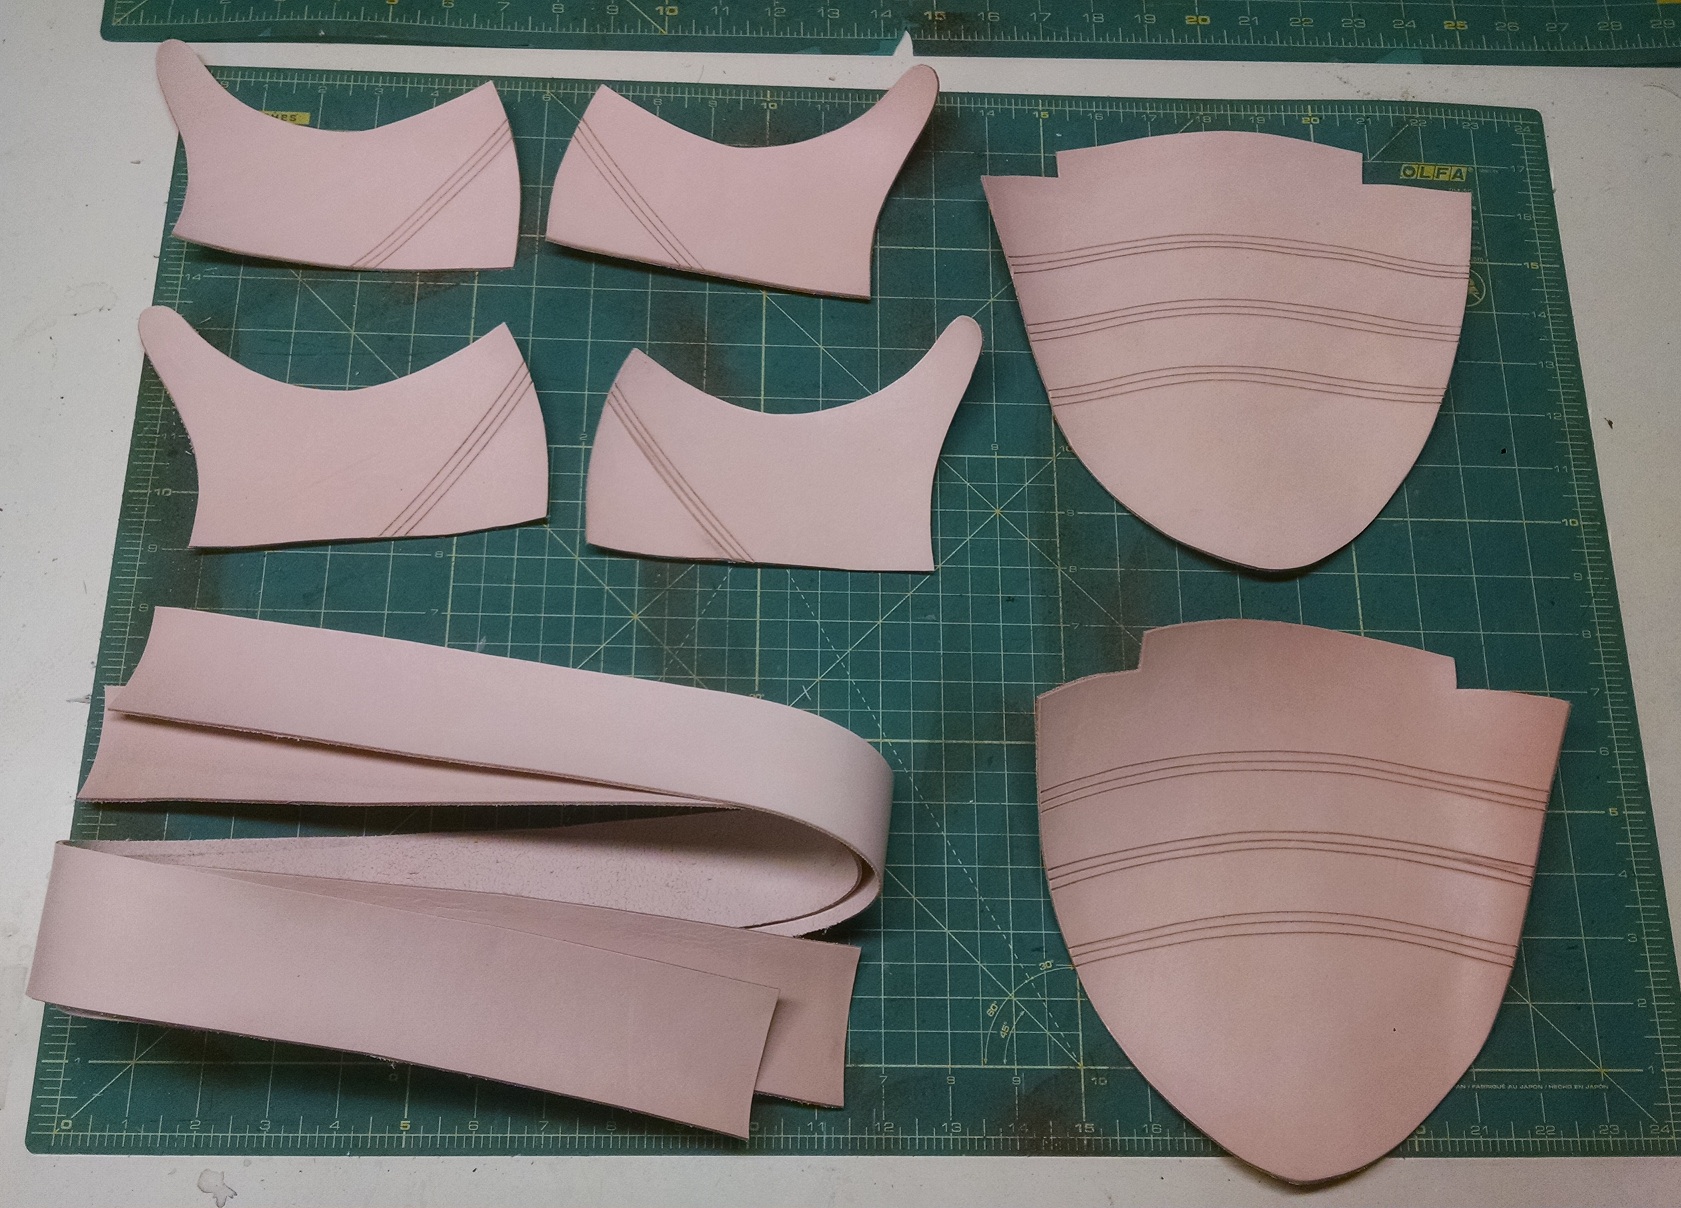
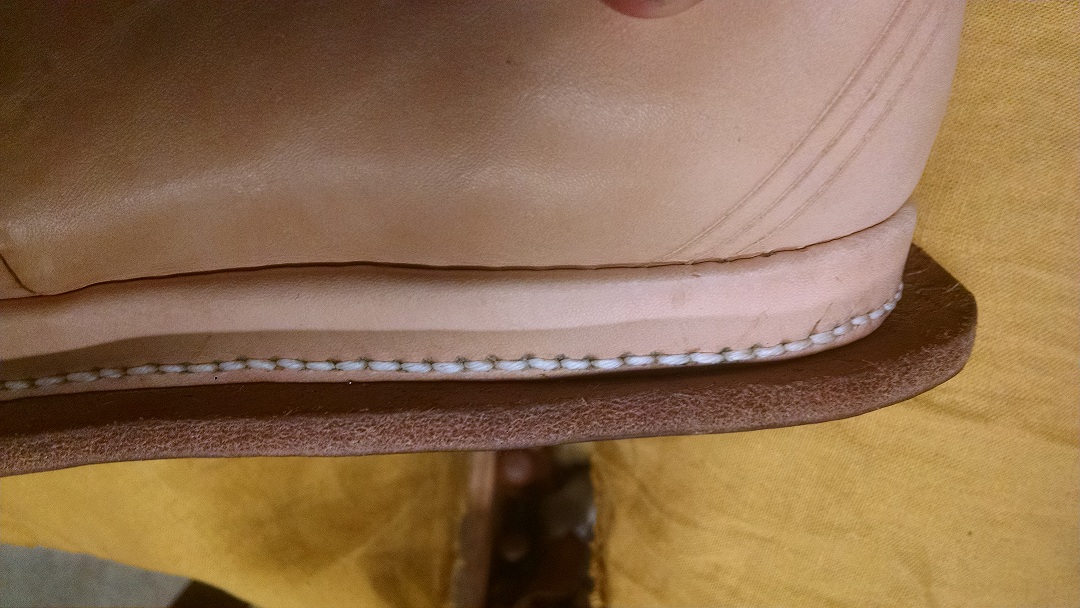
The cross sectional image here clarifies that this is indeed so-called “envelope” construction, in which the welt is tugged down under the filling with bracing threads. The cutting pattern of a typical shoe is also shown, and it is consistent with late 16th century shoes with straps. This is effectively the cutting pattern used, although piece “2” was not attached separately, and only one heel lift was added. One should take special note of the “inglezool” or insock that is shown in the upper right. In this example, it is not caught into the inseaming margin like in some shoes, but simply pasted in.
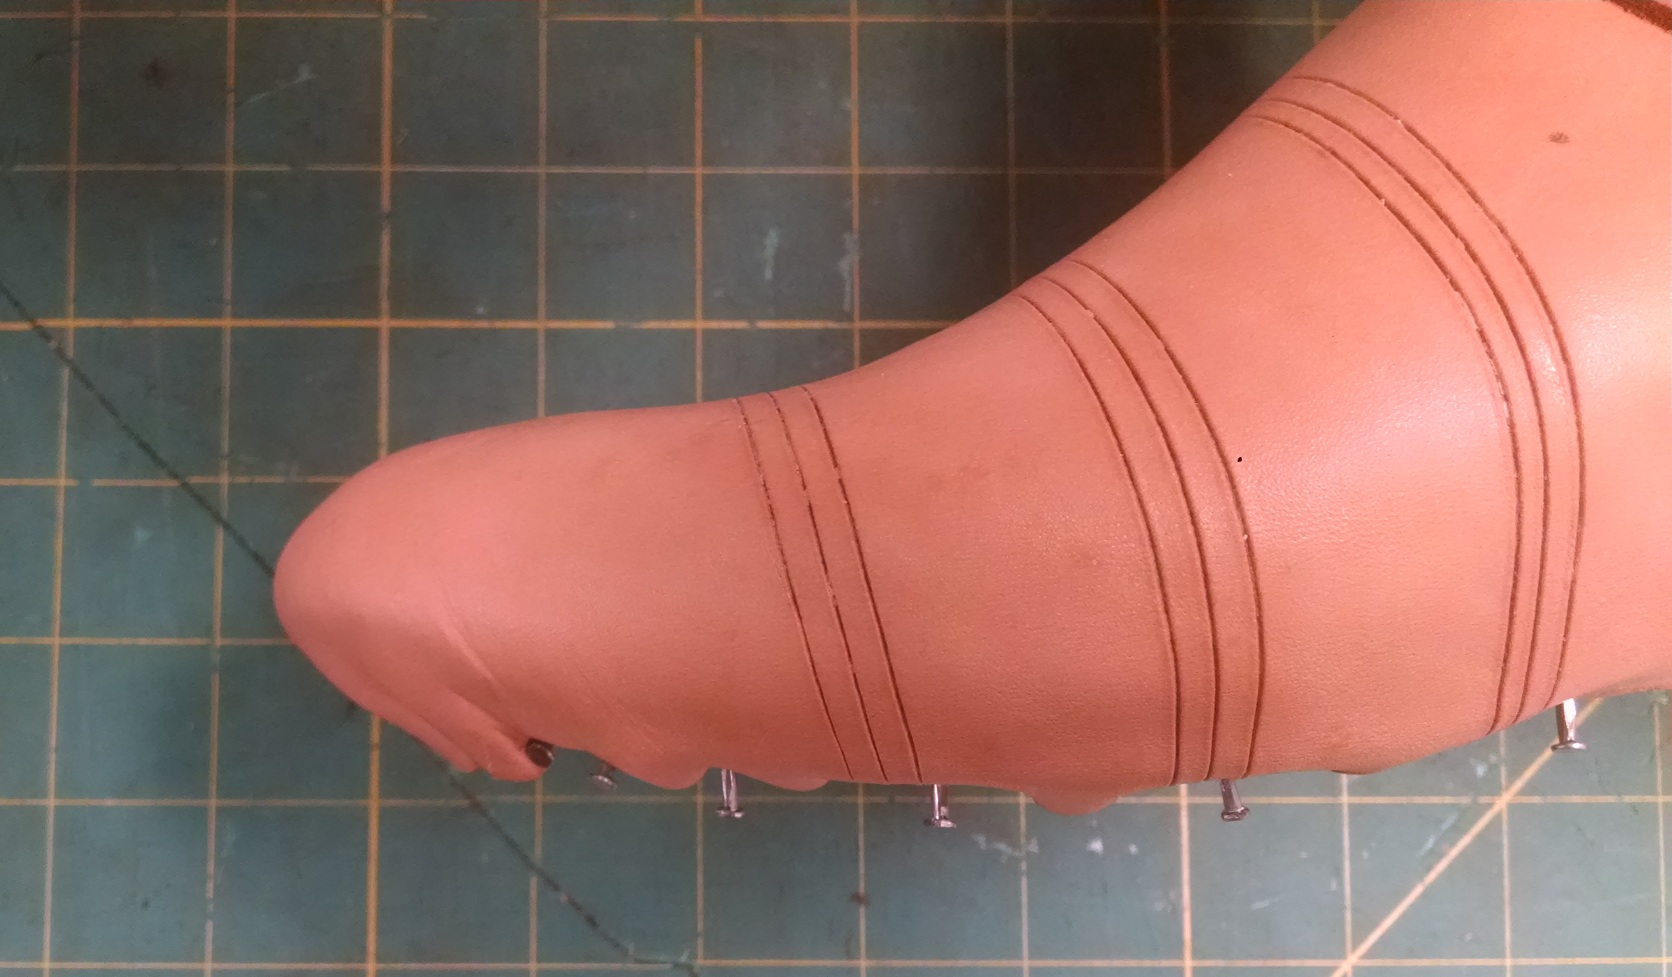
The decoration was a simple score in three, done on the vamp and quarters. The long strip will form the rand which will be pulled tight around the base material of cork and wood.
Closing is performed as before, with pitch wax, boar bristles, and a stabbing awl. You’ll note that there is fabric on top of my apron – this is an attempt to prevent any discoloration rubbing off onto the undyed, but greased, shoes.
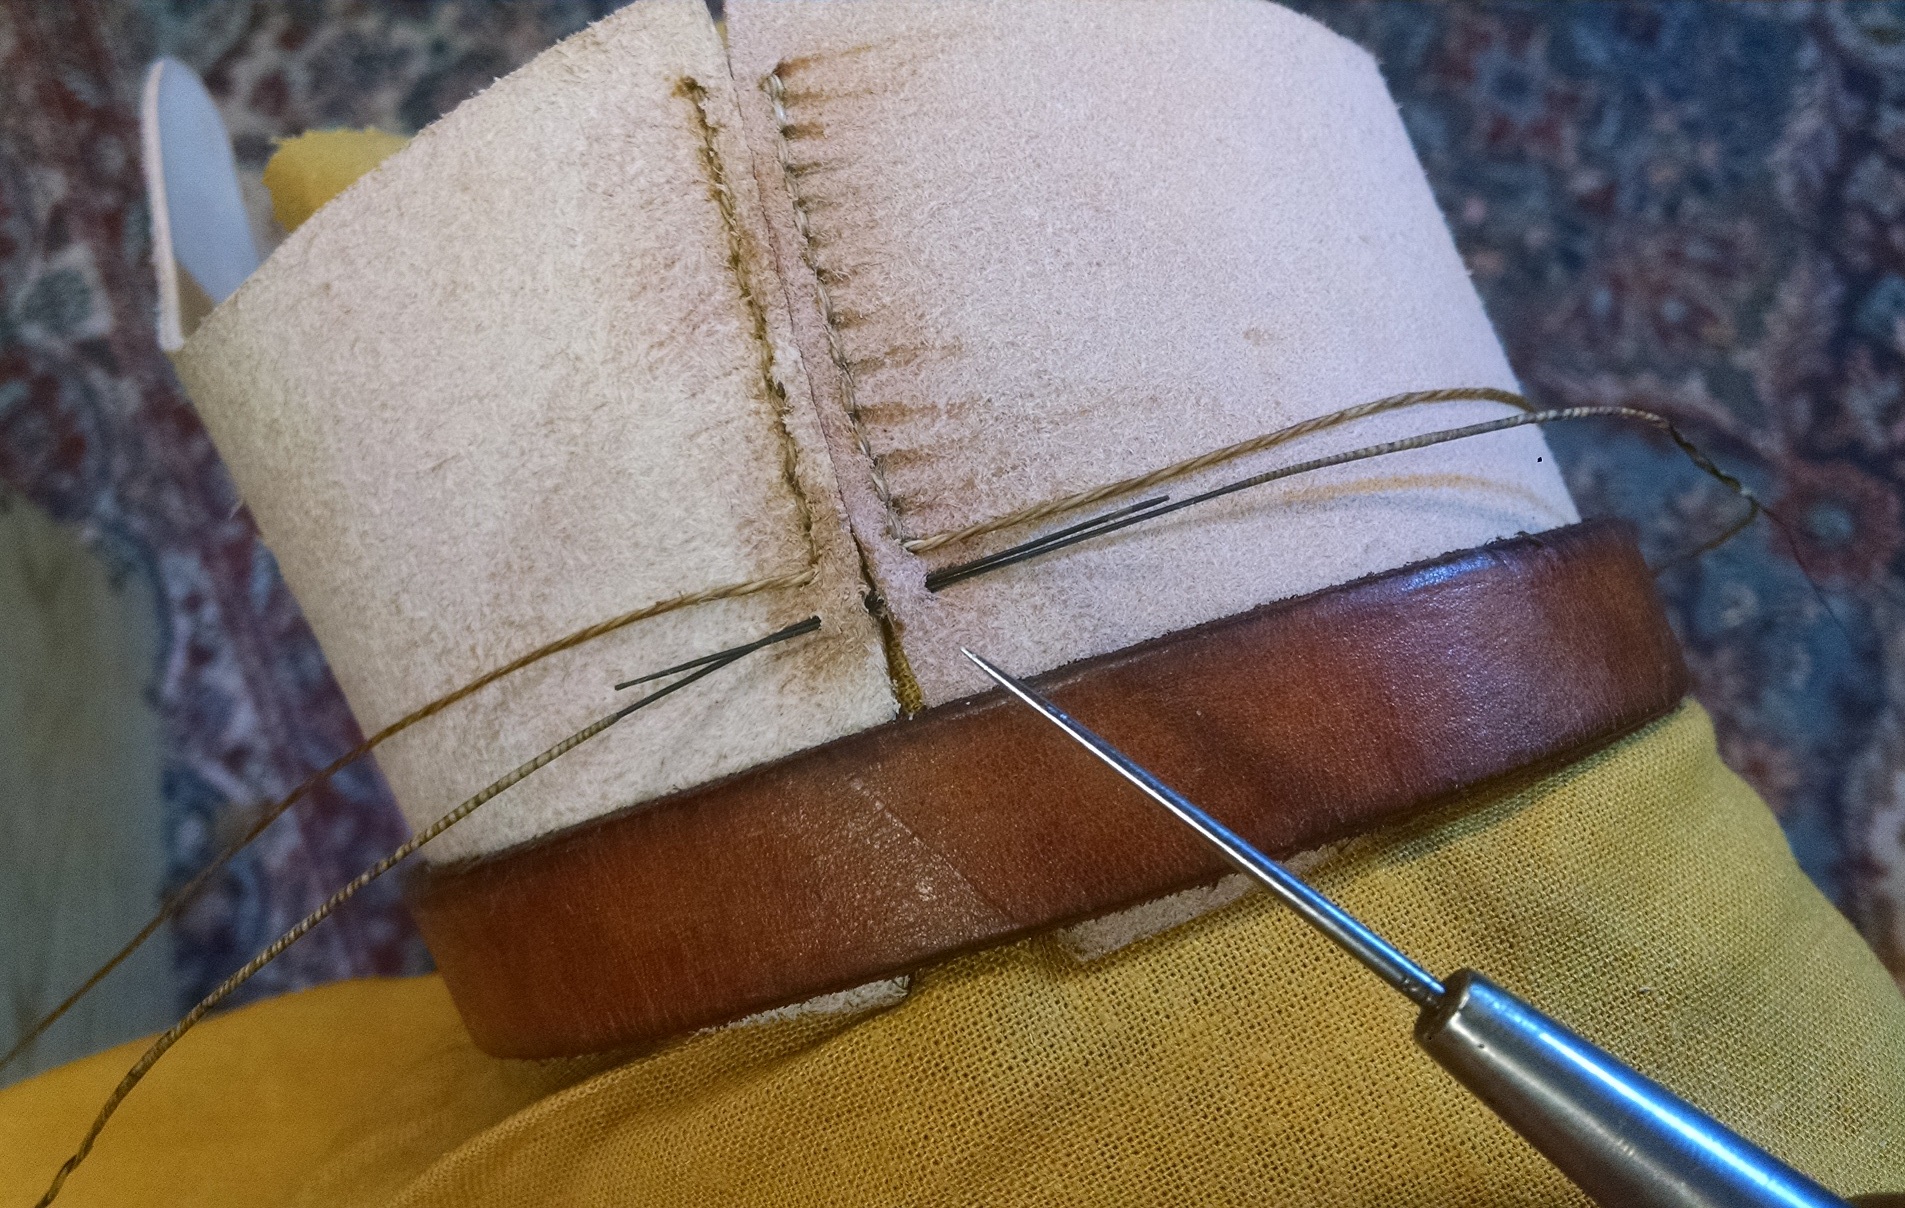
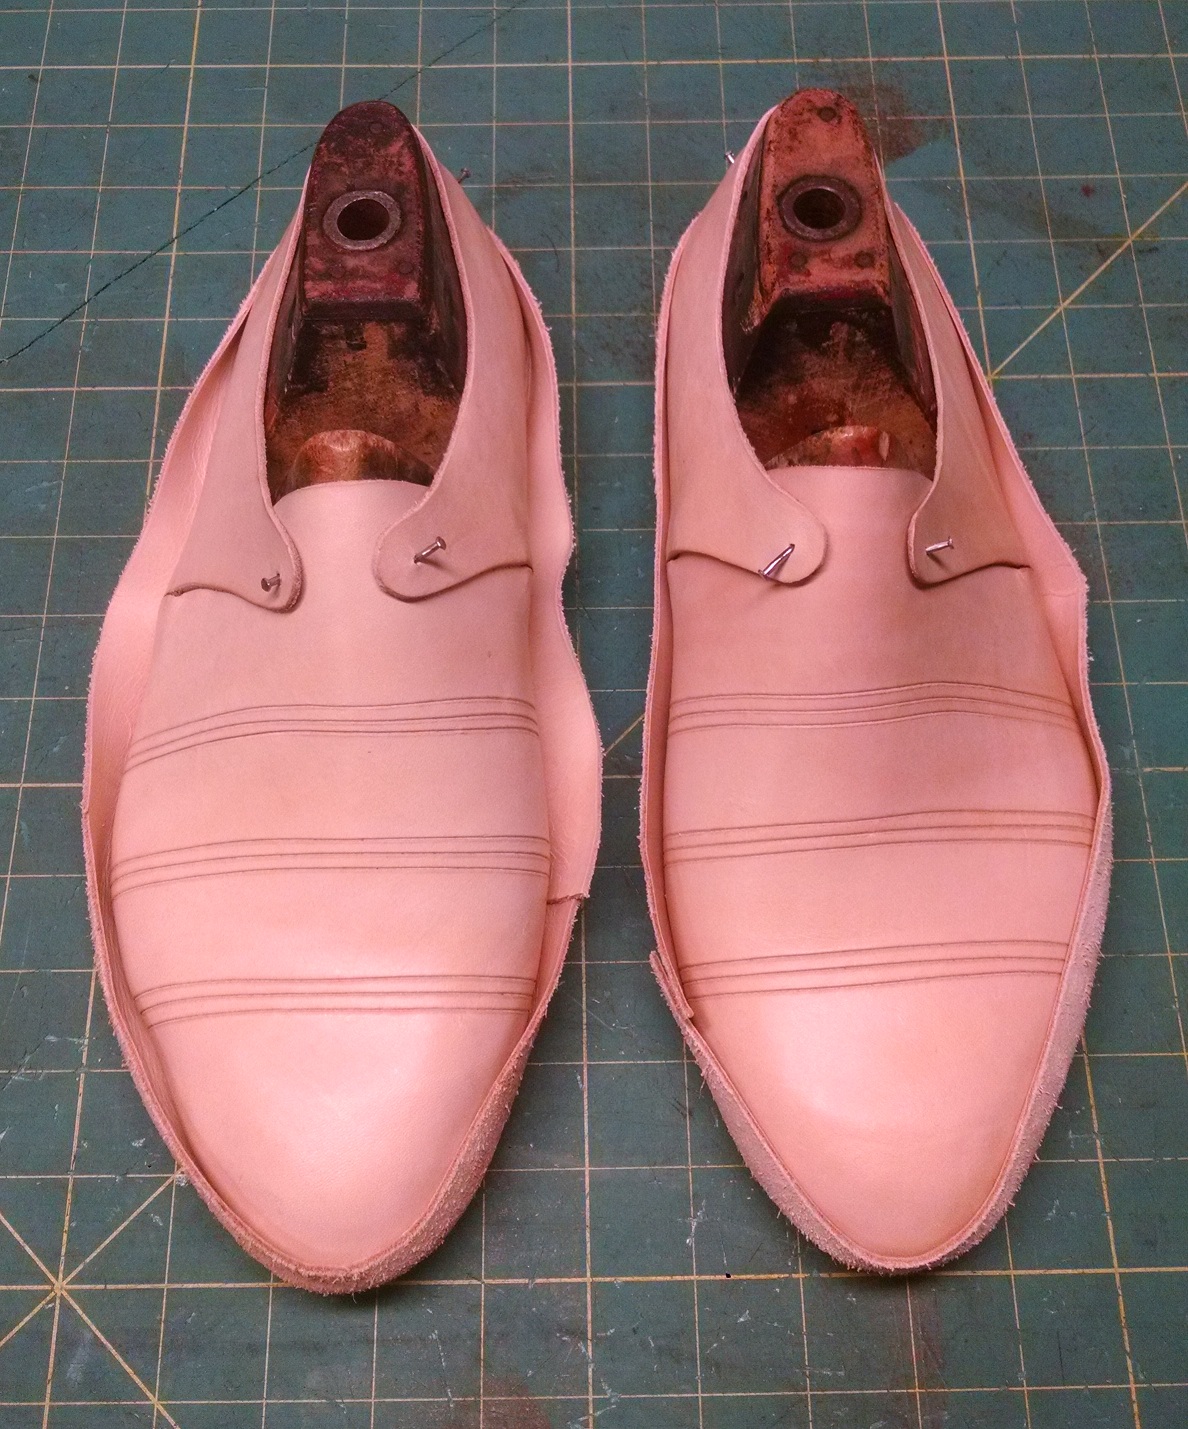
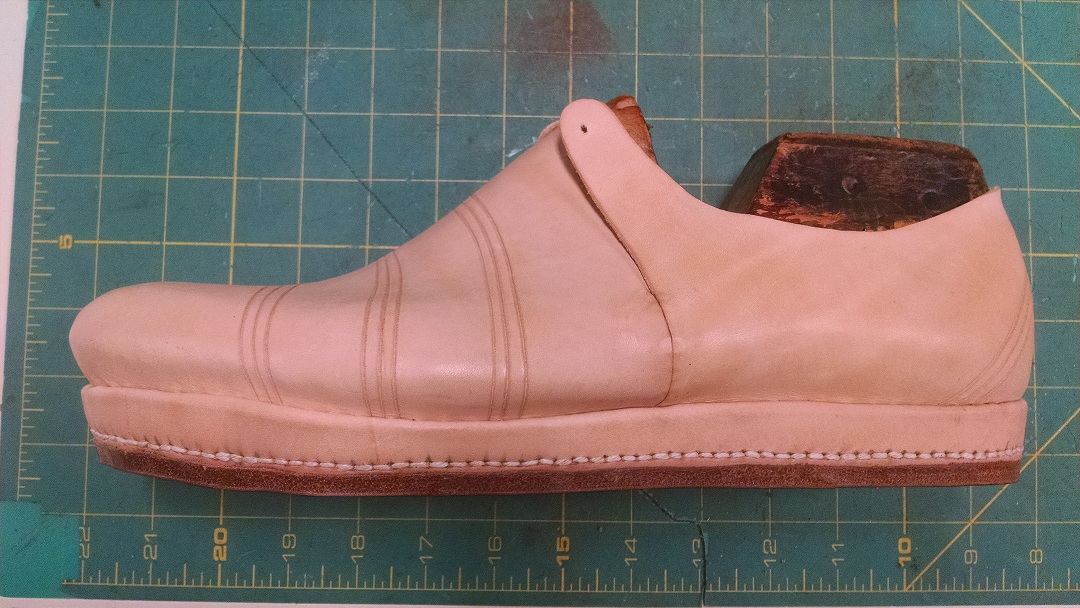
A heel stiffener is put in, and the completed closed shoes are shown here.
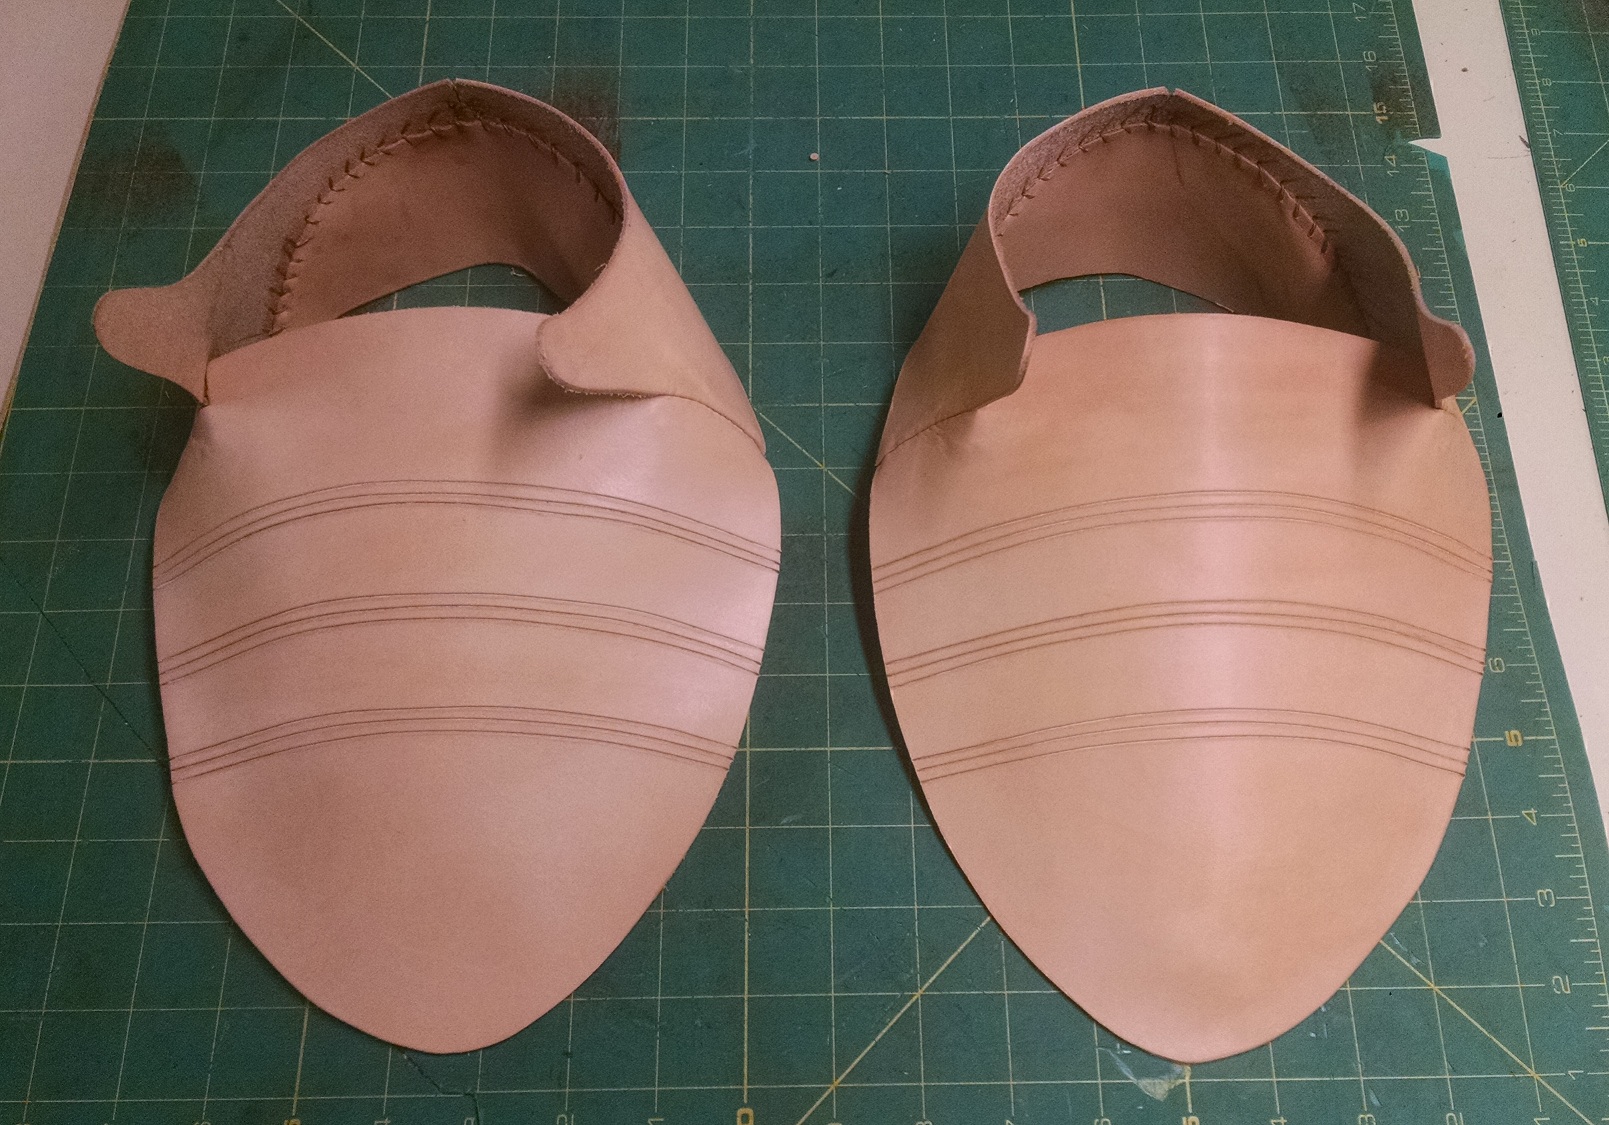
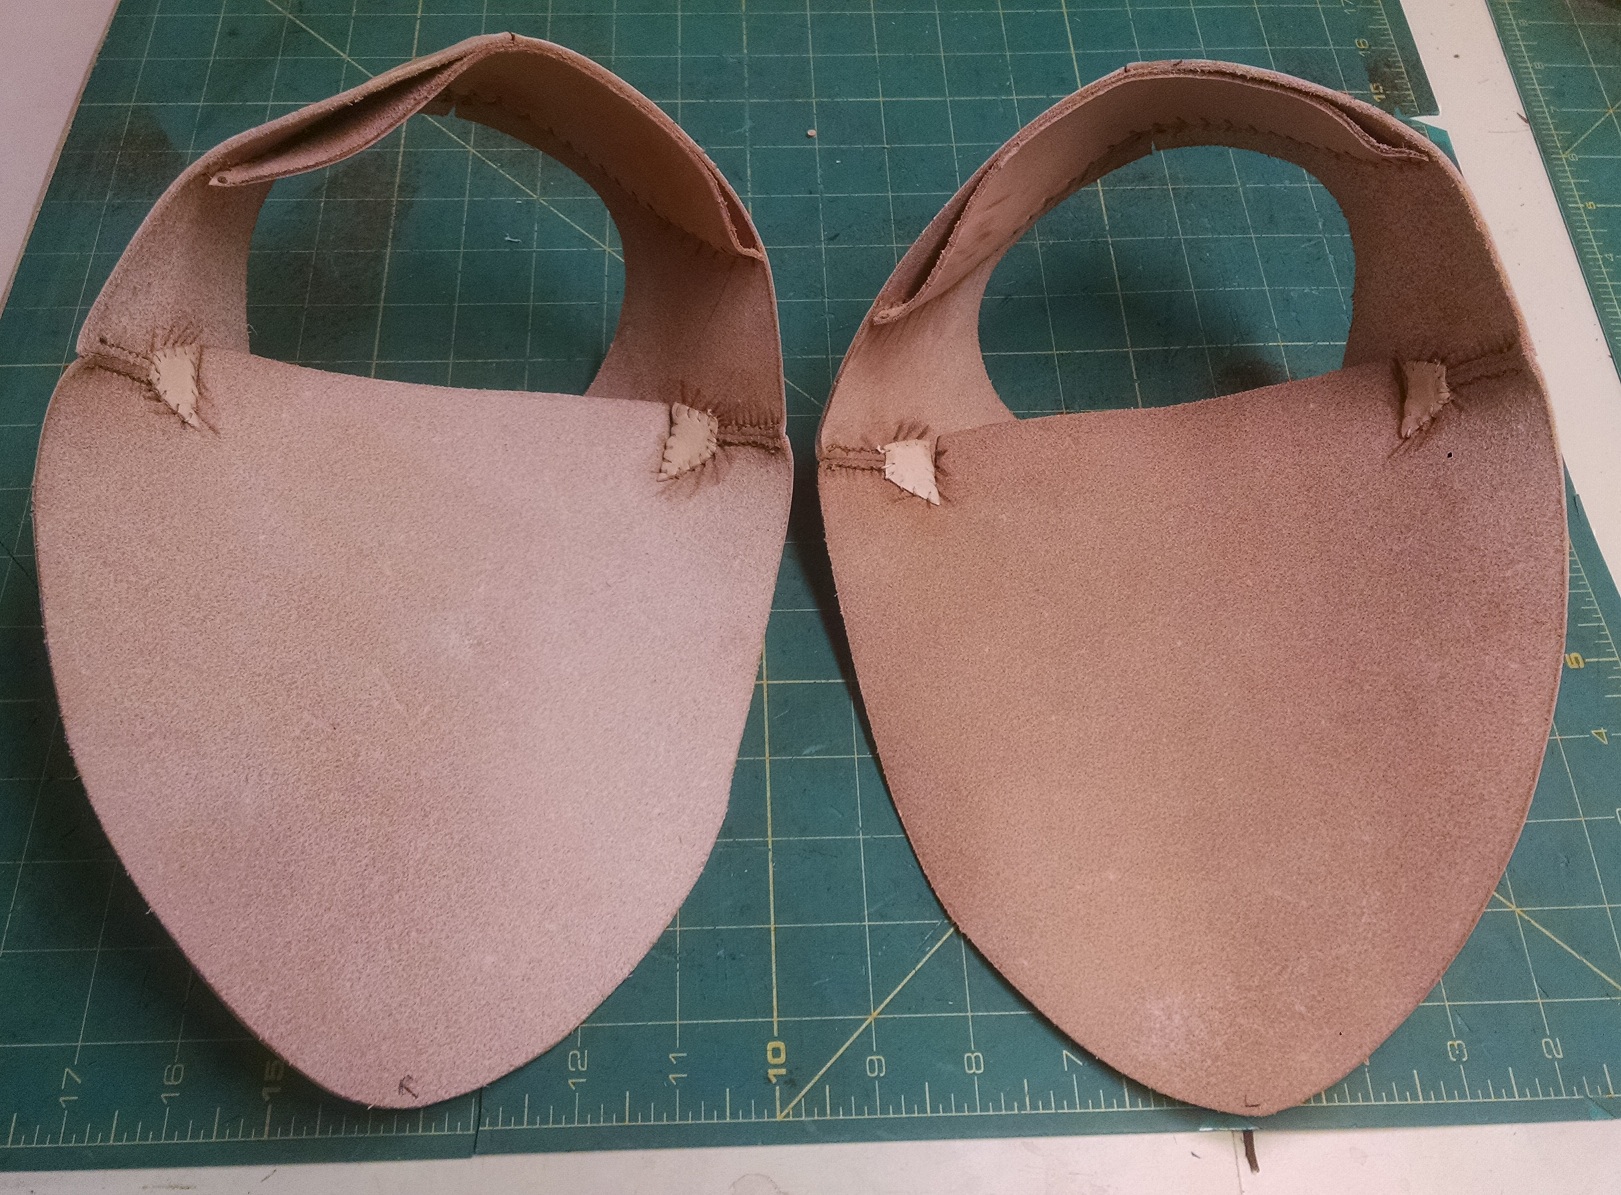
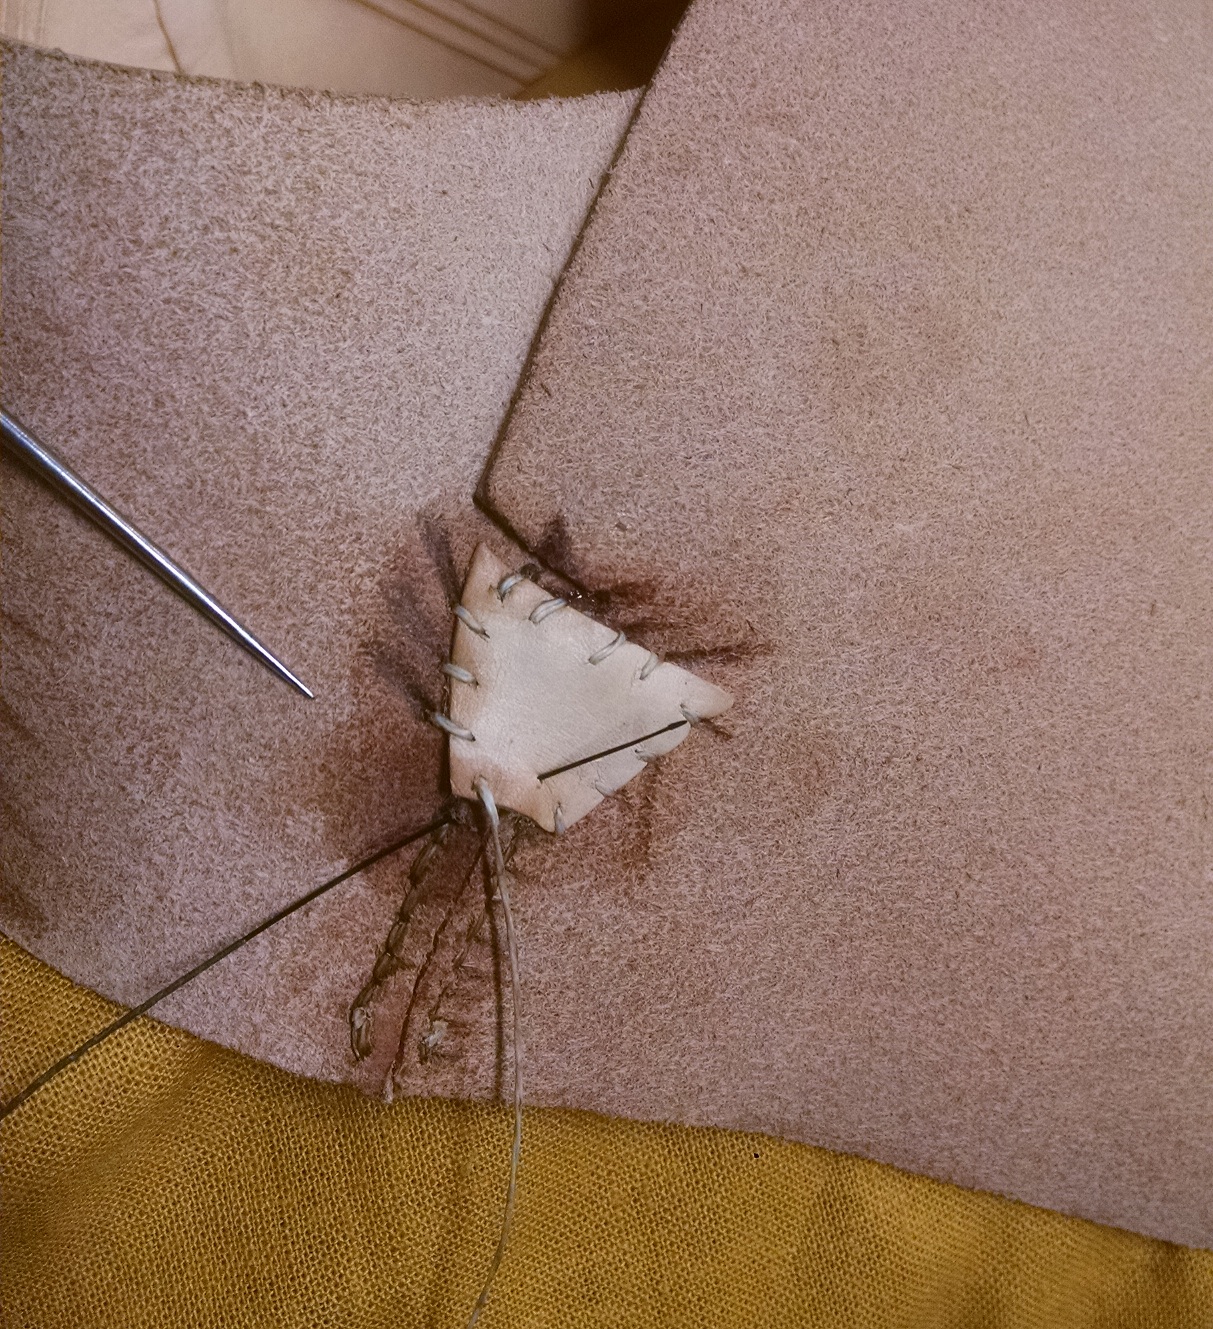
You’ll notice two little reinforcement patches on each side, as shown in the cutting pattern. These are whipped in like so. This can be done very carefully with a curved awl, but it was probably more common to have done it with a straight awl. Today’s leather is compressed and rolled a little which makes it more dense and more difficult to do this operation, but one can take care and achieve it nonetheless. The original shoes were made of goat which is a bit flanky and more supple, and easier to whip. Further, the quarters are not closed all the way up – this seems to be common with shoes of these kind, where the last centimeter or so are left open.
The insole, as typical, is cut smaller than the last. With a period last, the “corner,” or feather, of the last is highly rounded, but as modern lasts were used in this piece, a solution is to cut the insole smaller so as to force the welt or rand to be sewn closer to the underside and when the treadsole is attached, it allows a little overhang, something commonly observed in the extant pieces.

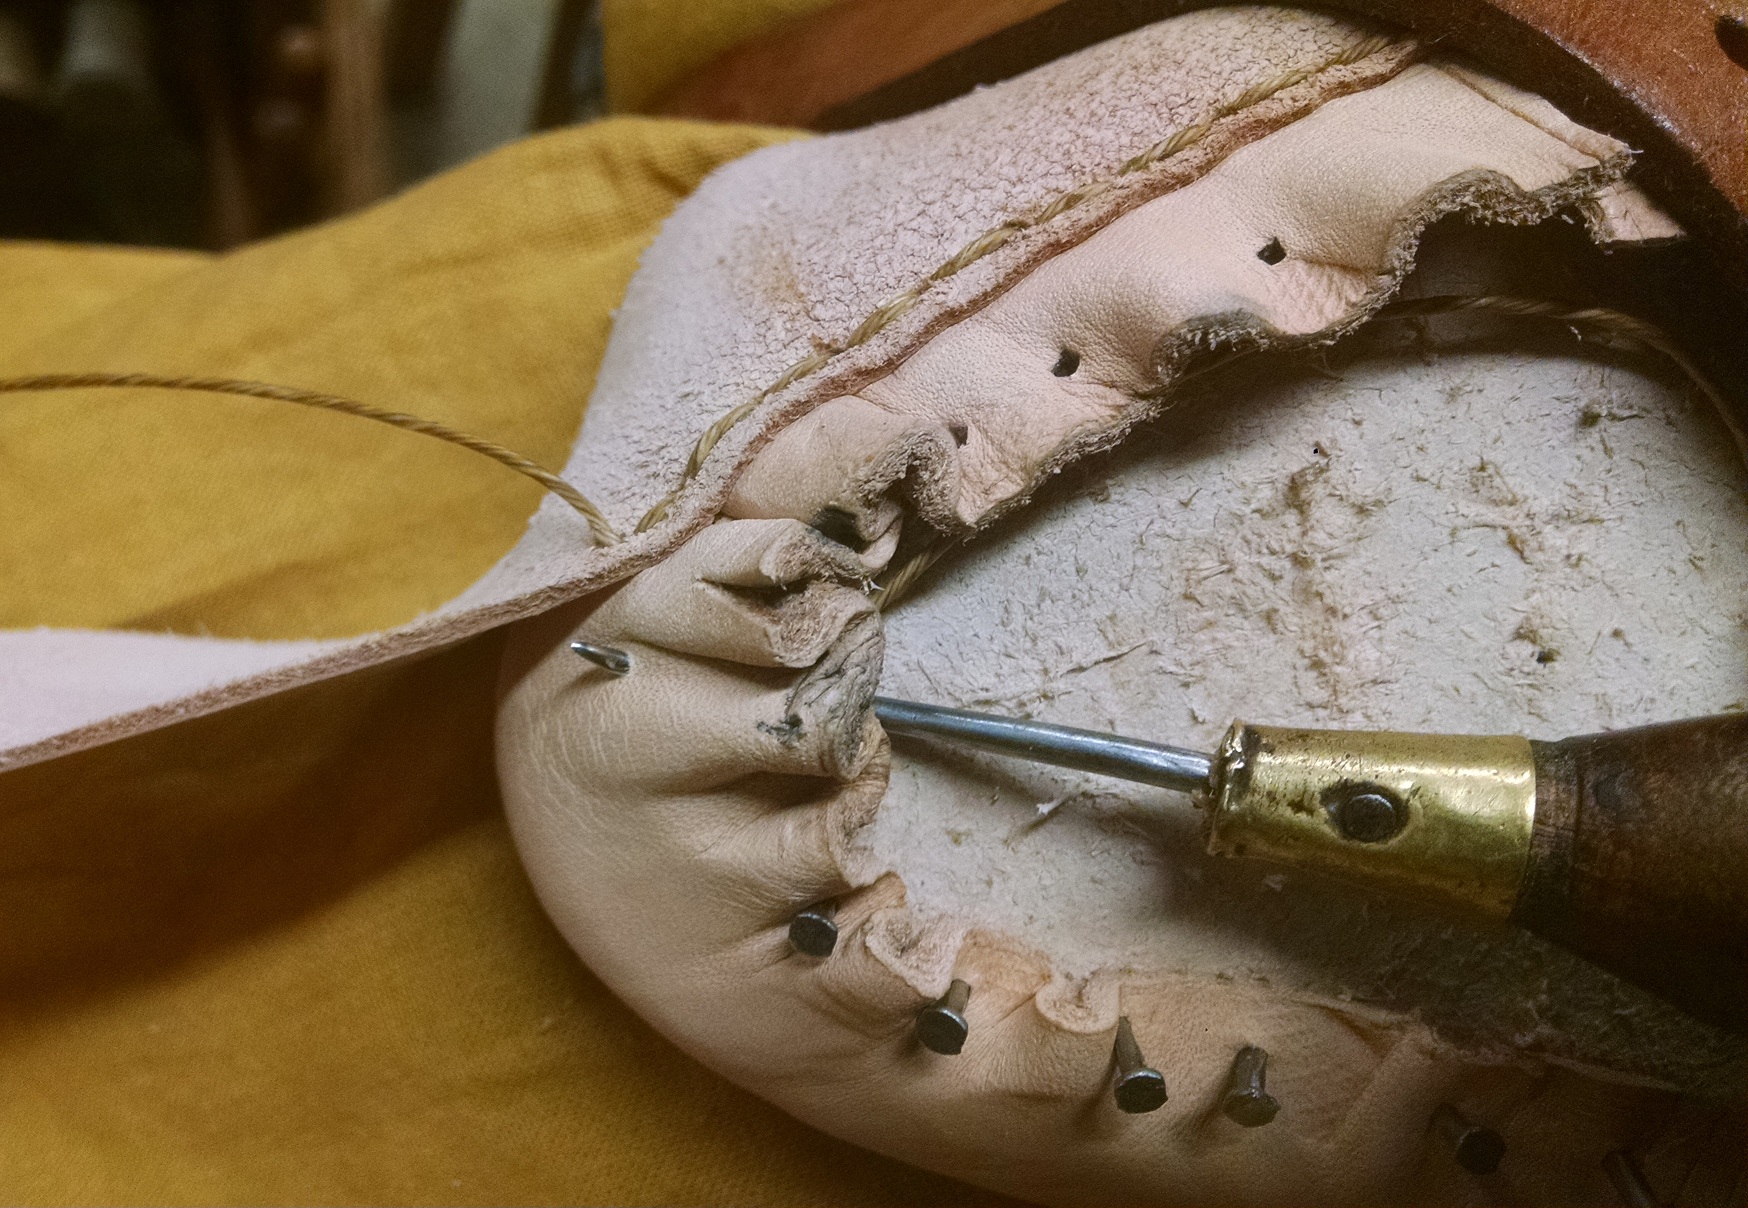
This can be seen after lasting particularly well. It can be difficult to get the toe of the vamp to fold enough to form a smooth fit to the toe of the last, but it is possible. Strictly speaking, the majority of insoles do not tend to show tack holes in this manner. It is more likely that a piece of sturdy thread was placed in the toe of the vamp and a running stitch made in order to gather the material. This would allow it to be tighter to the last. A couple of tacks may have been used at the toe and heel, but not typically the number used here.
It also happens to be the most difficult part of inseaming, as there is a lot of material there. Many of the extant pieces are finely folded and gathered at this point. It’s harder to do with more robust material, but not impossible.

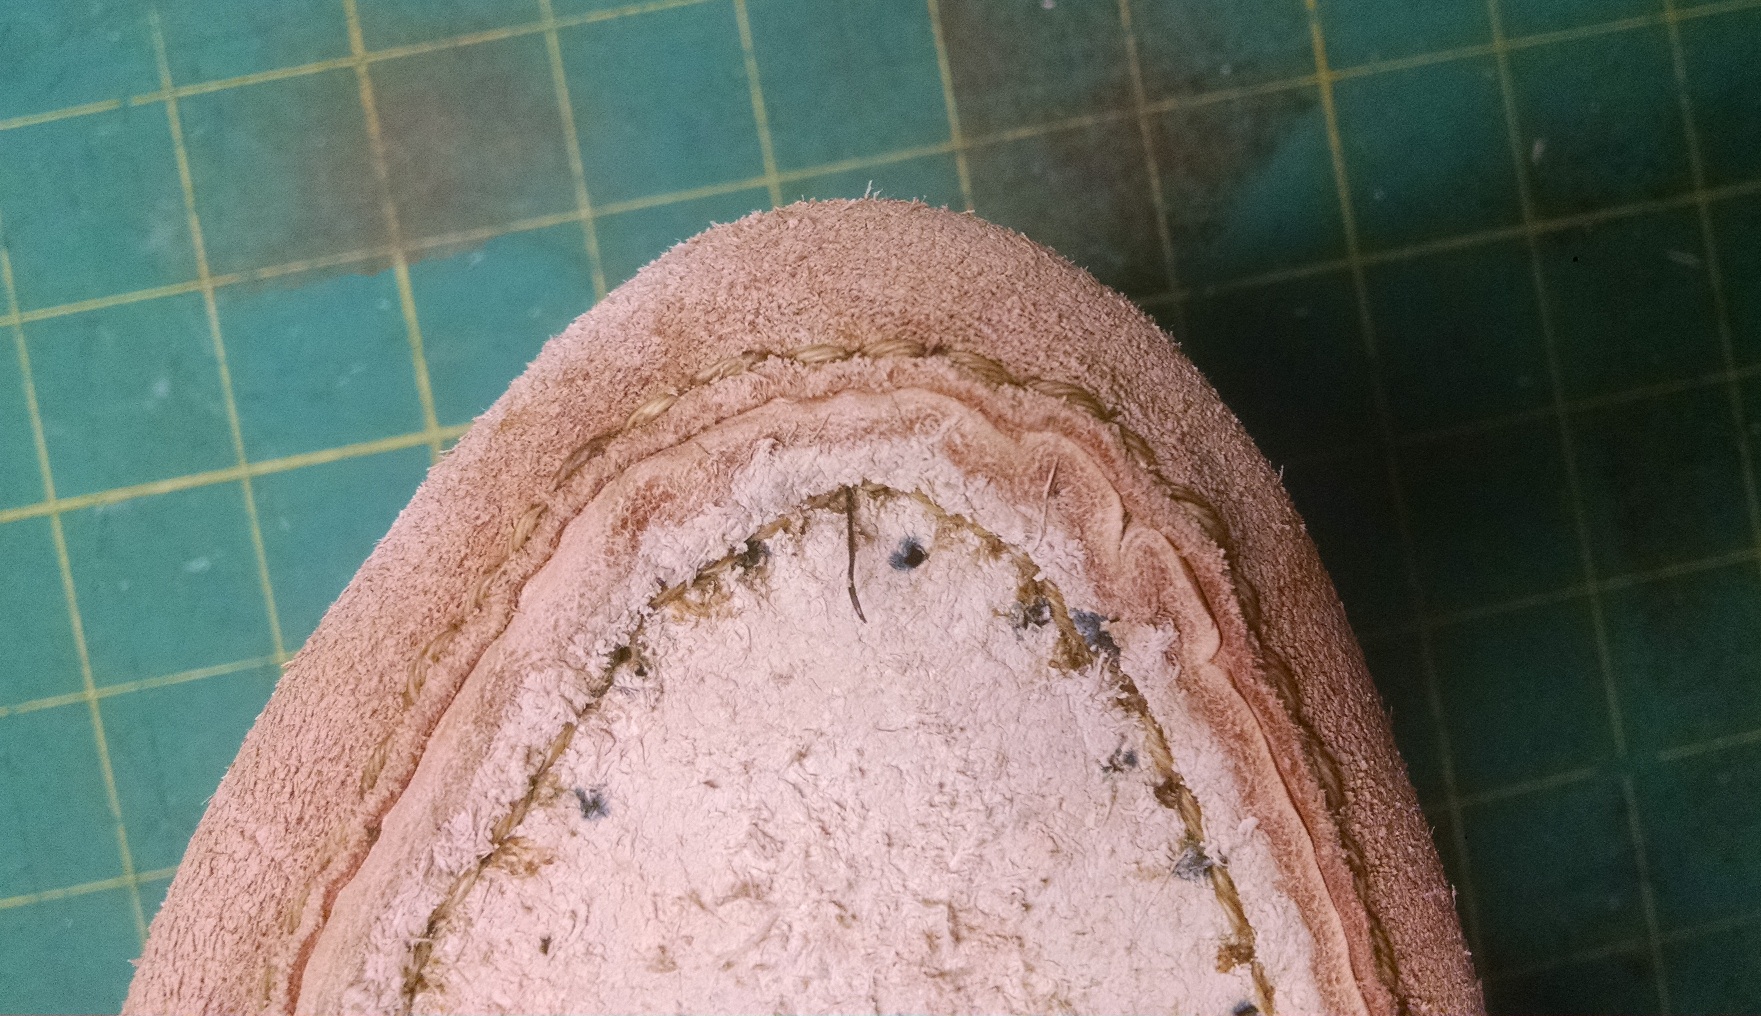
When inseamed and the rand pulled down, it becomes more clear, though this gets even more extreme when pulled tight.
You’ll notice that I have a nail in the straps as well as at the heel to keep the shoe in place while being sewn. Many extant pieces have some small tack holes – they were not as concerned with a small hole, as the entire shoe was handmade, and it was part of the process.
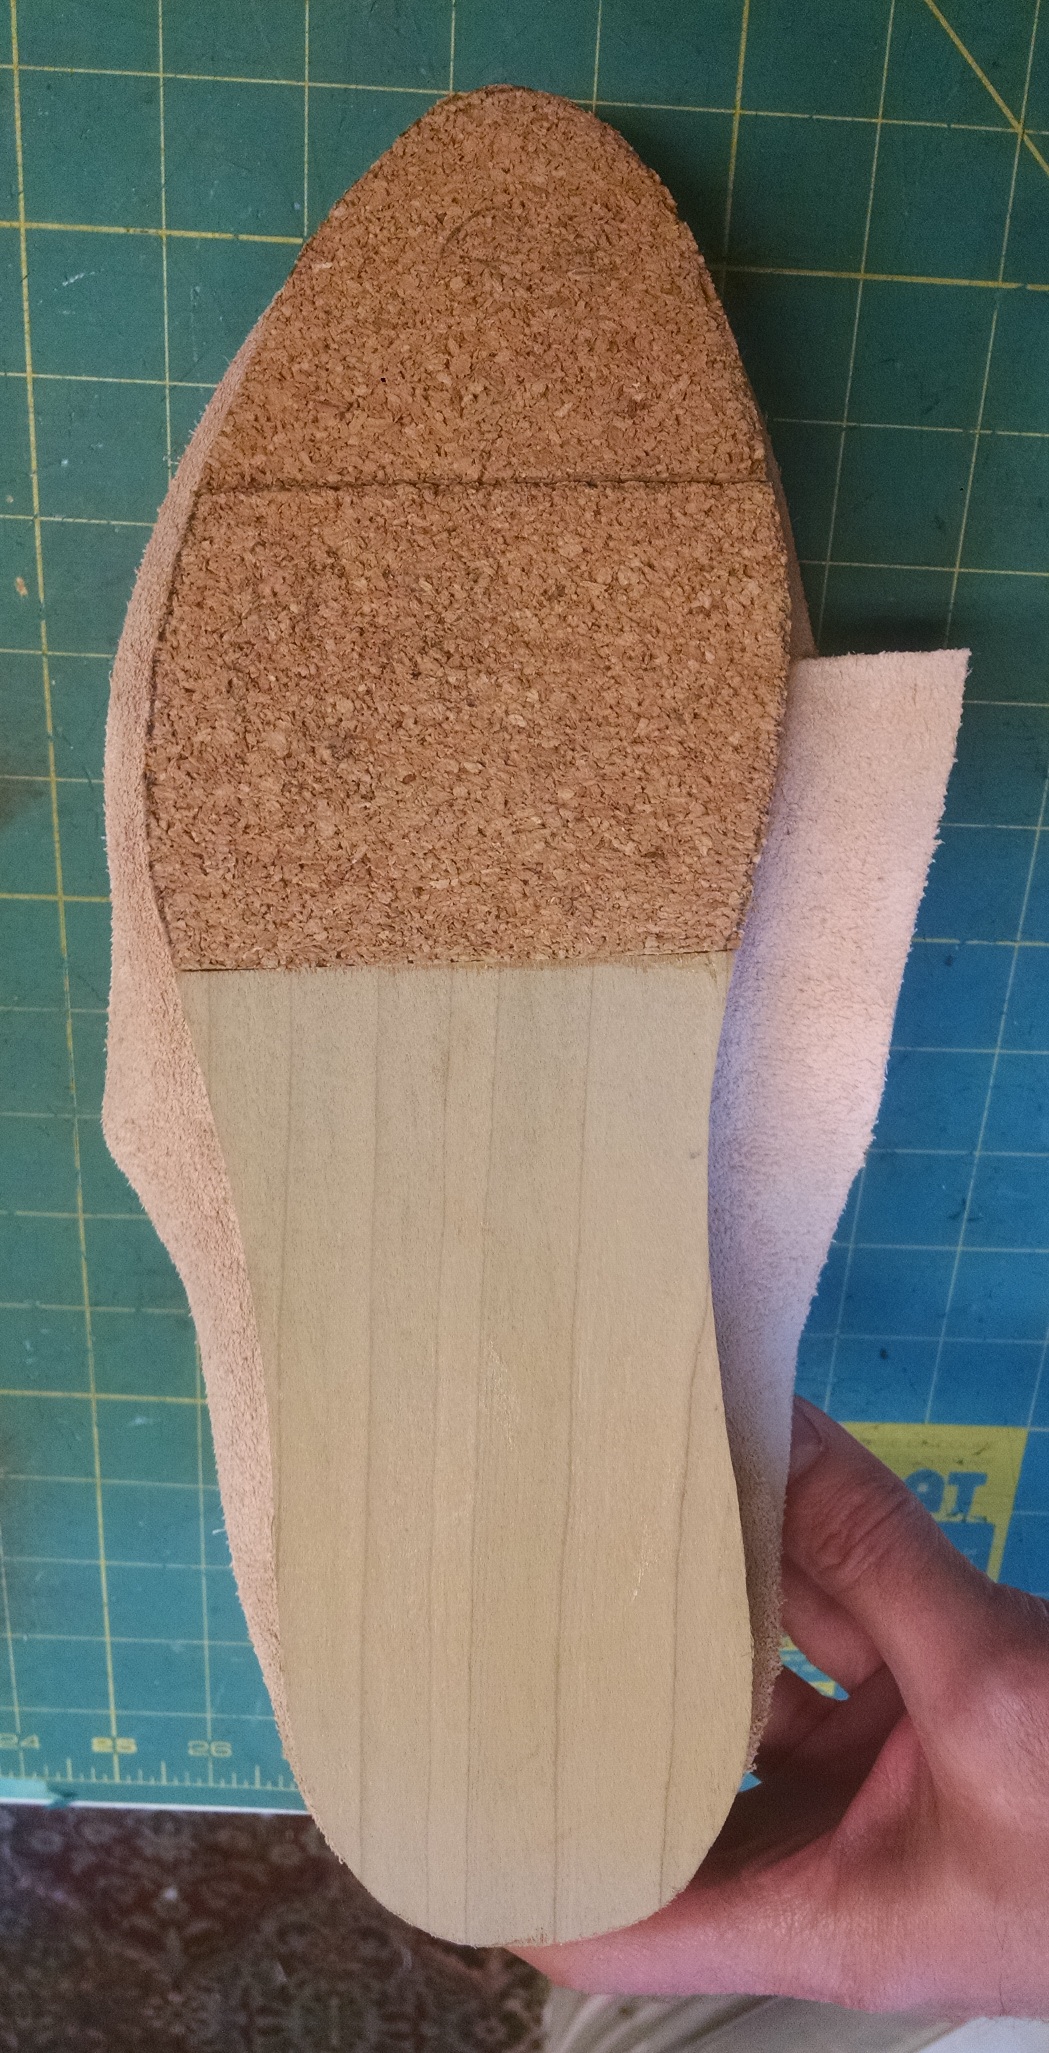
Now, comes the carving of the core. Not being a period woodworker by any chance (or I would be using far more period lasts), I used commercially available wood (poplar, in this case) and bulk cork. Cork bark is available, but it is expensive and tends to be uneven, much like the tree it came from. If I ever do another pair, I’ll likely try out some cork bark.
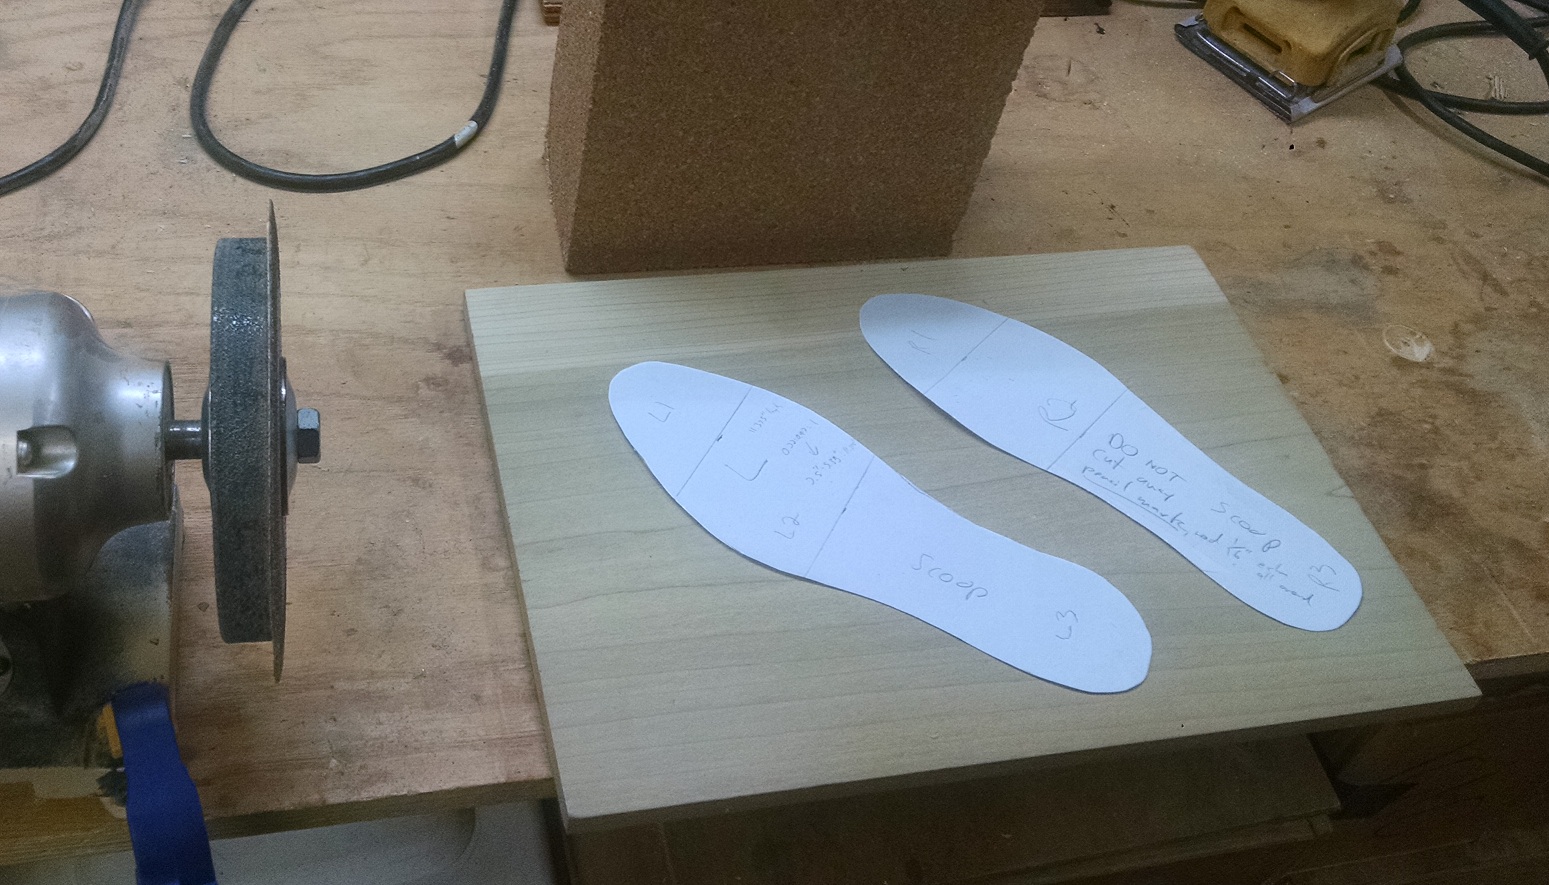
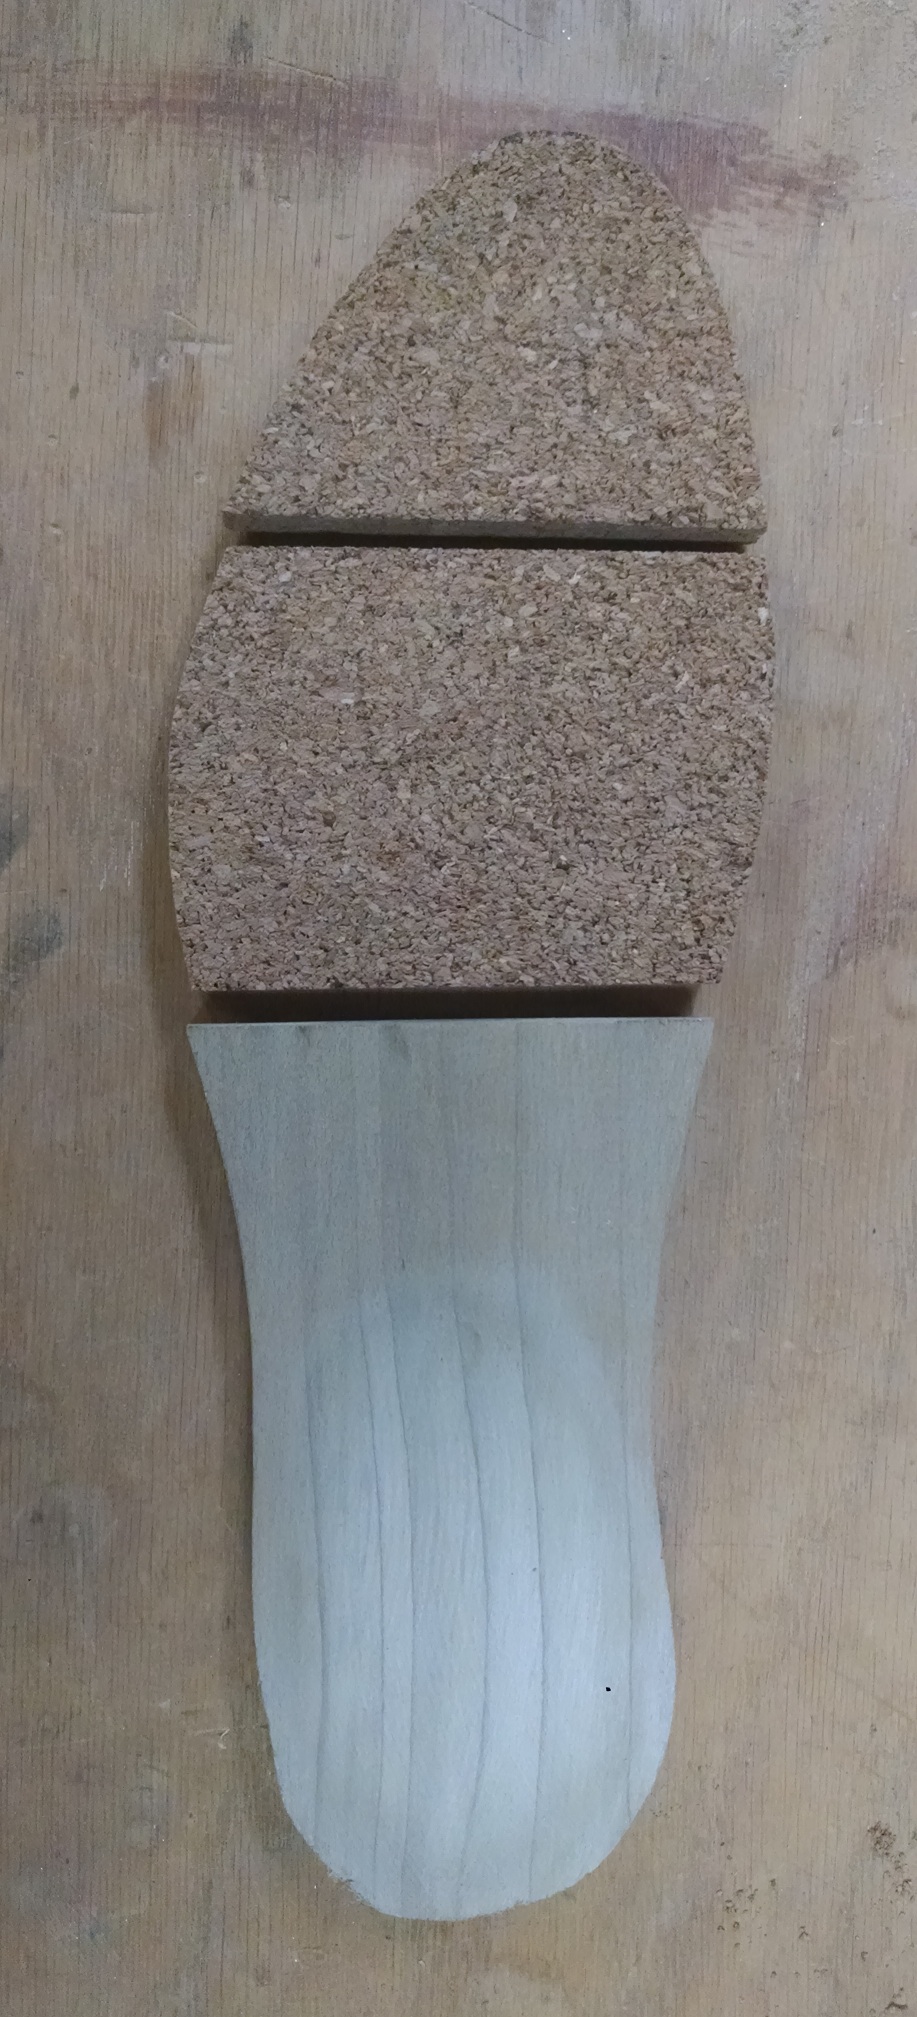
The cross sectional image shows the core is cut in three pieces. The ratio is as follows, from the toe to the heel:
Cork 1: (0 to 0.22)
Cork 2: (0.22 to 0.47)
Wood: (0.47 to 1)
So, the wood is actually more than half of the length of the shoe. Carved to shape and then cut, it is fit to the inseamed shoe. Note that the wood of the heel has been “scooped” out a bit to allow for a more comfortable fit to the ball of the foot. It is then pasted and placed. The astute observed will note that these are actually different sets of cores 🙂
Looking back, I would have preferred to thin out the cork a little at the toe, but it will be a lesson for next time.

I do not seem to have taken a photo of the braced rand around the base – my apologies for that. However, the paste kept the cork and wood in place (I waited for it to dry a bit) and then braced the rand around it. Then, we can begin the sewing process. A nice, deep groove was cut into the outsole which had soaked in the bucket for a good hour. In this case, I stabbed the awl from the rand side diagonally through the leather (but not through the cork) and out the groove in the treadsole. This is easier said than done, and any degree of forcing the awl will snap it. Patience and practice are key. I’ll note that I really ought to be closer to the edge, but I feared that any closer, and I wouldn’t have enough “meat” of the rand.
Trimming off with a very sharp knife and then burnishing, and we are almost done.
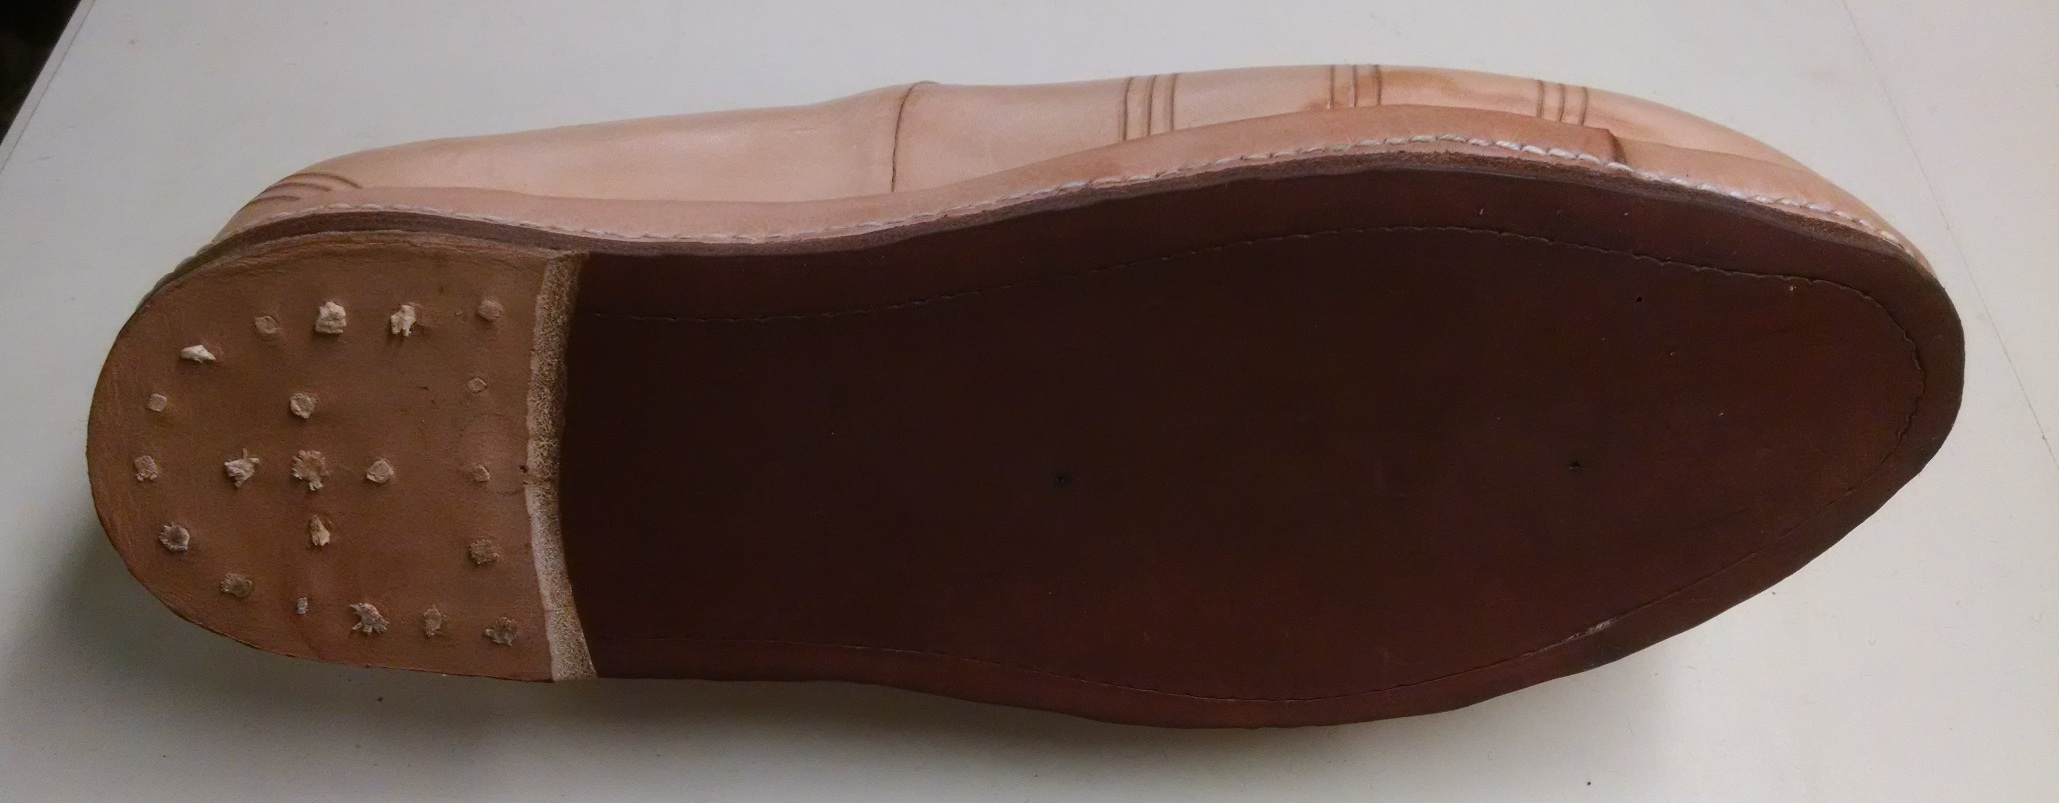
The original had a heel lift as well as a toe lift that were both pegged and sewn on. In this case, the request was just for pegging. Note that the heel lift for these shoes is curved slightly, consistent with period pieces.
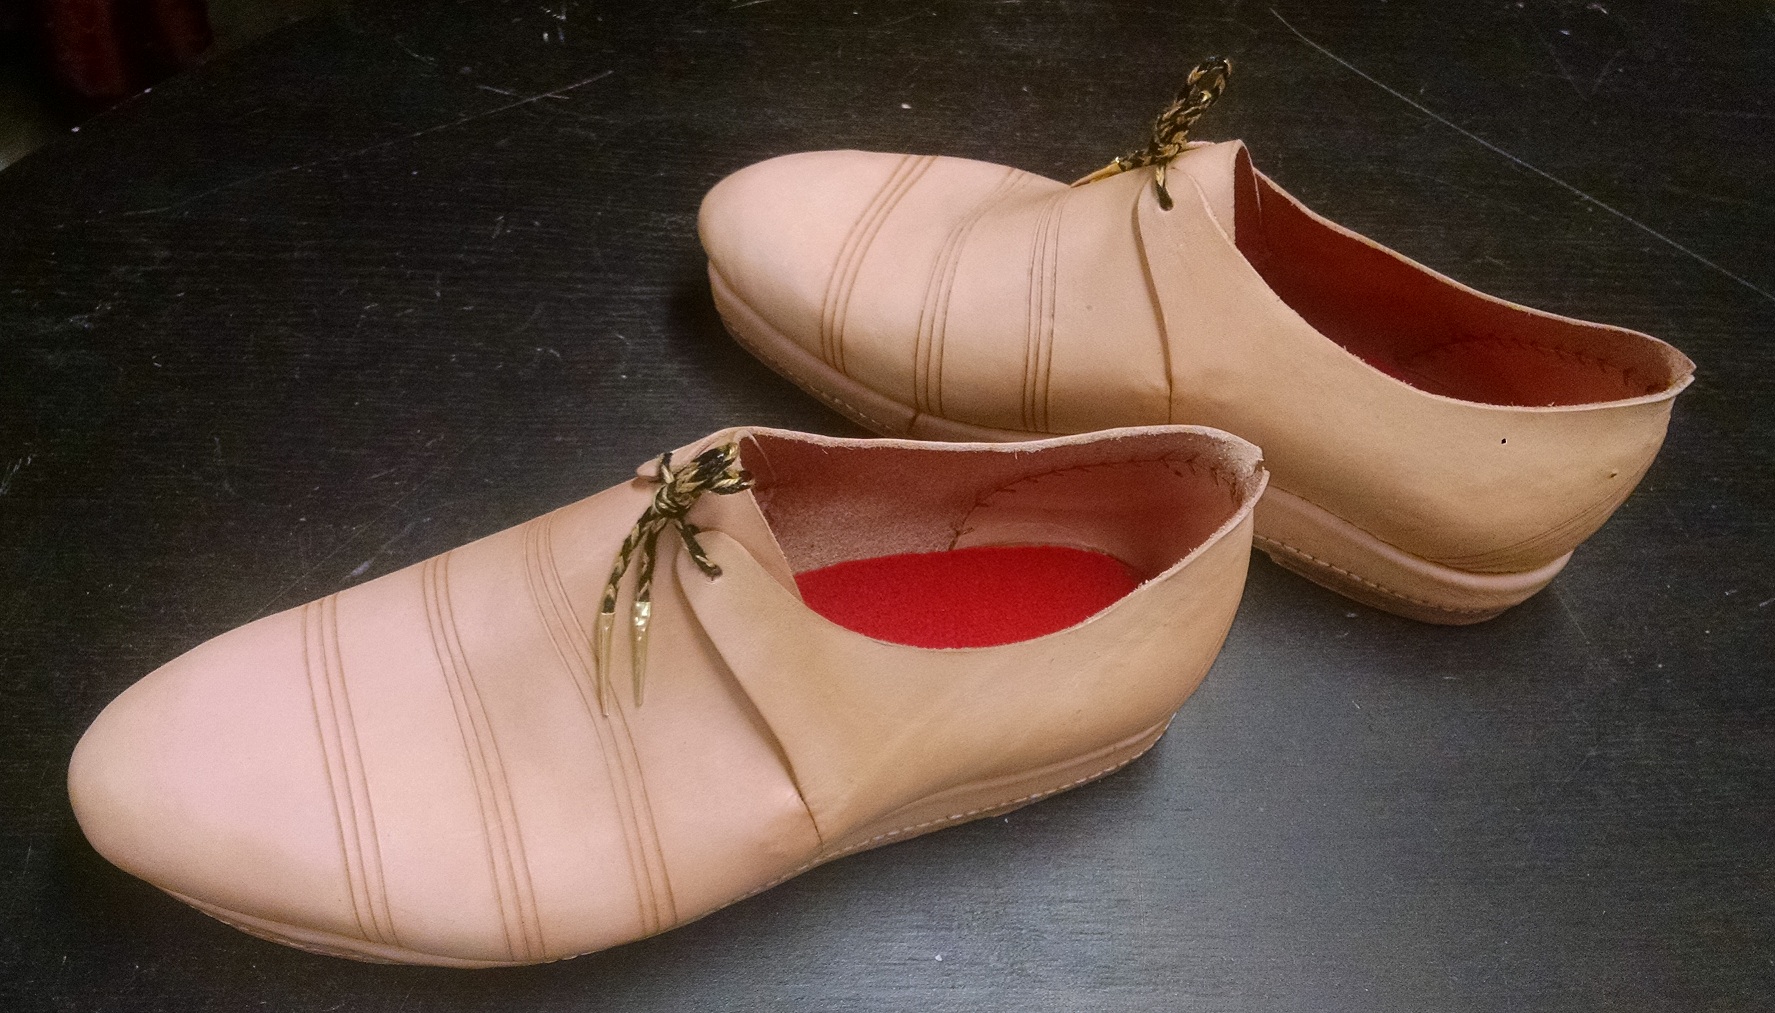
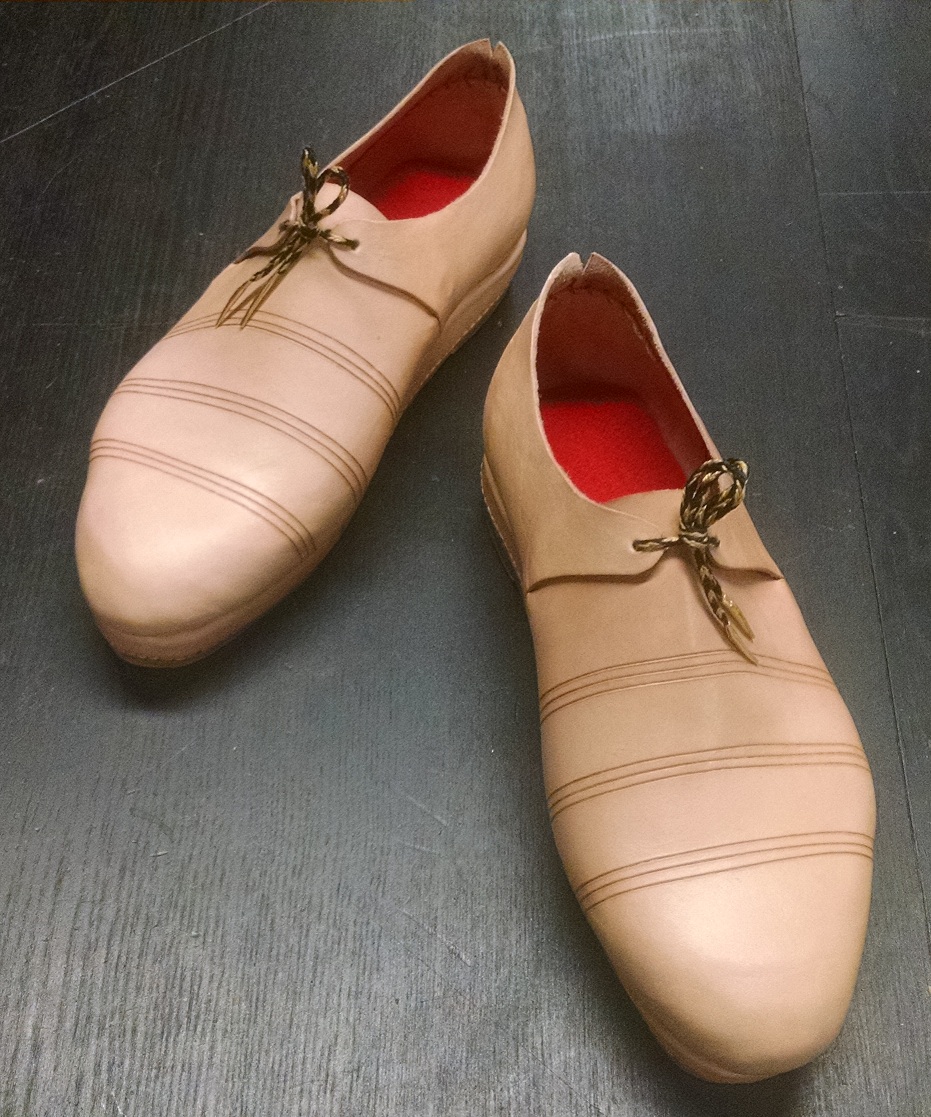
Holes are punched and the shoes are finished! With the scoop in the wood and the cork in the front part, they ought to be quite comfortable. The tan leather will age and darken a bit over time as the tannins oxidize, leaving a lovely rich color, almost orange.