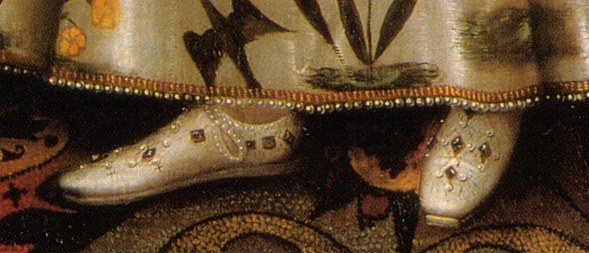
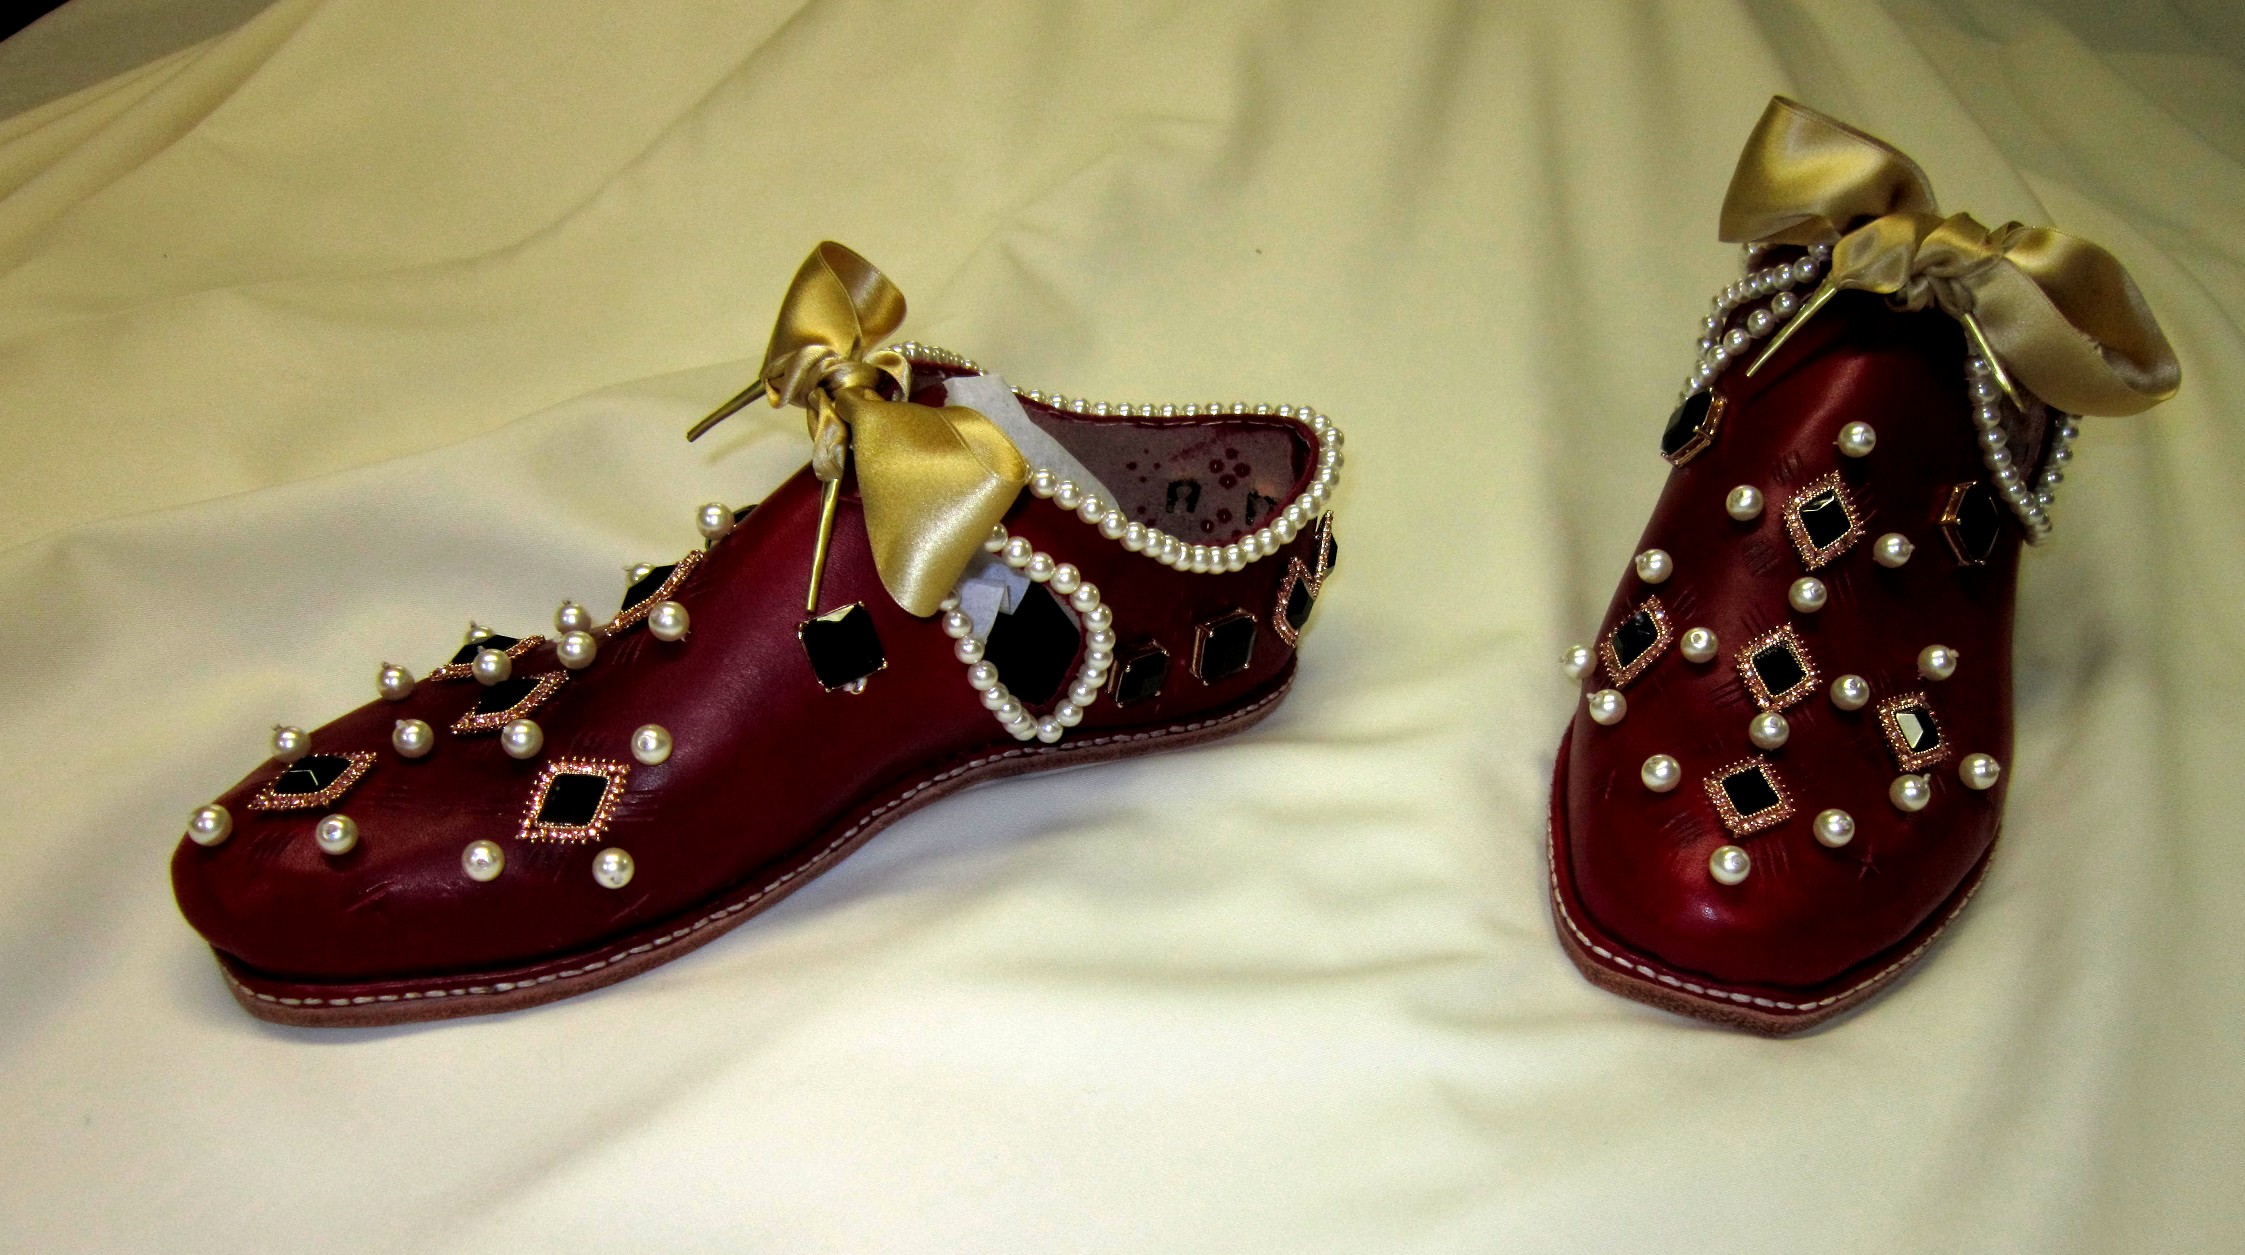
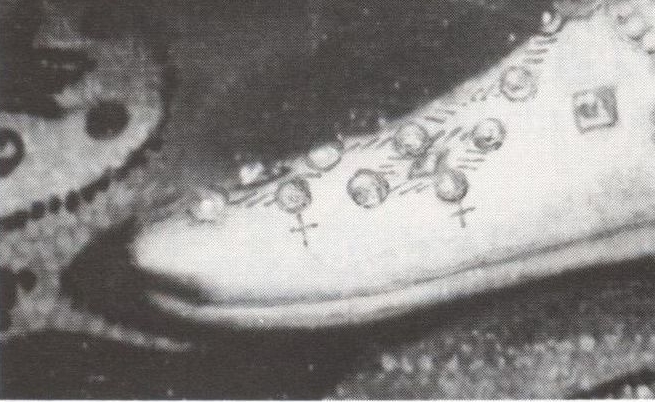
I’ve been pondering this particular project in my brain for some time, and I finally got around to sourcing the right raw materials. This is a pair based off of the painting of Elizabeth I currently located in Hardwick Hall, Derbyshire, dated to around 1599. Let me give you the original as well as the finished product and then tell you a little bit about the construction.
The most difficult thing about this pair, believe it or not, was actually finding the proper decorative elements.
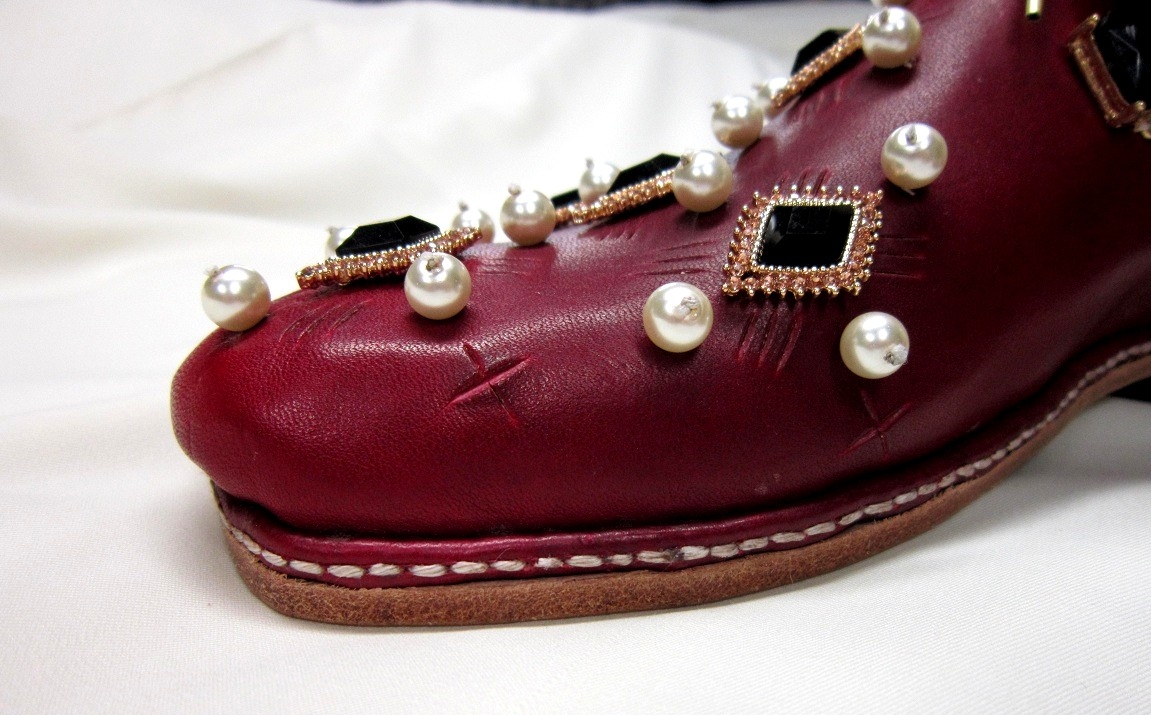
I ended up purchasing earrings off of Ebay / AliExpress which looked very similar to the baubles in the portrait. Interestingly enough, the square earrings were actually clear when I got them. I had to remove them from the setting, use black nail polish to paint the backside of the glass stone, and then re-set them. I think they worked quite well, though. Glass pearls, instead of real pearls, were used for cost reasons. You’ll also note that I used dyed vegetable tanned leather (curried with tallow) instead of alum-tawed calf. Instead of dumping all of the problems with this particular attempt on you at the beginning, let me tell you a bit about the construction process first, and leave the self-loathing for the end =)
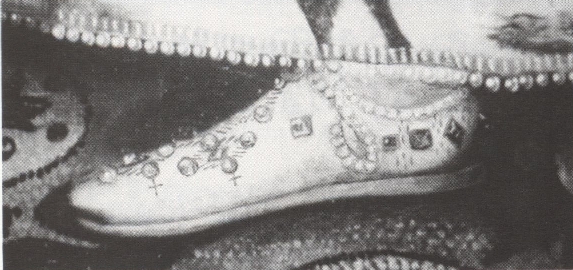
If you look at a close up of the side of the portrait, you can see that the toe of the shoe overhands the outsole. This is very common in later 16th century shoes, and I attempted to do something similar. There is no reason that this couldn’t have been accomplished all the way around the last.

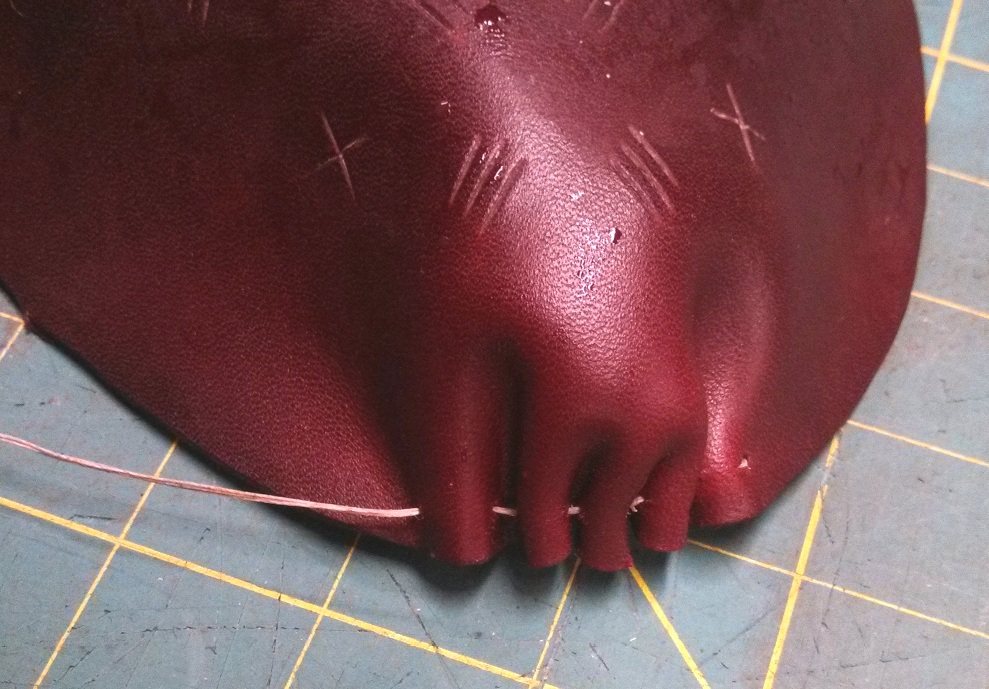
Speaking of the toe, a lot of extant pieces show gathering at the toe – this is crucial to be able to last the shoe properly, as it is the only way to get the upper to lie smoothly around the last. These two pictures demonstrate the gathering process (performed when the upper is wet) and then the results after the inseaming operation has been performed. Further, you can see how the insole was cut flat at the front, just as in the portrait. If a pointier last had been used (albeit still with a round toe), the results would have been closer to the original portrait. Please ignore the printing on the flesh side of the insole – no one will ever know (except all of you) unless the shoe is to be repaired! =)
 |

|
|
You can see in these photos how the toe overhangs the insole, just as in the portrait.
|
|
|
Very well, time for the rap sheet. As with any project, you learn by doing, and having done this once, I see all of the places where we could have done better, gotten more accurate, stitched a bit more evenly. I am pleased with the effort, but it takes a great deal of effort to respond to a compliment with thanks rather than, “Yes, but it could have been so much better!”
– Diamond-shaped baubles are too large. I could possibly have cut off the border of the gem and tucked everything in, but I have to admit that when I first looked at them, I really liked the gold around the border. Thinking on it now, I should probably have done it and gone for a more subdued look. It would also have matched the other gems better, and would have allowed me to tuck in the pattern a bit more closely. This would have allowed it to resemble the portrait more closely.
– Side holes too large. Although the holes look abnormally large here because the holes have not been punched and laced up tightly, I think they will still be a bit too large. In many ways, this looks more like a 1600s shoe than a 1590s shoe, but this can be easily rectified in the pattern.
– Last shape not pointed enough. The extant pieces look like they have a long, slender last with a round toe, and the last I used was a bit more blunted.
– Undercut of the outsole and rand. In period, lasts would have been curved along the feather line (that is, the bottom of the last). These lasts had almost a 90 degree angle which has the result of pushing the rand out past the edge of the shoe. On the next pairs, I plan to fillet (round) the bottoms of the lasts and undercut the insole like was done at the toe. This will hopefully get the rand/welt to “tuck in” under the shoe, making it a more elegant design, and less like a modern shoe.
– Possible “wedge” – it does seem to look like the portrait pieces have a slightly wedge to them, where the heel portion, though flat, is thicker than the toe. Hard to say, but it could easily be done.
– Finer Straps – the straps in the portrait do seem more delicate and thinner than the ones I’ve used on my reproductions.
These.shoes.are.stunning! Regardless of how YOU see them, anyone (myself included) would be very delighted to wear them! You should be proud of your work. 🙂
P.S. How did you get the baubles onto the shoes and how long do you think they would stay on with infrequent wear? (I’ve never worked on shoes before but, after seeing this pair, would like to give it a try.)
Mea, thanks very much for the compliments! The baubles were essentially earrings. For the diamond shaped ones, they had a metal “loop” which I was able to use to crimp down through two small slits in the leather. For the square ones, I took the gems off after soaking in nail polish remover overnight, drilled two tiny holes, and then sewed them in to the leather. I suspect that they would stay on quite well. The pearls were just threaded on a long thread and then couched on.